Star Wars Joycon Holders

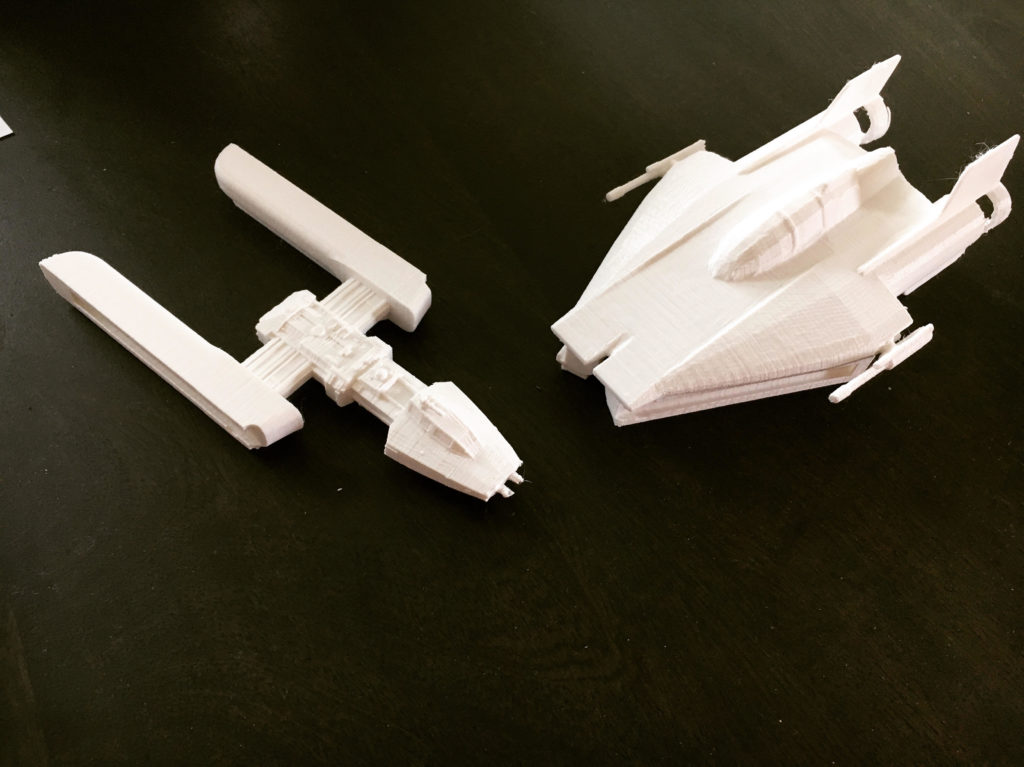
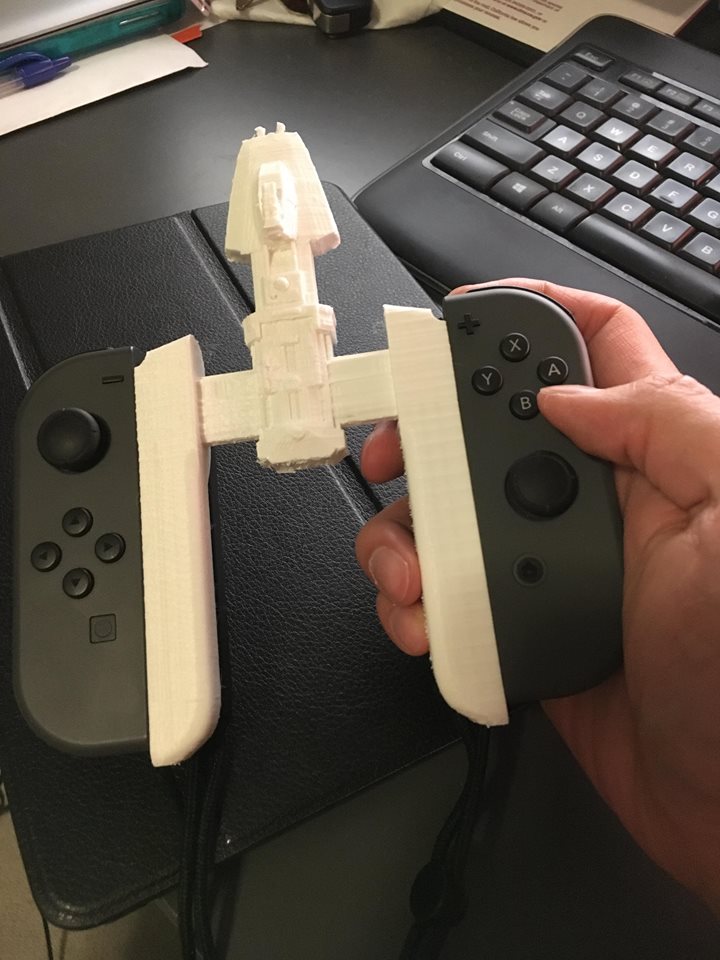
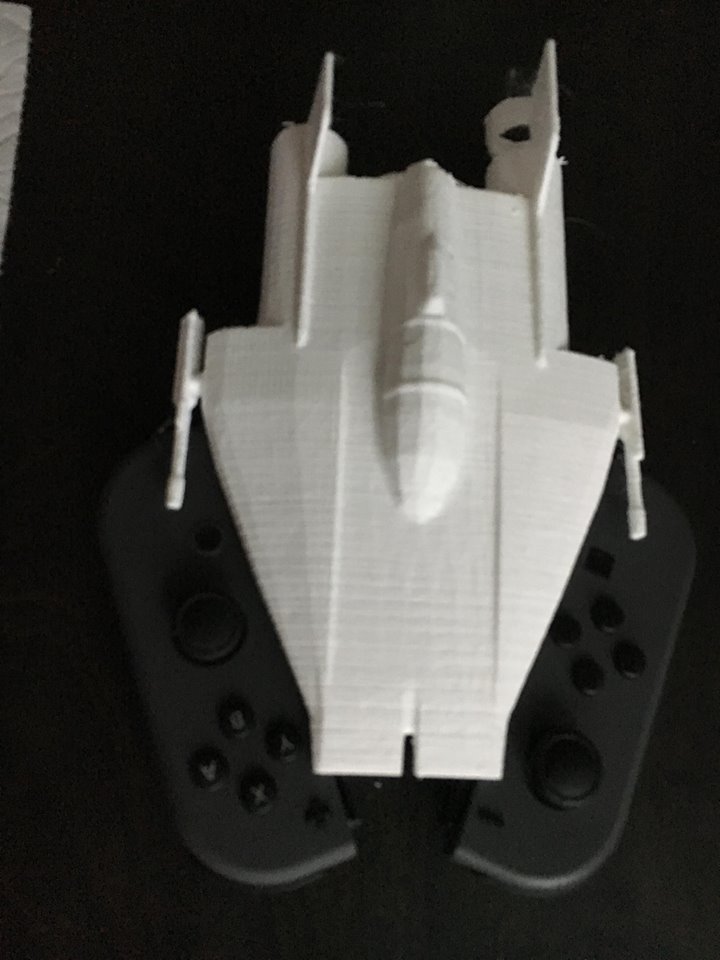
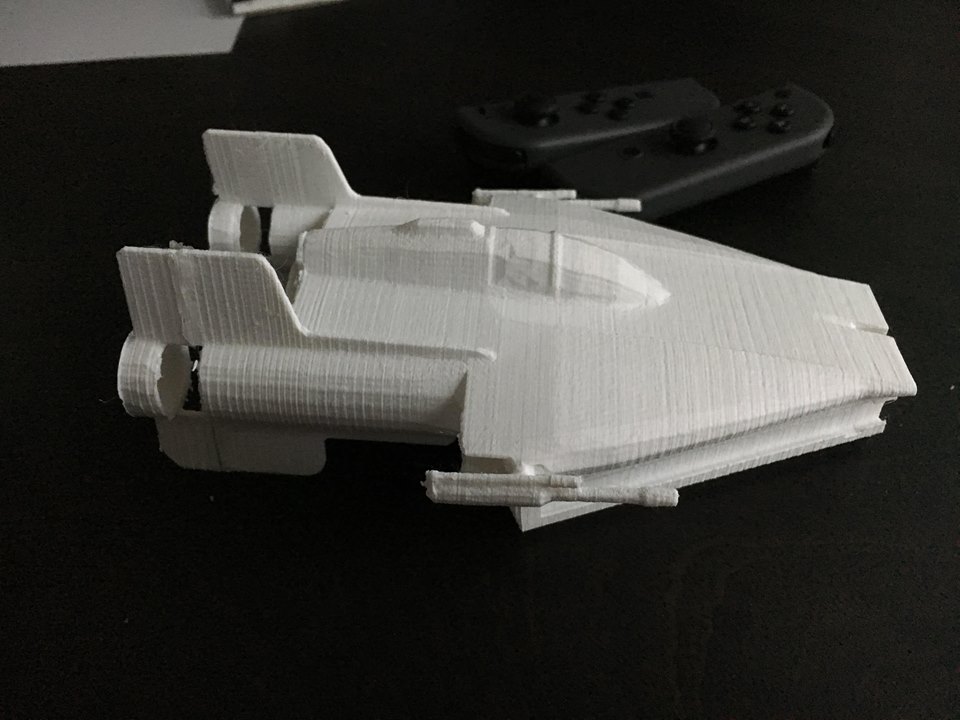
TL;DR: I made custom Nintendo Switch Joycon Controller holders in the shape of Star Wars Y-Wing and A-Wings.

I’ve been traveling quite a bit this year, and my Switch has been a great companion surprisingly easy to bring around. However, the biggest gripe I and everybody else has with the device is that it is no fun to use the controllers in single joy-con mode. I found and printed some neat grips that make it a bit easier to use them in this mode, but I’ll cover them in a future post.

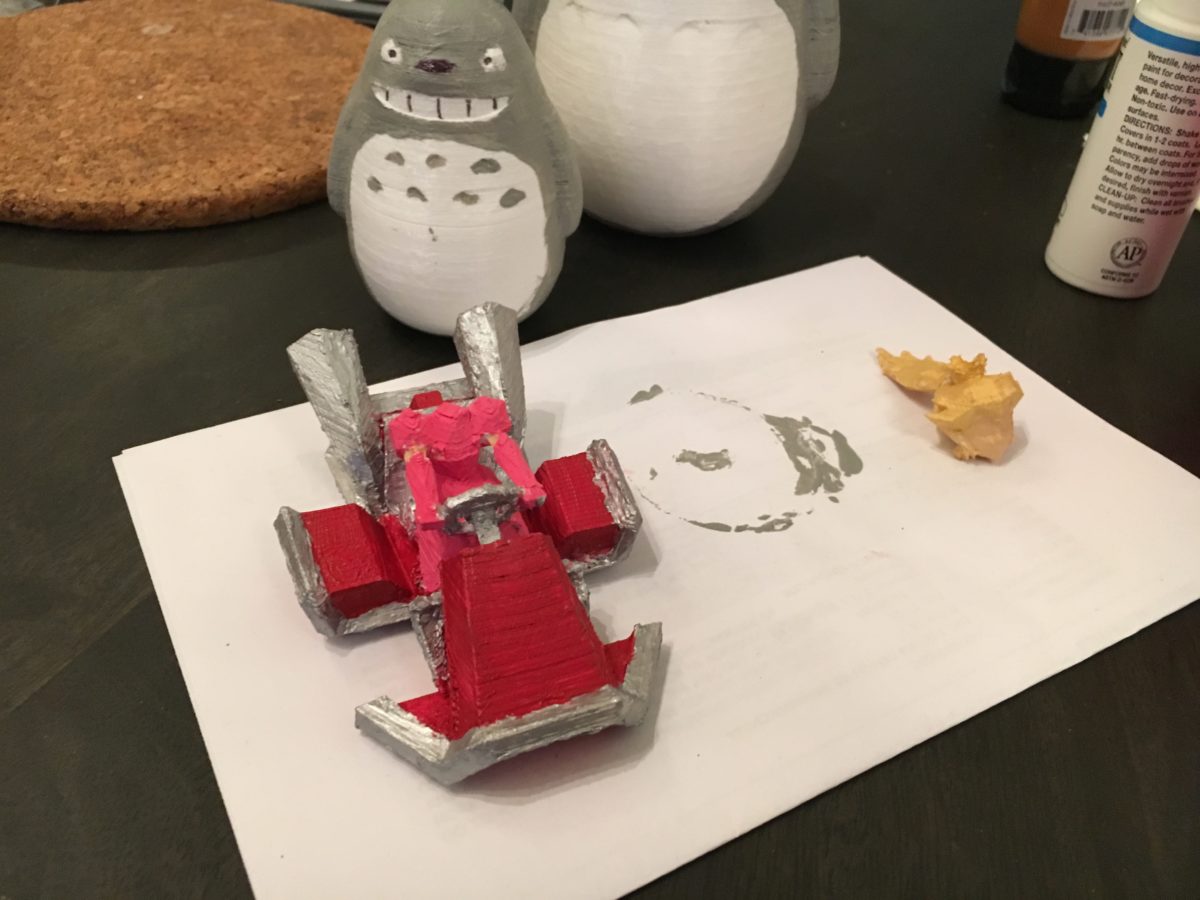
In this project, I made some ridiculously tardy birthday presents for two of my Switch-owning friends: Y-Wing and A-Wing Joycon holders. Honestly they aren’t that practical, but they technically *are* functional, and I think they look pretty cool. I started by downloading STL files from thingiverse of various Star Wars ships and a simple dual-joycon holder.

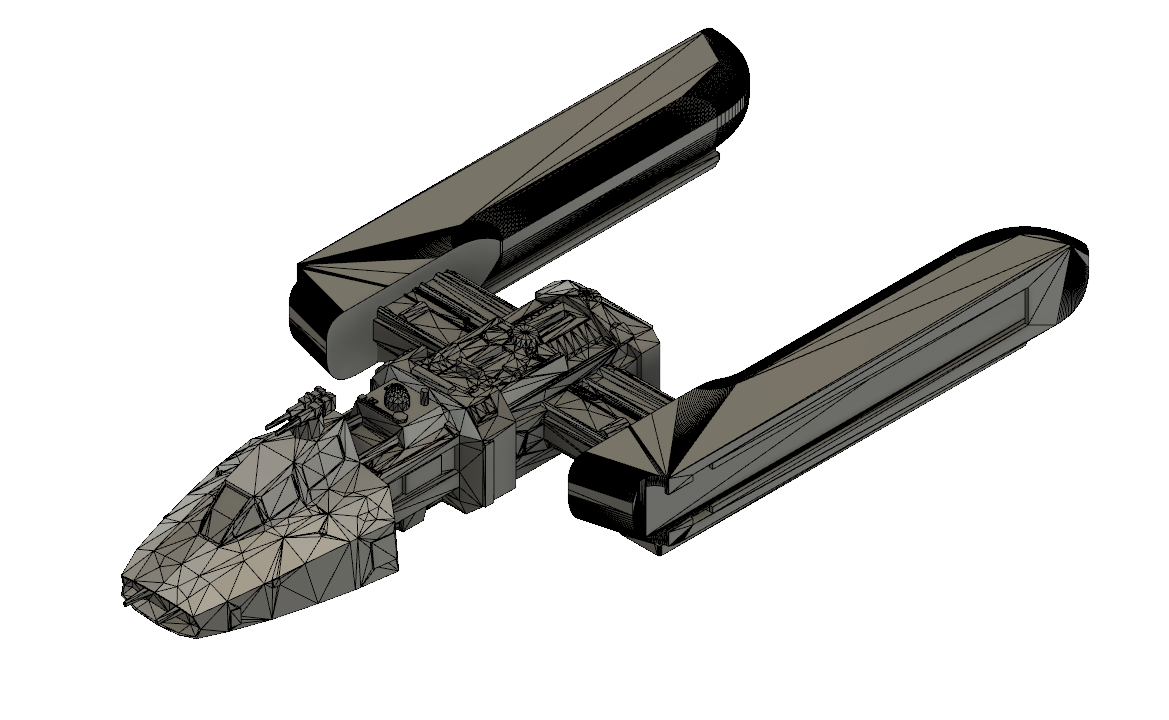
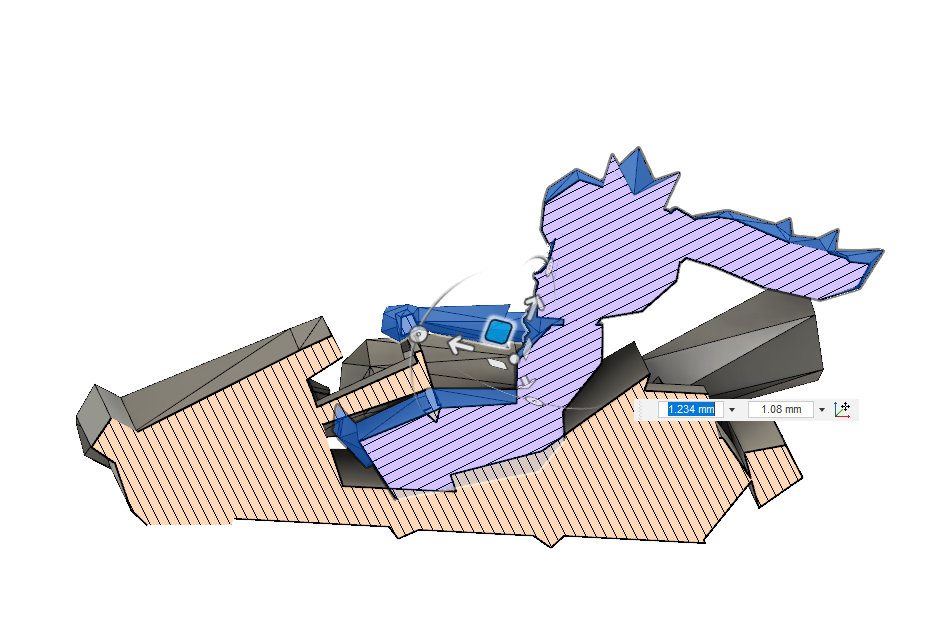
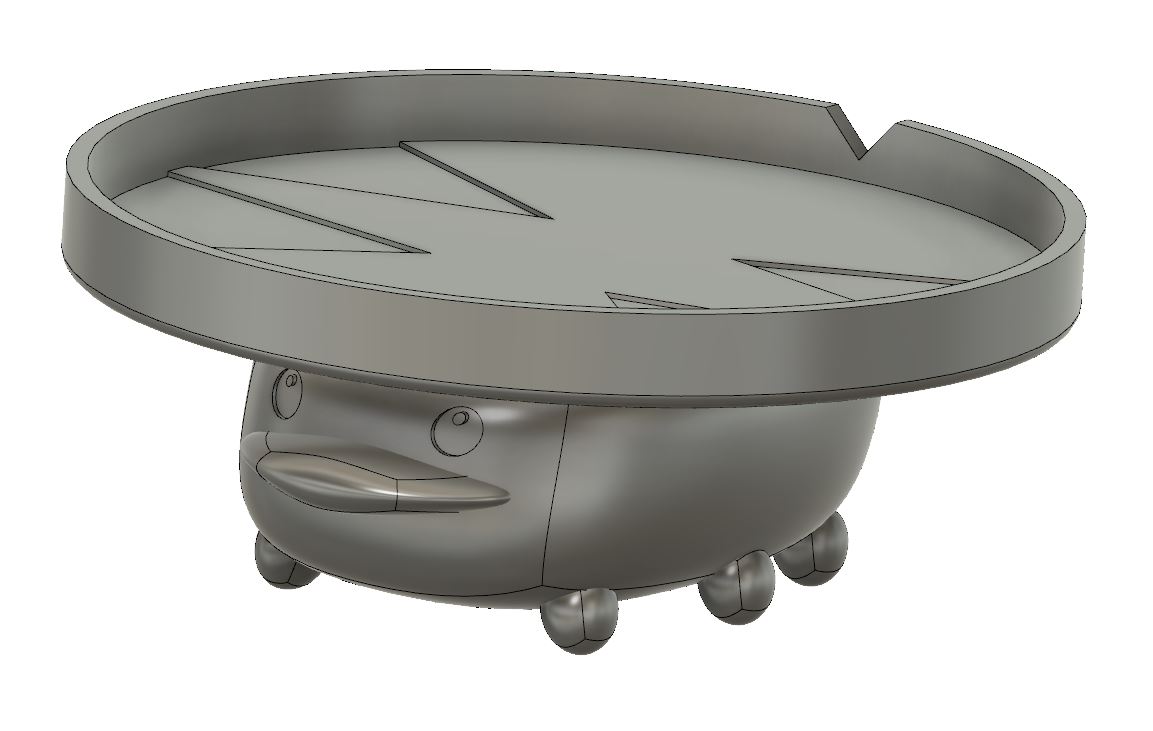
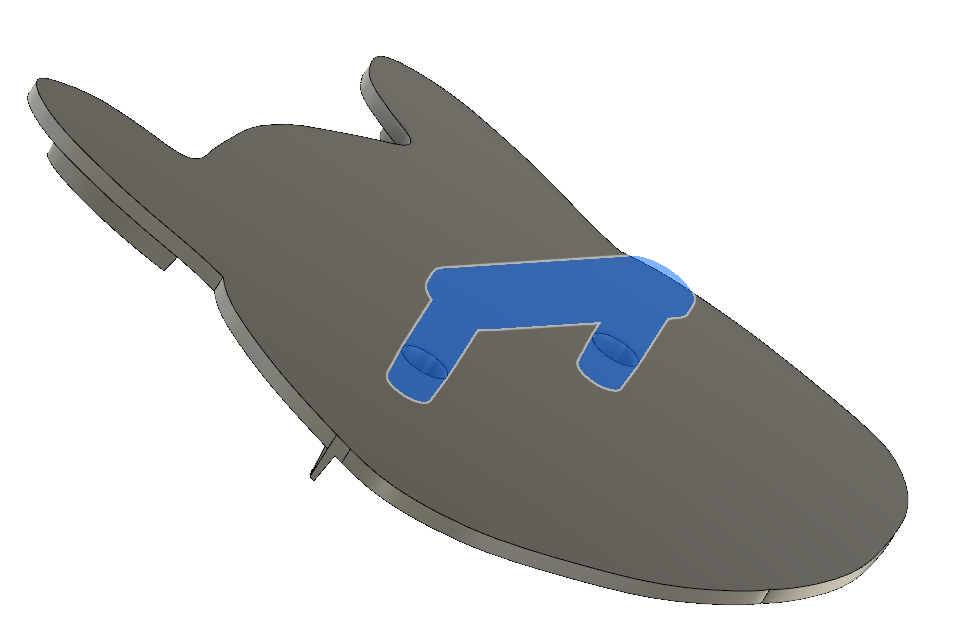
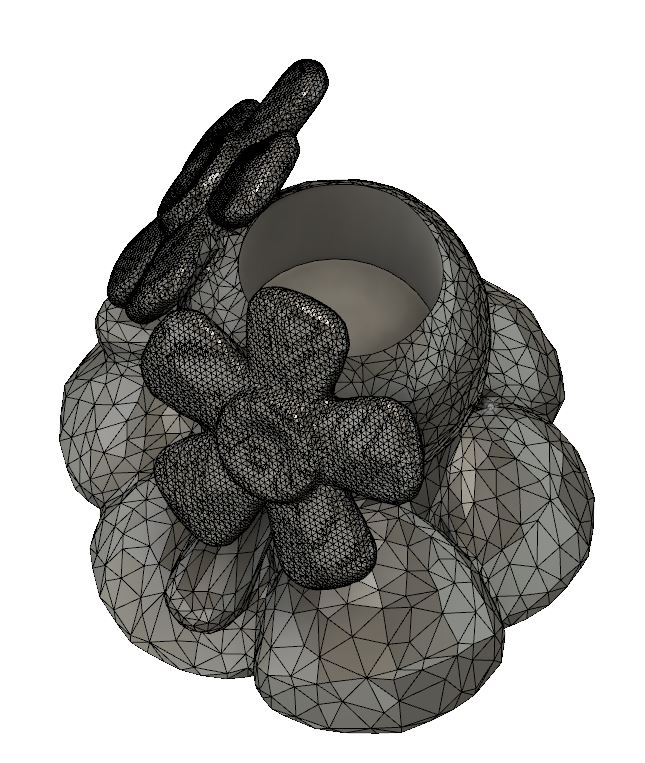
In Fusion 360, I chopped off the joycon rails and saved the bodies as separate components so I can reuse them in multiple projects. Next, I started processing the Y-Wing by simplifying a lot of unnecessary mesh details, cutting off the engines, then making the mesh into a solid body. I inserted the joycon rails where the engines used to be and played around with the scaling of the Y-Wing body to fit well. From there, it was a simple merge bodies, slice, and print… or so I thought.

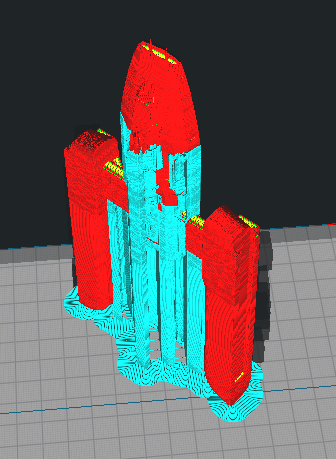
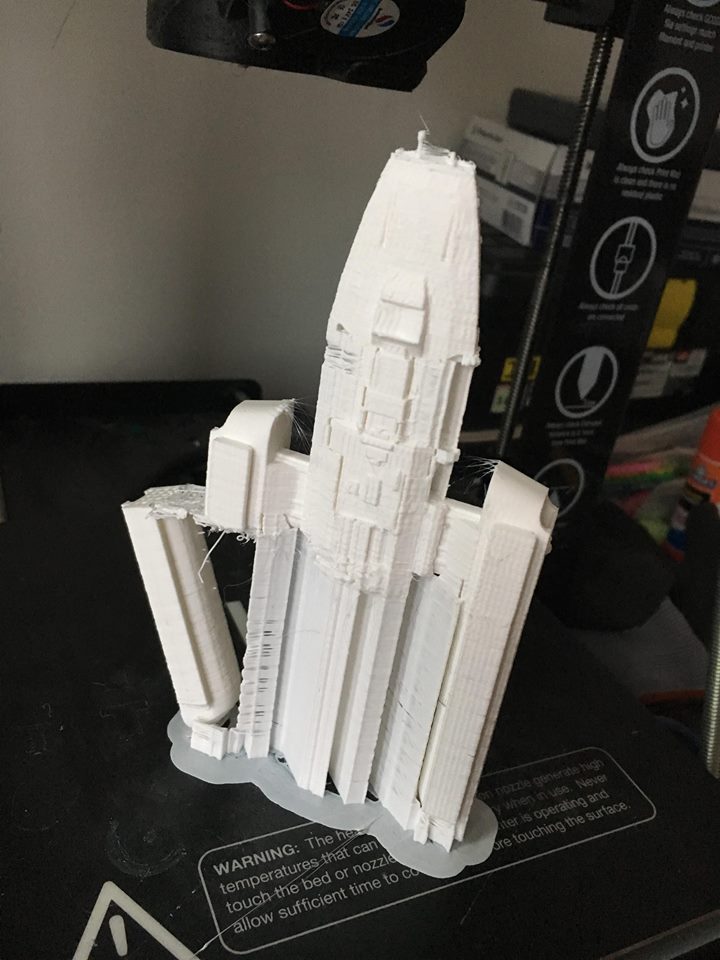
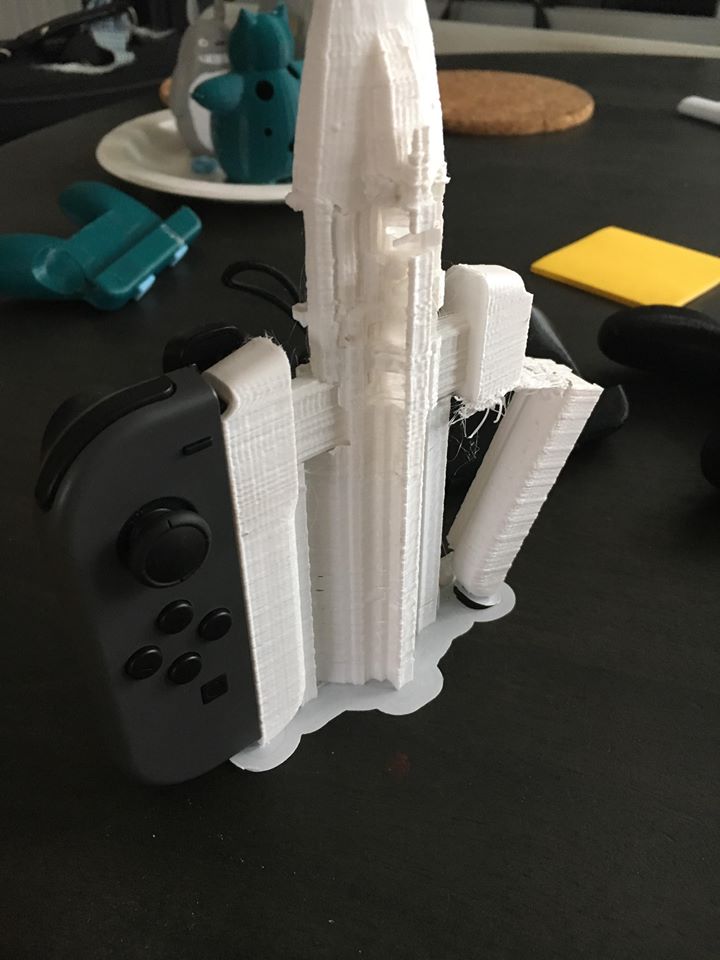
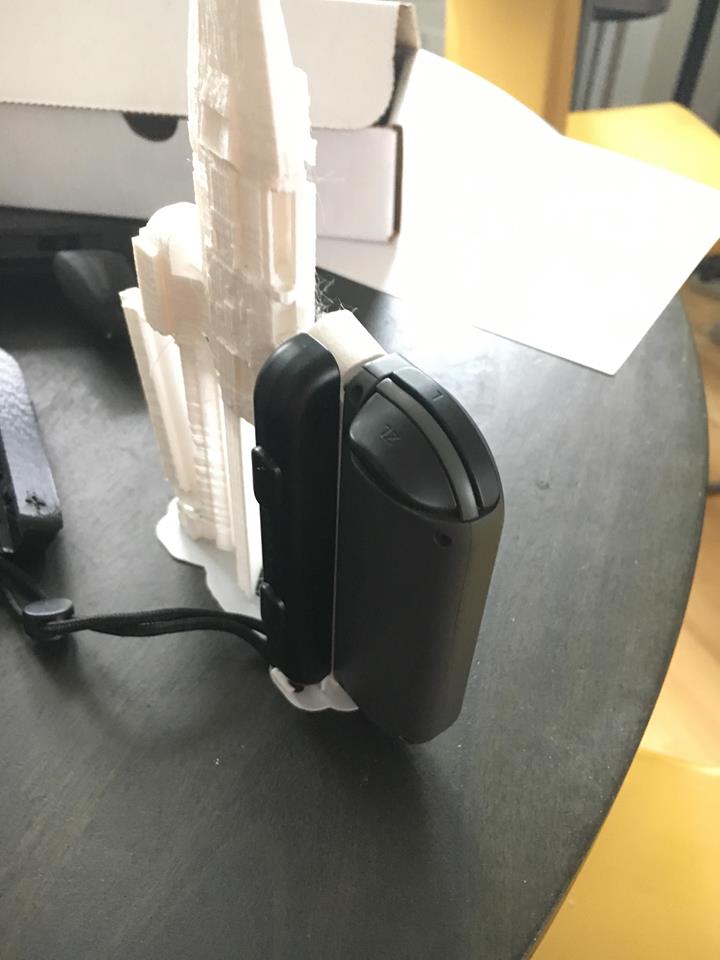
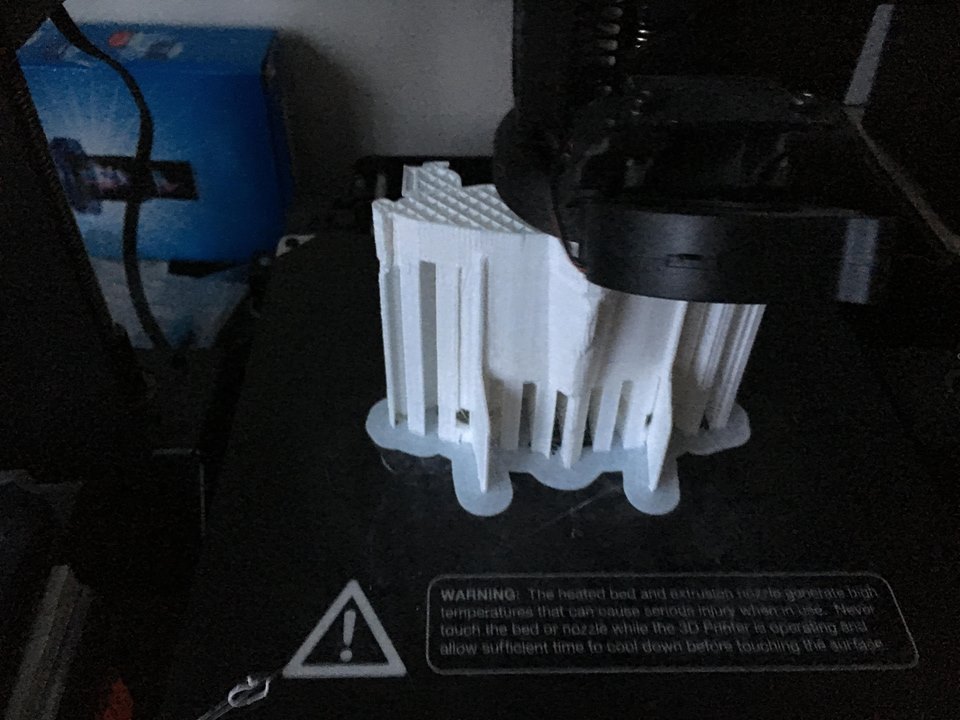
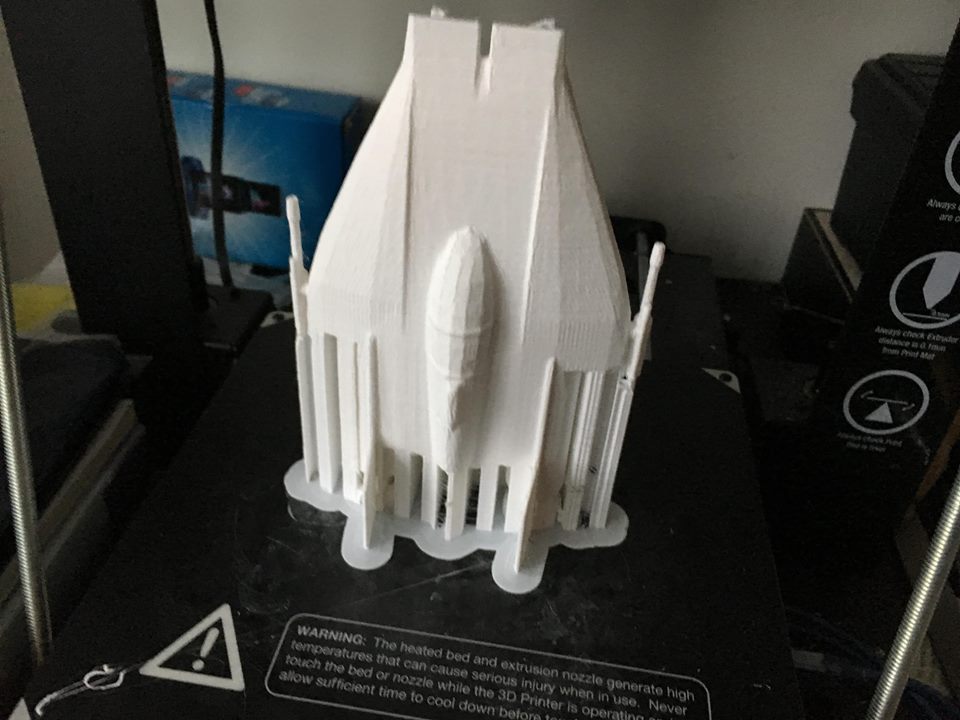
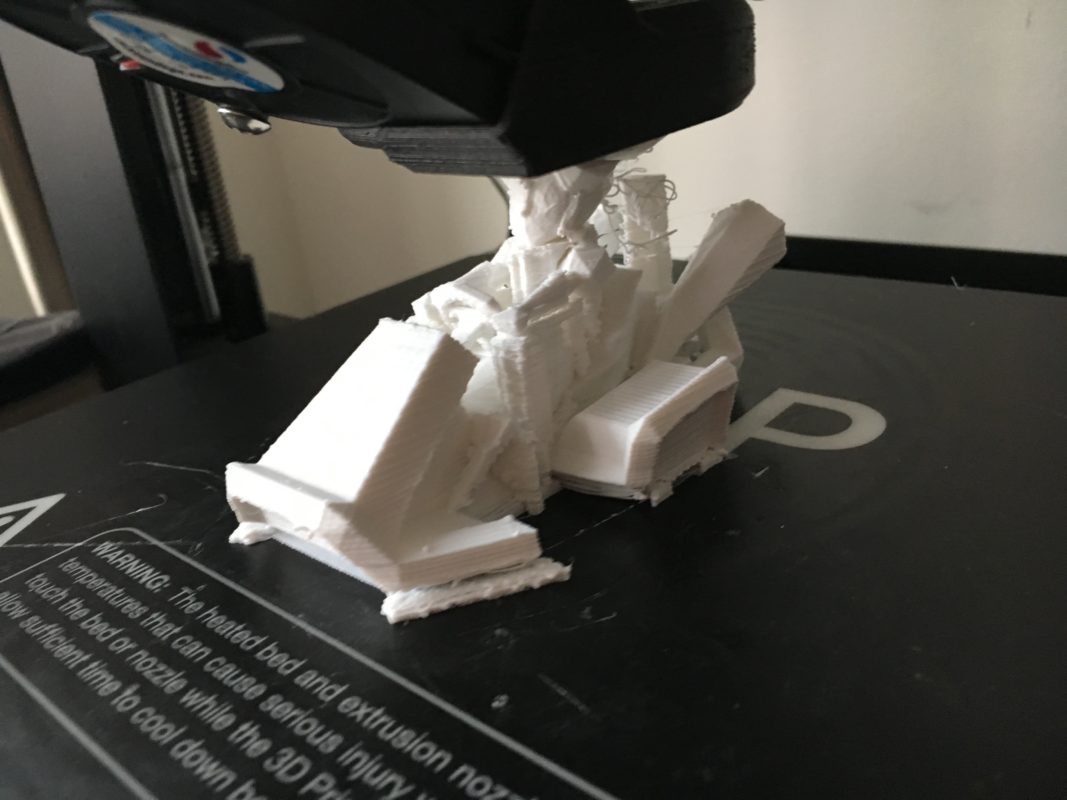
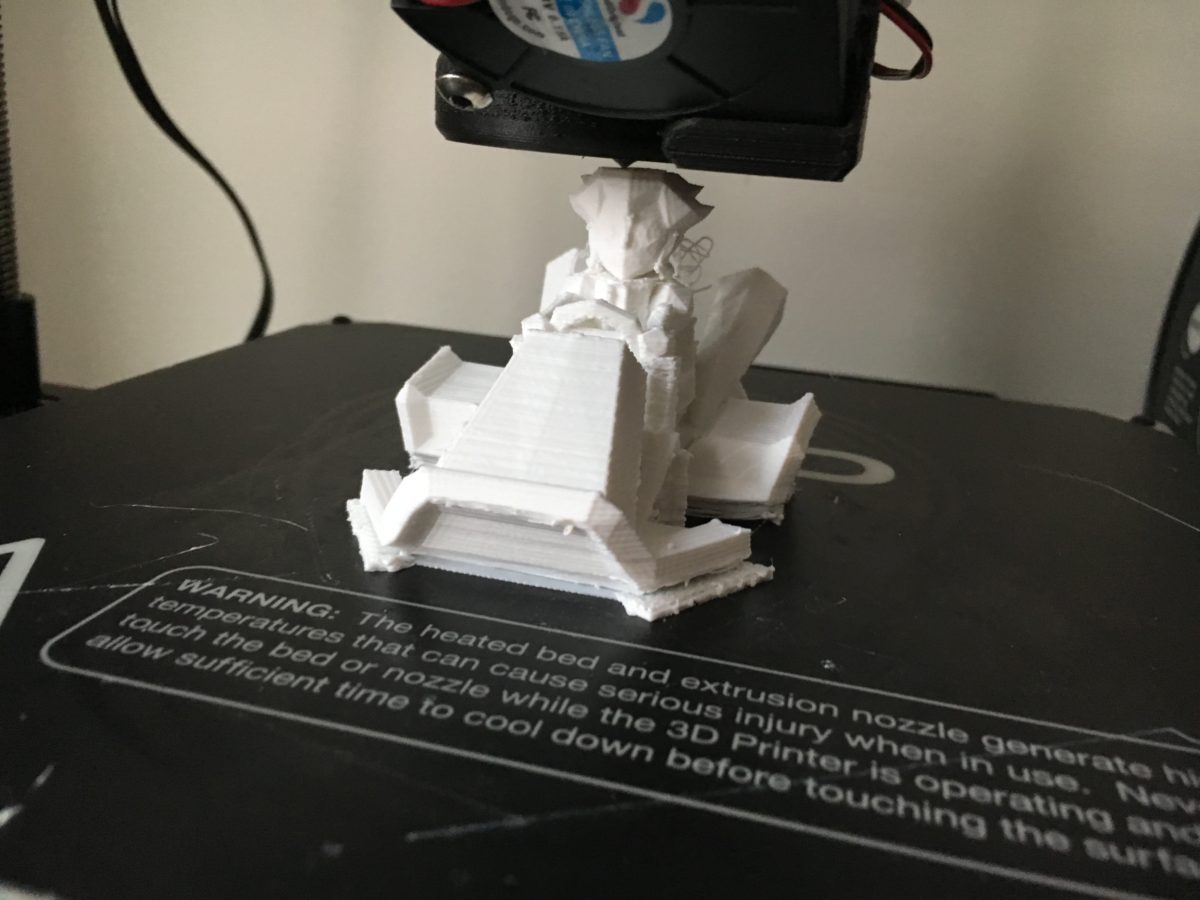
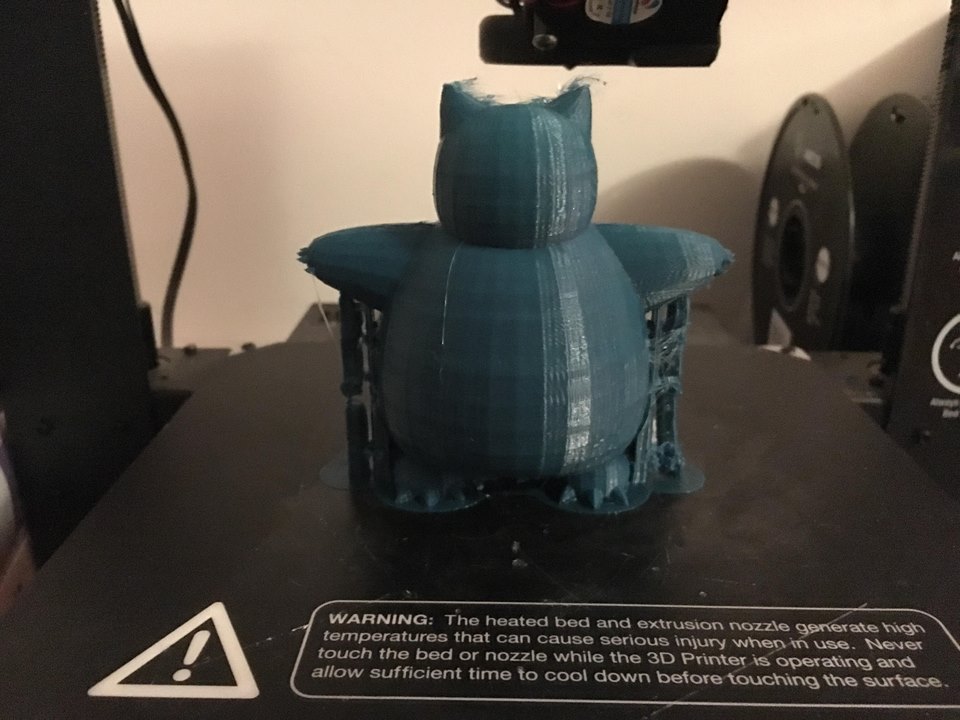
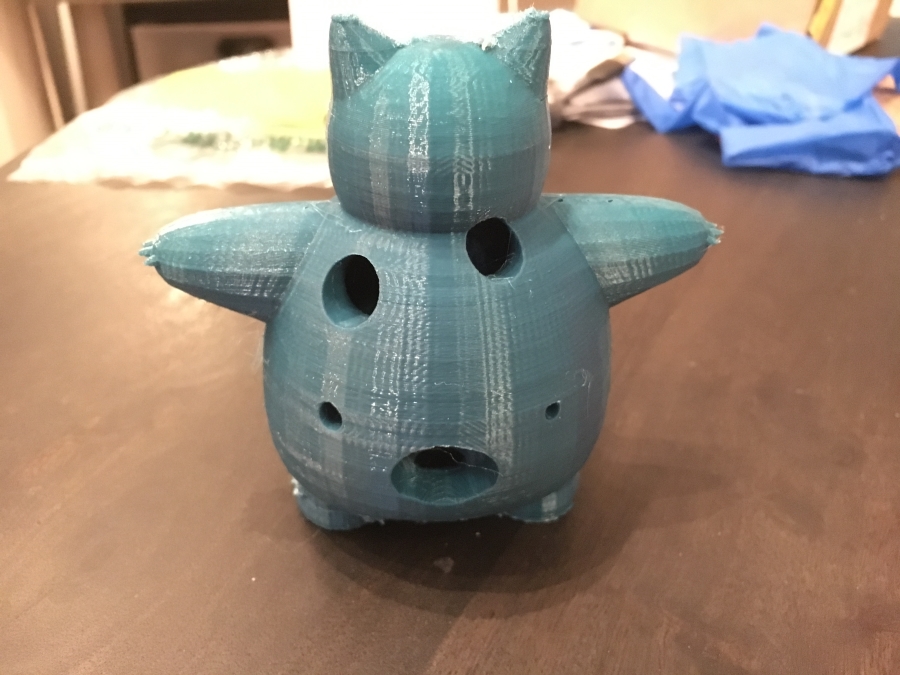
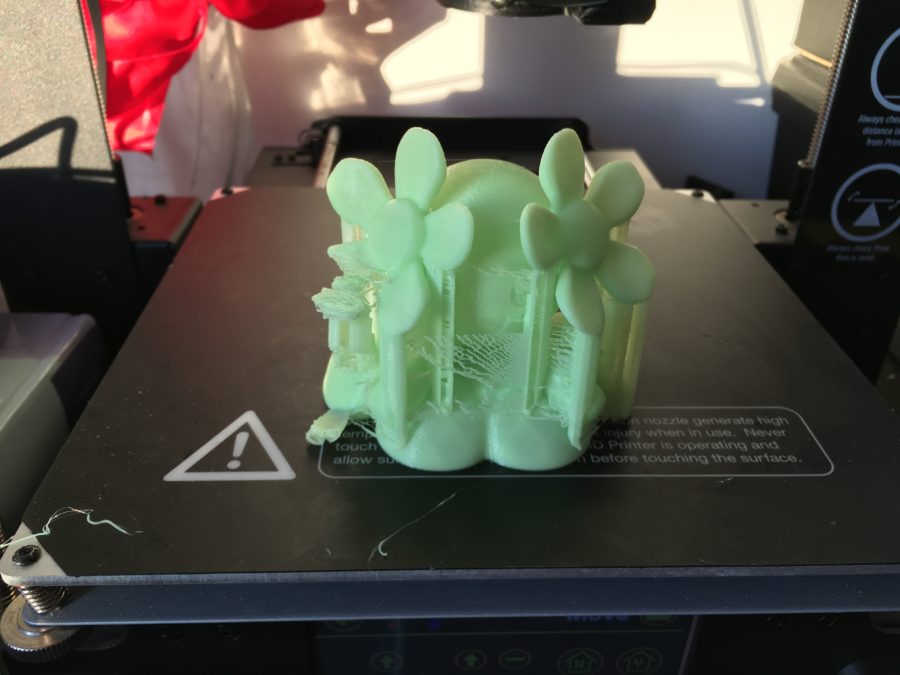
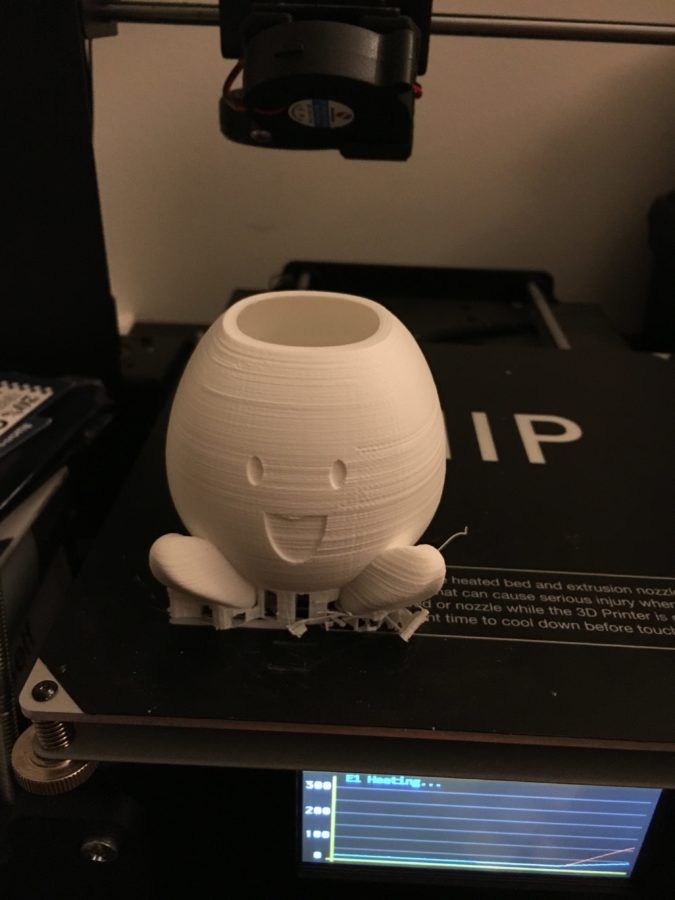
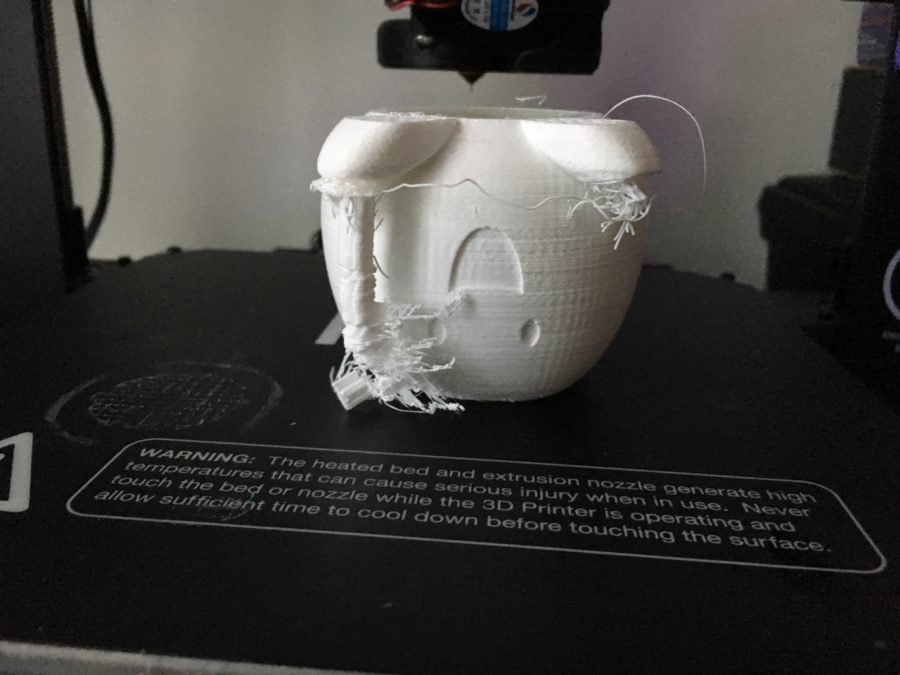
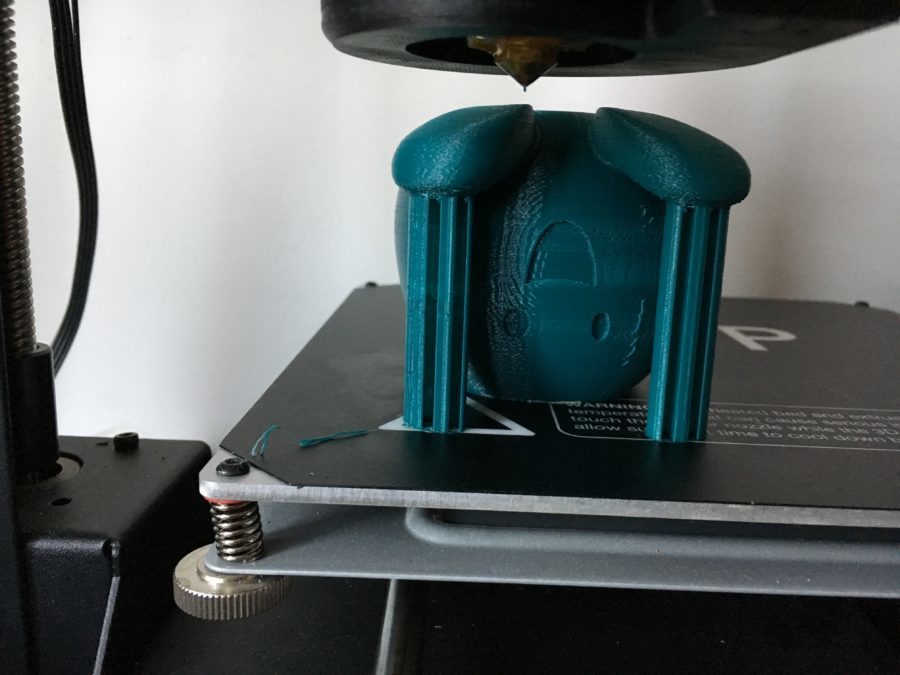
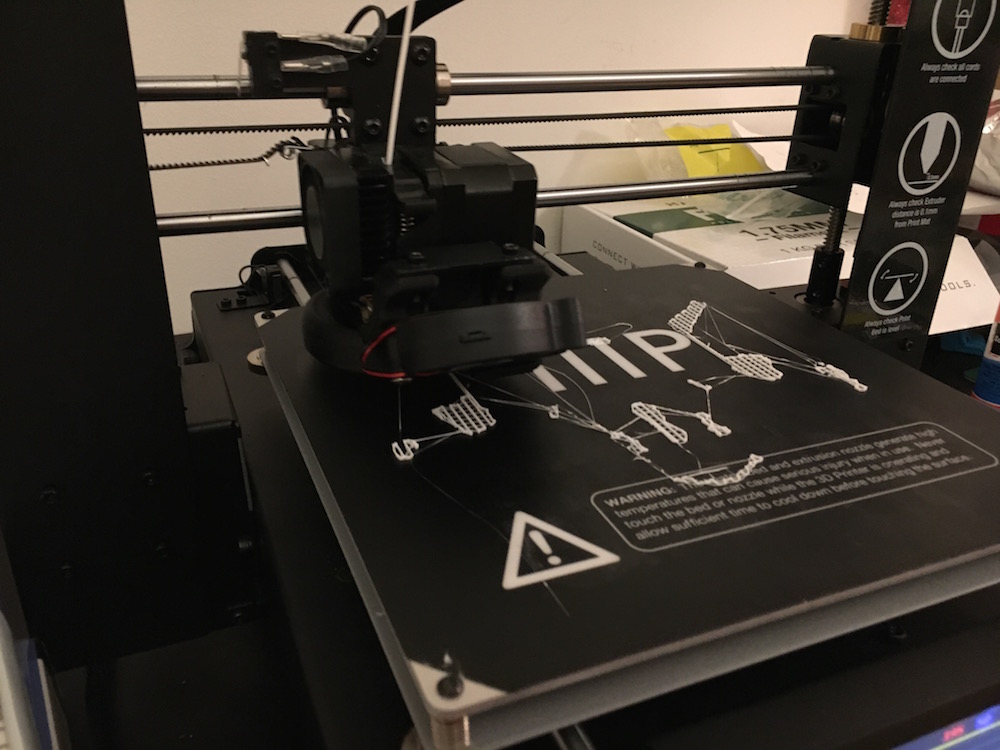
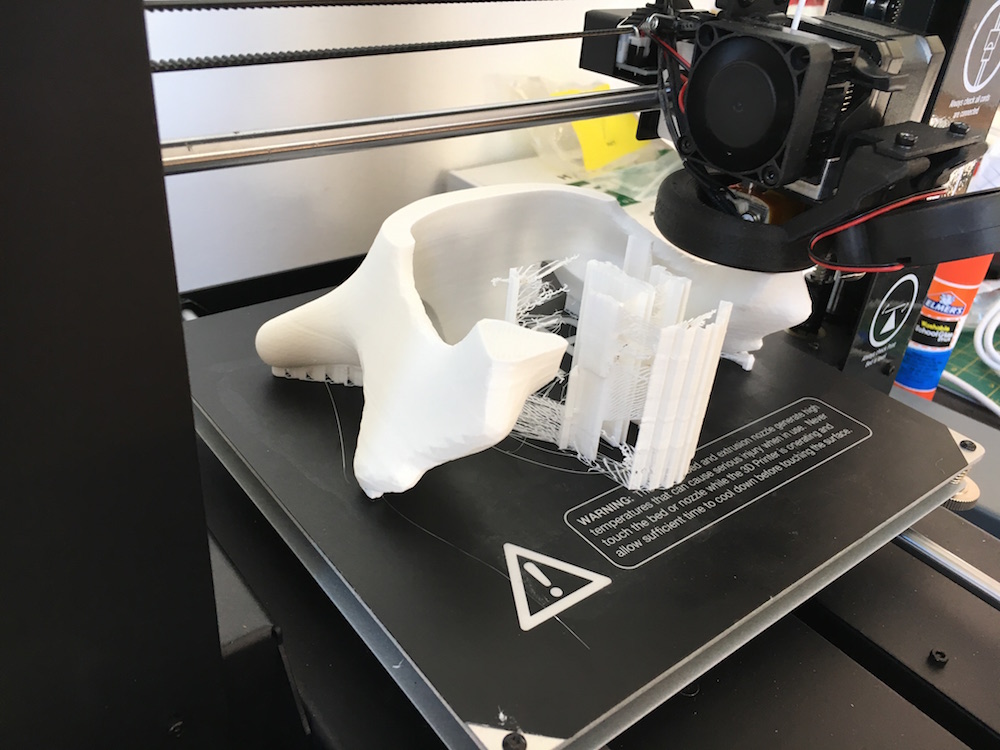
Unfortunately, I messed up some of my slicing settings in my first attempt, and part of the print fell over. Even though part of the print had failed, I was still able to do a geometry check, and I was pleased with how well the joycon and strap both fit into this model.

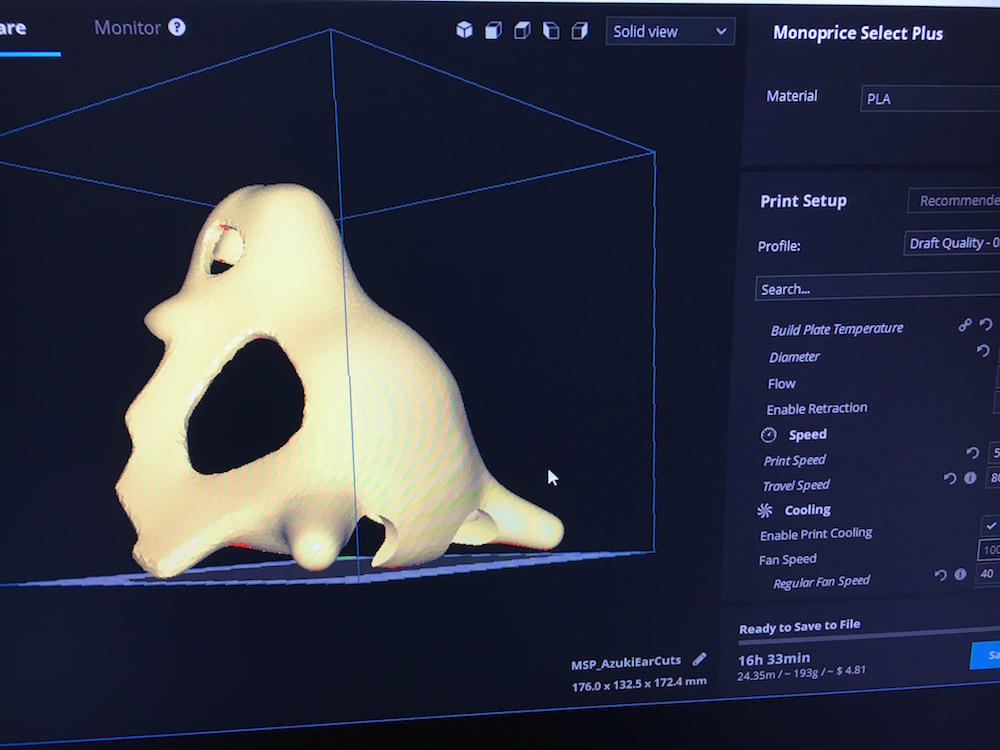
My slicing error was in a boneheaded misconfiguration of adaptive layer settings. Using adaptive layers in slicing software allows for faster prints since the printer is programmed to use larger z-steps if it is safe to preserve model details. The base layer height for this was 0.12mm, and by entering the deviation to 0.2mm, for some reason I thought I was setting the absolute height limit for the print to 0.2mm, but this was not the case, and my printer was trying to print with 0.32mm layers, which it just was not able to do. On my subsequent attempts, I dialed the deviation back and was able to get a really nice print.

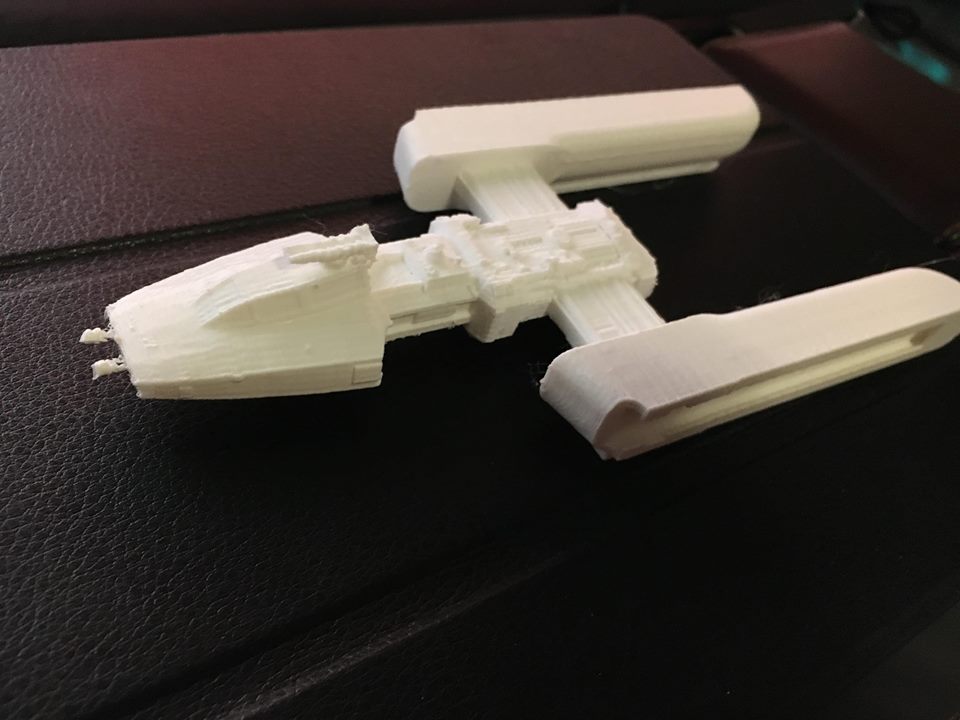
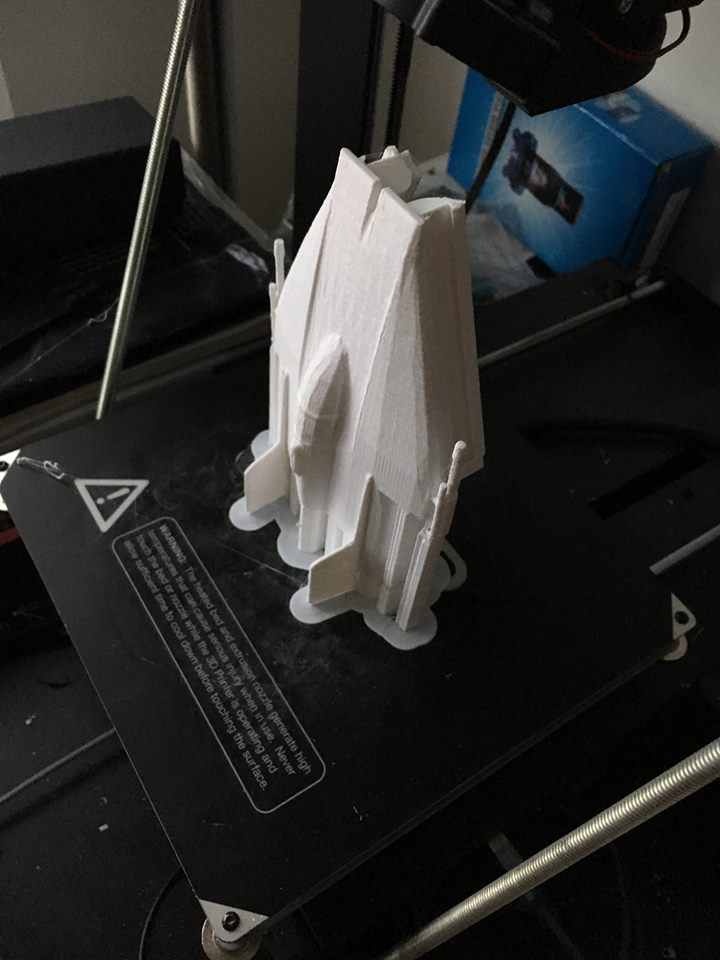
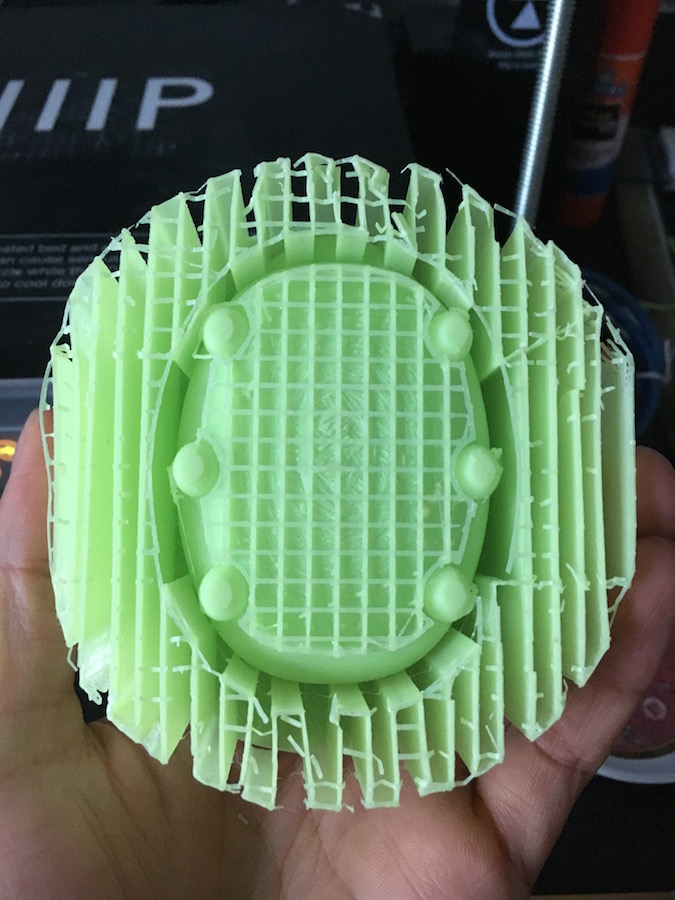
Y-Wing gallery here:

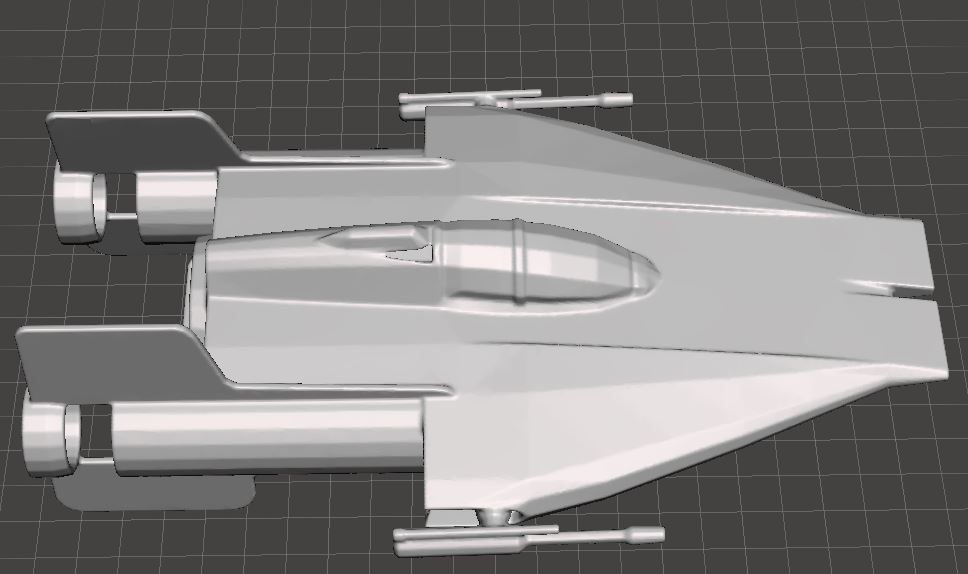
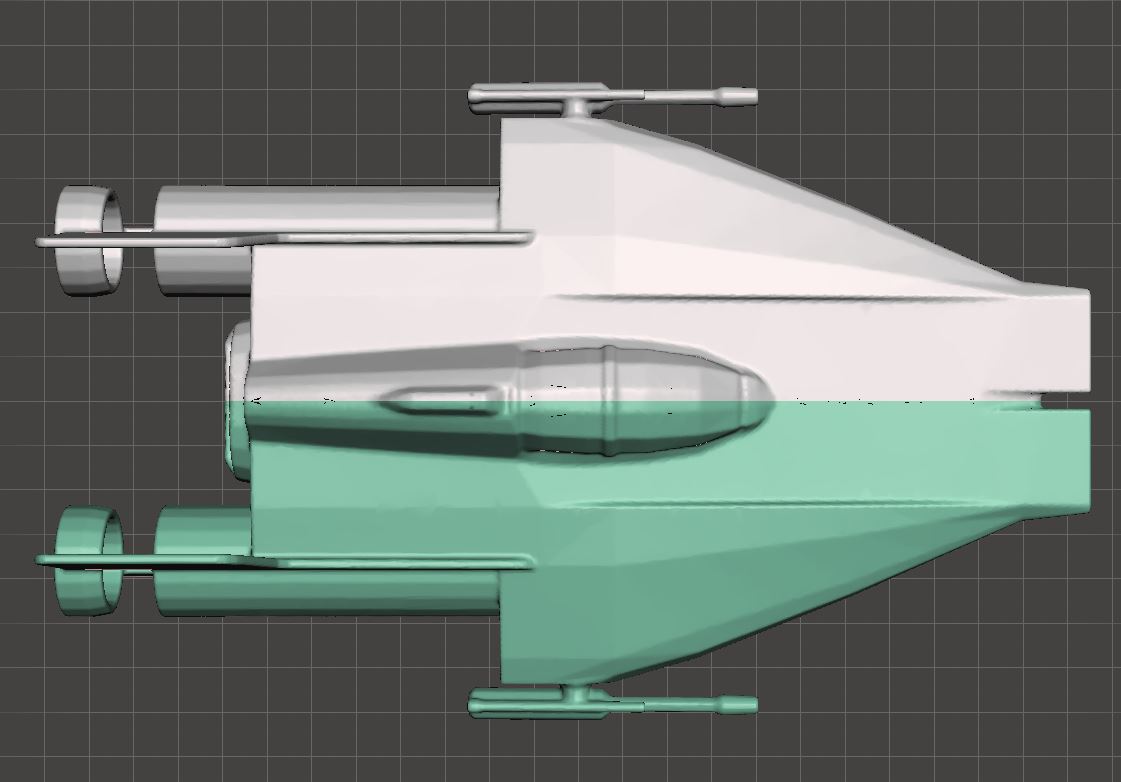
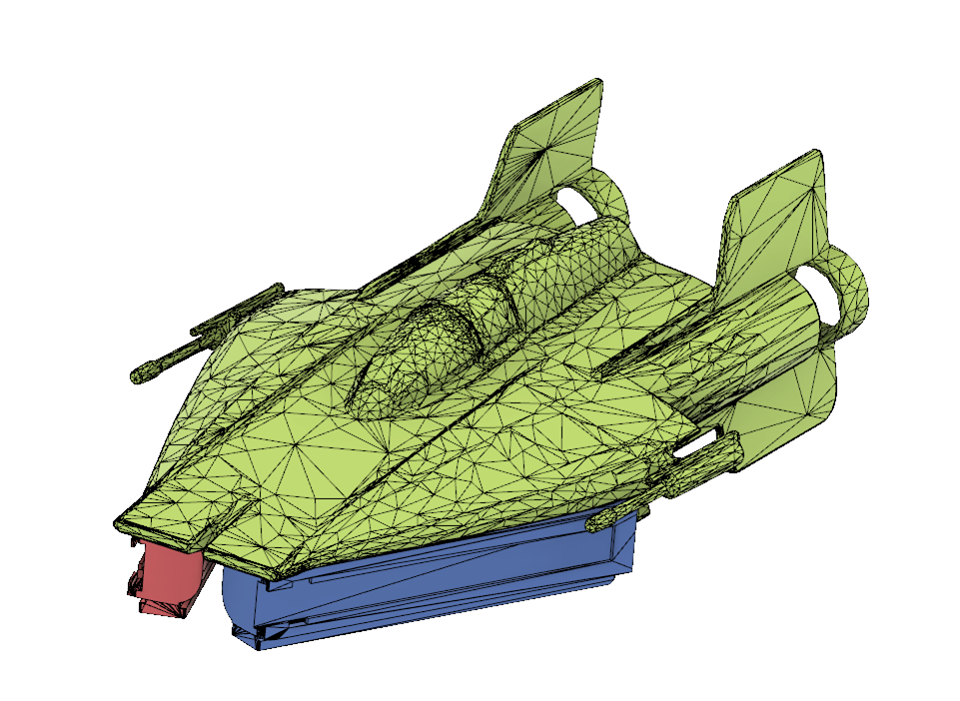
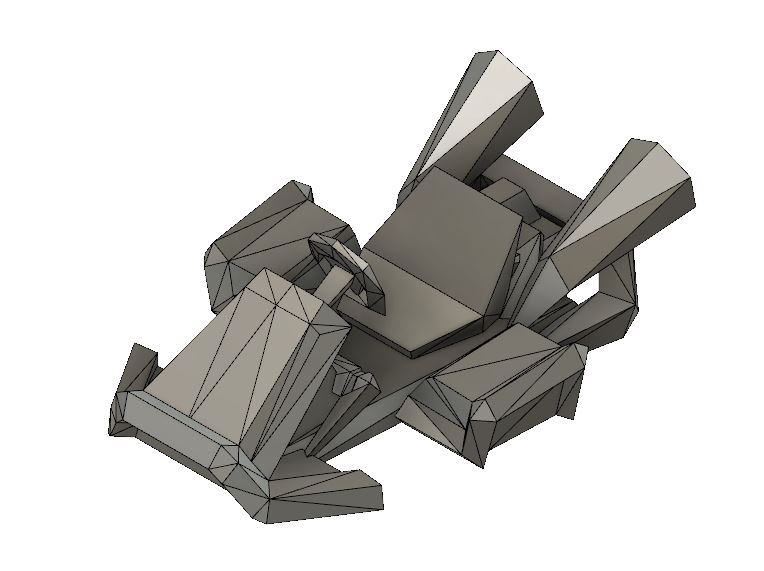
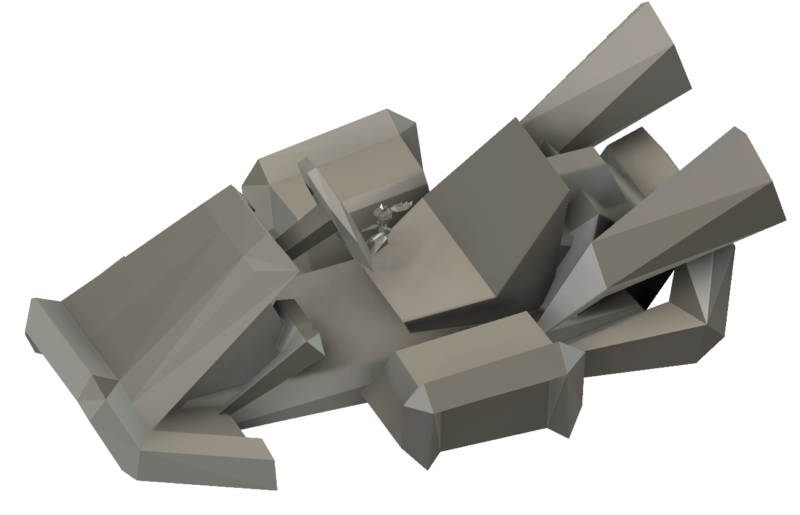
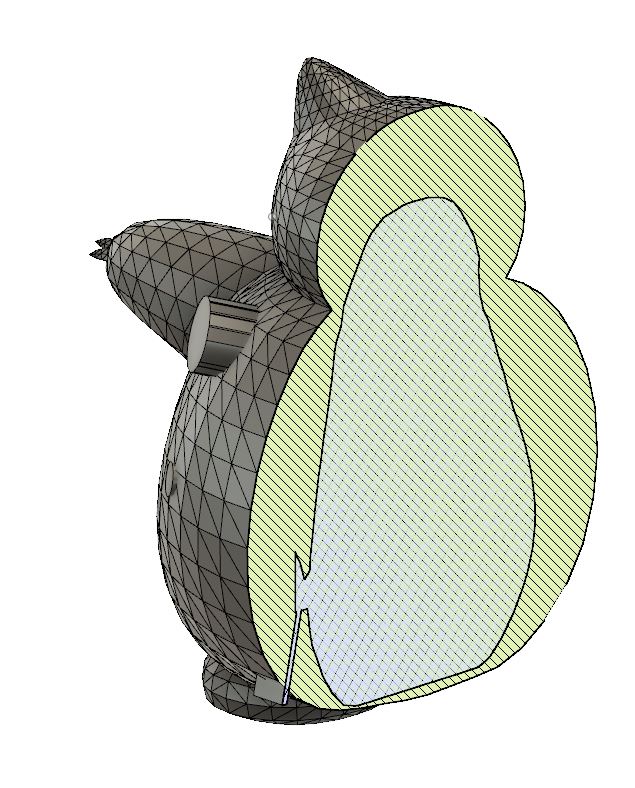
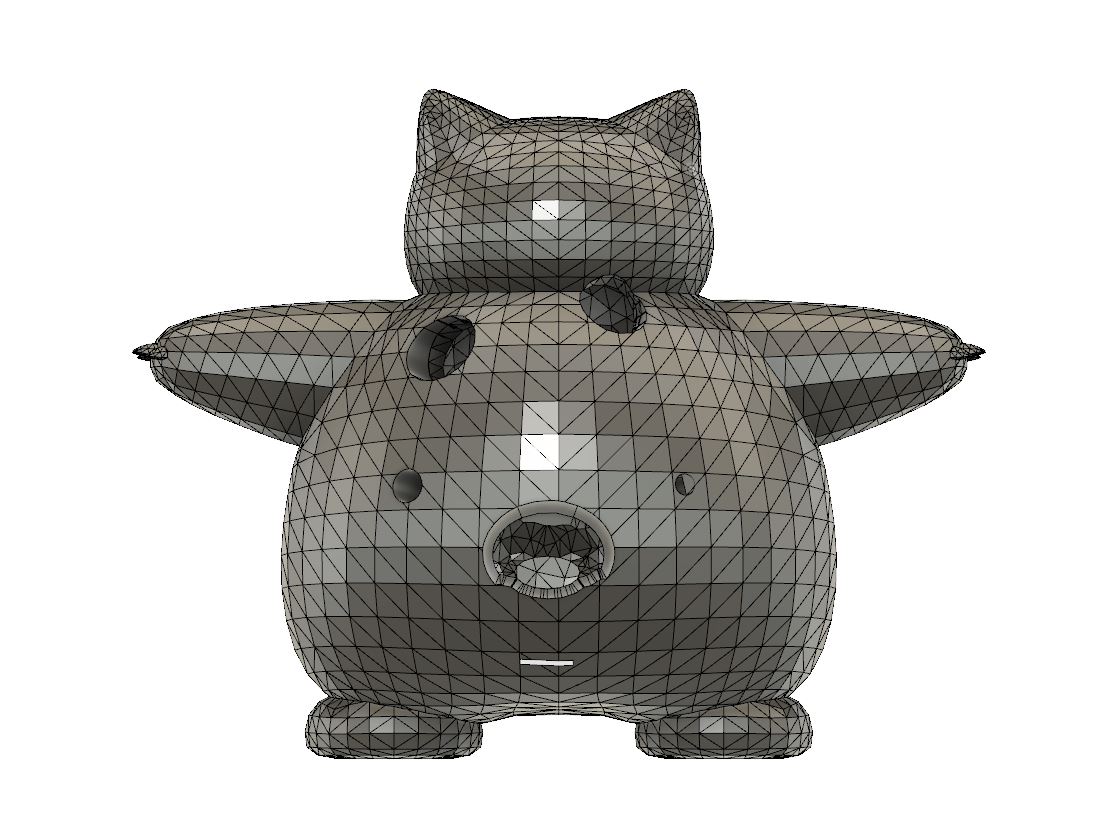
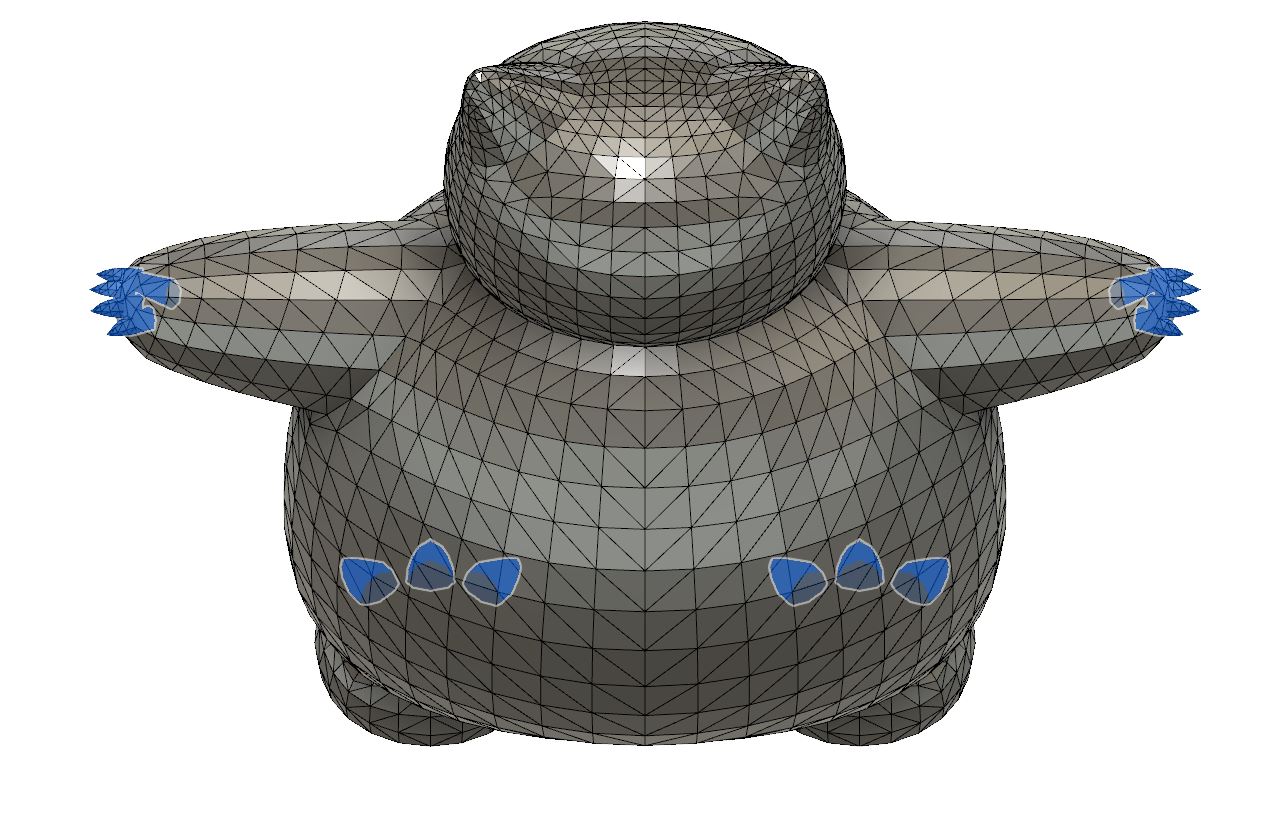
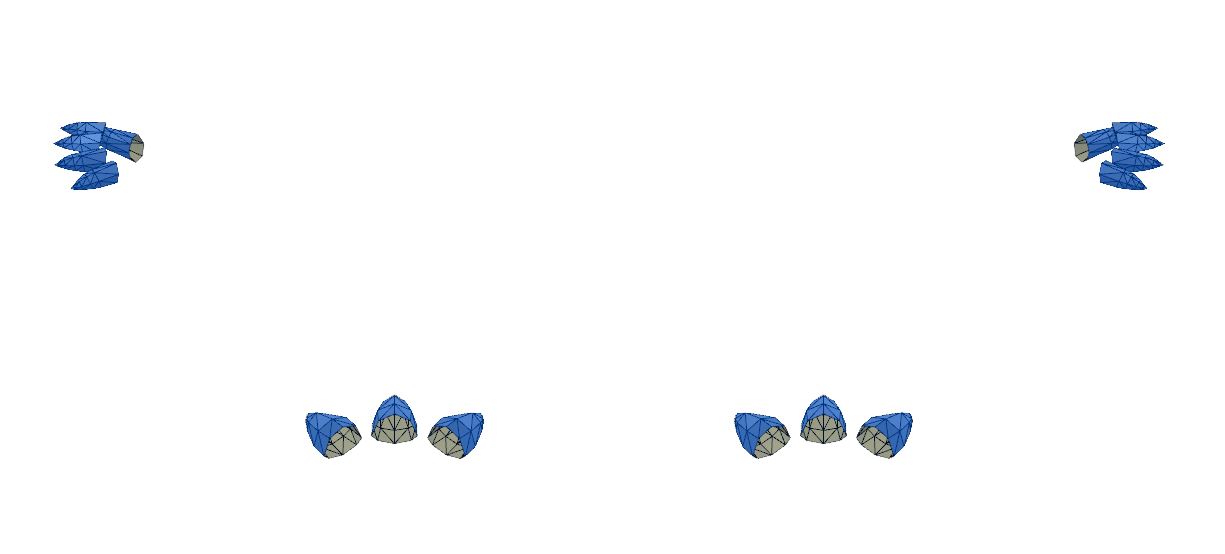
The A-Wing model took a bit more pre-print processing. First, I noticed a small hole in the surface, so I used meshmixer to mirror the better half of the model. Second, the model I had was hollow (there was an internal surface), which would have caused issues later on in combining with joycon holders and printing. The hollow body was simple to rectify—I created a block larger than the A-Wing then used combine to cut the A-Wing from the block. This left several bodies, including one that was the ship model cavity, which was added back into the main ship model. Just as for the Y-Wing model, I imported the Joycon rails, scaled the Awing body, and moved everything in place before combining the bodies.

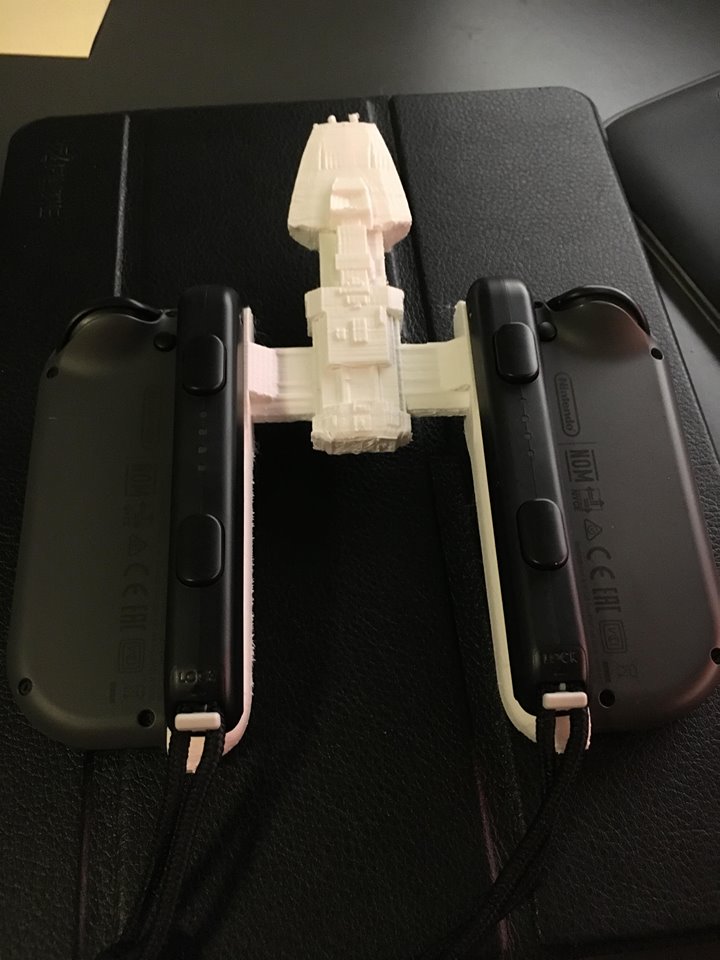
I’ll admit the joycons on the A-Wing are less than ideal, but I still think it looks cool. 😛

Mario Kart Princess Peach Print

TL;DR: I printed and painted Peach from Mario Kart for a friend’s birthday. The model came from the video game and I think it turned out pretty well.

Back in the ancient days of Sophomore year of undergrad, my drawmates and I spent hours playing MarioKart 64. My roommate would always grab Peach before anybody else, so I decided to make him one for his birthday. I got surface models from a Mario Kart video game then did a bit of patching work to make everything into a nice solid model. The Kart and Peach came as two separate files which I combined into a single model for printing.

During support clean-up, I had an unfortunate accident with our dear Princess, and she pulled a Marie Antoinette on us. This actually turned out to be advantageous since I’m not sure how I would have accessed a lot of the body for painting without the decapitation. The only truly custom parts I made for this project were the wheels, which were printed in black and simply hot-glued on.

I already missed the birthday of the other drawmates, and I feel bad… but I have prepared the racer models for both him and the last of the drawmates… We’ll all be getting together in June 😀

Totoro and Snorlax Ocarinas

TL;DR: I printed and painted a Totoro Ocarina for my girlfriend’s birthday. There are 4 finger holes and is actually tuned to play notes correctly. After that, I created a positive model of the cavity so I can use a Boolean subtract to make ocarinas out of custom models :D.

I came across this amazing model on Thingiverse (https://www.thingiverse.com/thing:1798728) while looking for inspiration of things to make for my girlfriend’s birthday. She loves Studio Ghibli films, and this is a cool application of 3d printing I had not really seen nor tried before.

In 2016, Autodesk research developed a software package called “PrinTone” which analyzes any arbitrary 3D model to add a cavity and holes so you can play tuned notes. Unfortunately, they have yet to release the software, so I couldn’t use it to transform any custom model into an ocarina. Luckily, the only customization I wanted to make was the addition of a birthday message through an extruded text cut.

The poor settings on my initial print attempt led to some underextrusion on some of the walls, and some small gaps in the head, which is no good for a wind instrument. I also tried printing a larger version at 1.5x scale, but the holes became too big for my fingers. I’m very happy with how the present came out after painting J.

After I finished this part, I still wanted a way to design and print custom ocarinas. Inspired by physical molding techniques, I was able to use CAD tools to create a digital model of the cavity, finger holes, and mouthpiece. I am now able to subtract this new “core” model from any custom model, as long as it has a similar-ish shape. The very first custom ocarina model I created was Snorlax. I admit… it looks kinda disturbing since the air inlet is basically his butthole, but I still think it’s a neat idea. Unfortunately I probably need to bring the cavity closer to the surface since this ocarina is broken as a PokéFlute.

Lotad Dish

TL;DR: I made a two-toned Lotad spill tray upon which the Oddish planters (or really anything) can sit. This model was easy to split into two colors—one for the body and one for the dish. Initially, I manufactured the part using a pause for a filament swap… this turned out ok, but ultimately I decided printing two separate parts gave better results.

Here’s the gallery:

I finished making this Lotad spill tray a few weeks ago, but hella lagged in writing this post >.<;; For those who haven’t kept up with newer Pokemon, Lotad is a Gen 3 water/grass type which has a lily pad on its head. It pretty much looks like what I modeled ;P The dish was made using both the more traditional CAD model workspace to create the lily hat and the sculpt workspace to create the main body in Fusion 360. I created this model with the idea of trying multi-colored prints in mind. The lily pad is to be green and the body is to be blue. I started the prototyping off with a single color print at first to validate the model. After it turned out well, I went ahead and tried changing the filament partway though. The only color I had at the time though was the same bluish-green color I used for my Oddish prints, which was less than ideal. I bought a light blue filament from a new company, 3D Solutech on Amazon. The filament was a great color, and is cheaper than my normal filament, but unfortunately, this material requires a lot more tuning of my print settings (which I have not done yet) to get the same quality of print I can get with my usual filaments. Completing the filament swap during the print was surprisingly easy to do, and the prints turned out quite well. However, the geometry of this model simply requires a huge amount of support for the large overhangs, which seemed wasteful. In my initial design, Lotad’s belly was suspended in the air, so the print required some hard-to-remove supports. To eliminate the need for support material, I made two important decisions. First, I split the print into two parts—the lily pad, and the body. Second, I altered the design of the body so Lotad’s belly would sit more flush on the tabletop. The belly change is hardly even noticeable from a visual standpoint since the entire part is so squat to begin with. Although I need to manually glue the two parts together, the result is much cleaner looking and takes less effort than cleaning the support material.

Shiba Cookie Stamp

TL;DR: I made a shiba cookie cutter/face stamp combo for a friend. As a bonus, I made a bone-shaped stamp with her dog’s name on it as well :D.

First up, here’s a photo of the completed cookie cutter, stamp, and name stamp. The overall dimensions of the stamp are approximately 3in in width and 2.75in in height. 

I received a request from a friend to design and print some stuff for her Shiba’s birthday coming up. I used a photo of her dog’s vest to use as a template I could trace with splines in Fusion 360. In my first version, I made a combined cutter and stamp by extruding various parts of the face to different heights.

While the first prototype worked on polymer clay, it was pretty clear that a few simple tweaks could make it easier to use. First and foremost, it was pretty difficult to press the stamp down since I didn’t include any holes for air to escape. Second, it was a bit difficult to remove everything from the press. Third, since I had fixed heights, the cookies the stamp made would likewise have no flexibility.

Changing to an outline cutter and a stamp for the face addressed all of the issues above and was very simple to do in CAD. The trickiest part was my desire to have a detachable handle to cut down printing time. I created mounting points for the handle by cutting holes beneath the eyes. On the stamp, I made sure to add a larger draft angle on the extruded areas to make it easier to detach from the dough.

I also made a simple name stamp. I was pleasantly surprised at how easy it was to create extruded text in Fusion. The rest of the bone shape and handle were essentially just decorative. I think the name stamp has a potential issue with the letters being too close together, but that should be something easily addressed in a future revision.


Bellossom Print

TL;DR: I created Bellossom model and have sliced it in a few different ways to print. There are two planter versions (one with and one without flowers) and one which is a figurine (no holes). I really like the light green material I have… let me know if you’re interested in buying one ;).

In my Oddish planter post last month (sorry I’ve been busy), I gave a sneak peak of my next project and am finally delivering on it. Bellossom has a much more complex shape than Oddish, and it was fun to use the Sculpting menu along with the Body Boolean Combine menu (cut, join, intersect), move/copy, and patterning tools in Fusion 360.

Seriously, using multiple bodies and the Boolean tools was a real light bulb moment for me. For instance, I needed to create a shell in the head of the model in order to use it as a planter. With the multiple body design paradigm in mind, I used full cylindrical-ish shapes for the centers of Bellossom’s head flowers. Initially, part of the flowers were visible through the wall of the shell, but I used the main head as the cutting tool to slice the flower body into separate pieces—one outside the head and one inside, allowing me to easily remove the undesired inner portion.

Although I created a full model including flower dress, I’ve focused on printing bust versions for now… Honestly, I am dreading the support removal process for the full figure. Practically though, I have the excuse that the shape of the full figure body is not ideal to use as a planter.

Enough boring you guys, here’s the good stuff… the gallery:

Next up, I’m going to be making a Lotad spill tray sized such that Oddishes can sit on them :D. I promise it will take me less than a month to get that line up and running ;).

Oddish Planter!

TL;DR: I created a custom Oddish planter model and printed it. I messed up a few times, but learned from it, which was pretty cool. I’m going to make some other planters too, lemme know if you want one 😉

Here’s a bunch of completed prints outfitted with airplants… I finished some of them with an epoxy sealant to make them super shiny.

Here are the details if you’re interested 😛

The biggest category of goods I’ve always wanted to make on my 3D printer involves Pokemon. I’ve seen a bunch of planters for sale on Etsy and the like, but wanted to try my hand at completing my own designs, so I did. I chose to tackle Oddish first cause it’s a popular with ‘mon with a very simple shape. This ended up being a good learning project because for the very first time on my printer, I needed to troubleshoot print settings and tweak the model to prevent failed prints.

The initial design only took about a half hour to complete, and most of the time was spent trying to finalize the face, feet, and drainage hole designs and positions. I printed the first design with supports thinking it wouldn’t be a big deal, unfortunately, it ended up being a huge pain to remove. For my next iteration, I added a plane cut to the bottom, so the model could sit flat on the table and print without support. While this worked pretty well, I wanted to see if I could improve on the overhang quality.

Then I tried printing the Oddish upside-down. Despite requiring more support material, I liked the fact that all of the areas with overhang would not be visible (except for the tips of the feet). As an additional benefit, I removed the plane cut and give Oddish a nice rounded booty. The first time I tried this though, the support broke resulting in misprinted feet. I tried re-leveling my print bed and adding extra surface adhesive—to no avail.

The breakthrough came when I modified the design, enlarging the feet and changing the angle they sat at such that the support towers started with a larger, more stable base. While I had a successful upside-down print, the support towers left a more visible mark than I envisioned. Additionally, the rounded tush was actually worse than a flat-bottomed one, since Oddish would roll around -_-. The final iteration added the plane cut back in so Oddish would be able to sit flush on the ground.

I’ll be honest–the blue/green filament I bought from Amaz3D on Amazon left me a bit wanting. I’ve had success using their plain black and plain white material before with great success. On initial inspection, the color is spot on what I need for Oddish, so I was pretty excited at the lack of post-print-painting I would need to do. However, after the prints started coming out, there are definitely some noticeable inconsistencies in the filament color, which is a bit disappointing.

The last thing I tried out with these prints was the application of XTC-3D coating to smooth out layer lines and give the parts a shiny finish. The coating is essentially just a 2-part epoxy, which you mix in a 2:1 ratio. The coating ended up being a bit thicker than I anticipated, so I’m glad I decided to wear disposable gloves. The paintbrush I used to apply the epoxy sacrificed its life to give four models a new clear coat. I let the models dry overnight on top of wine bottles, and the result is actually very impressively shiny—you can actually see your reflection in their faces :o.

I posted a little preview photo of the first print (the one with too much support) before my numerous iterations on the model, and managed to get enough interest from a few friends for commissions–yay social media! I’m super happy to say that I made the first sales of my own custom designed planters :D!! I’m excited to take the numerous lessons I learned from this project to continue making new models (Bellossom is up next) for custom planters.

Infinity War Masks

I waited 10 years and 18 movies for Infinity War, and as a superfan with a movie club, I obviously needed to watch it opening night. I bought 22 tickets in the center of the theater within 15 minutes of their availability, but unfortunately, Alamo Drafthouse’s site wasn’t ready when I was. Alamo is by far my favorite movie experience, and the moviegoers there are true fans. It’s pretty normal for opening night premiers to be filled with people dressed up (scroll down far enough and you might see a familiar face :P).

I managed to cajole a few members of my movie club to join in geeking out and dress up for the premiere at AMC. As somewhat expected, we were like the only group dressed up there, but whatever. We had fun and that’s all that matters.

I continue to be pleasantly surprised at the utility of my cheap little 3D printer. This was the first project I completed that involved painting post-print. I found some decent STL’s for Ironman and Black Panther on Thingiverse. While these base STLs worked, there were some changes I wanted to make but didn’t have time to do so, cause of course I procrastinated. I didn’t start making the masks for Abaho and I until 5 days before the movie.

The first part I printed was the faceplate for the Ironman MK50 (Bleeding Edge armor that debuted in Infinity War) helmet. I measured the space between my eyes and scaled everything accordingly. I tried it on and it seemed to fit well, so I continued with the rest of the helmet. It turns out that my head does not have the same proportions as that of the guy who originally designed the model, so I couldn’t get the skullcap on:

At this point, I only had 3 days to print and paint 2 masks, so I decided to cut and print only the front part of the Ironman helmet to save time and ensure wearability. It was pretty easy to make planar cuts of the mesh files using Fusion 360, which was good.

I noticed that the STL I was using was not perfectly symmetric, and the parts didn’t actually fit perfectly together. It’s definitely something I’m going to address before I make my next print.

I needed to do a decent amount of work to prepare the Black Panther mask for printing. First, the raw STL had a ton of unnecessary detail and sharp edges on the inside of the mask, which would have increased the print time and made the helmet more uncomfortable to wear, so I did lot of simplification and smoothing of the inner surfaces. Next, I needed to slice the helmet into a bunch of parts to both fit on my printer, and print in time (I only had about 36 hours cause I ended up printing TWO Ironman masks). Initially, I was worried about having visible weld lines in this mask, but luckily, I bought some BLACK GLUE STICKS a few weeks earlier at Daiso (I didn’t know these were even a thing) to hide them perfectly.

Here’s a gallery of the build process:

Painting the Ironman masks was a huge pain since I needed to cover quite a bit of surface area using three different colors of paint (gold, silver, shiny red). To make the shiny red, I needed to mix a metallic copper paint with the basic red I bought (the red was too flat and bright to match the gold). The Black Panther mask in contrast was ridiculously easy to paint… the mask was already printed in black, so only a few raised areas needed to be highlighted in silver.

I was incredibly happy with how the finished helmets turned out. I added a fabric strap to the back of the Ironman helmet with some hot glue for wearability. It turns out that Abaho’s head fit perfectly within the Black Panther helmet with no additional modifications needed.

Next up, I’m going to be printing out and attaching parts of the Black Panther mask we removed earlier. I’m also going to fix the model symmetry and adjust the dimensions to fit the proportions of my head.

Printer Mods and Cubone Dog Mask

My friends James and Cat found photos of dog owners putting Cubone masks on their doggos like this online, and asked if I could help them make one for Cat’s shiba, Azuki. I searched and found this STL file graciously uploaded to thingiverse to use as a baseline, so I agreed to help.

Here’s the finished product on a very dapper looking, but unhappy dog:

For the uninitiated, here’s the inspiration for the mask:

Since this was my inaugural long print (previous record was about 5 hours) on my 3D printer, I had a number of upgrades I wanted to complete to ensure a smooth print. I found all of these mods on this very useful site.

  • By far the most time saving mod I completed and by I, I mean my roommate did most of the work, was setting up an Octoprint server onto a spare Raspberry Pi I had. This lets me monitor print status from any computer on my network and allows me to send gcode wirelessly rather than need to futz around sending files with physical SD cards.
  • Next, I swapped out the stock cooling fan for a radial blower using the diicooler mod. This mod cools the part from all directions around the hotend, which greatly improves the print finish and dimensional accuracy. I ended up needing to change the wiring on my new fan’s connector. It was a bit of a pain, but I ended up non-destructively disassembling the connector by pushing the pins in and pulling the wires out.
  • After I swapped the cooling fan, I realized that I would need to recalibrate the heating element PID parameters. Unfortunately, the stock firmware did not make this super accessible.
  • In order to calibrate the PID parameters more easily (and add a number of cool new functionality) I changed the firmware running on my printer. I’m currently running the open source ADVi3++ v2.1. Octoprint proved to be incredibly useful here since it let me flash the firmware on the printer from my laptop. Seriously, how cool is that??
  • After installing new firmware, I went and recalibrated the X, Y, Z, and Extruder motors using tools built into ADVi3++ and by printing a calibration cube.

All of the printer setup above took about 2 nights of work. I’m not gonna lie, it ended up being more involved than I originally anticipated. I made the mistake of thinking I obtained all the required hardware, but this ended up not being the case. Oh well, all things considered, it was well worth it.

With all of the printer mods out of the way, I was able to focus on modifying the base STL to fit Azuki better. I asked Cat to take a bunch of photos of Azuki from the profile, top, and front views as best she could. I imported the photos directly into Fusion 360 and used the tape measure she included in the photo (genius move) to scale them exactly. I imported the base file, simplified the mesh, and converted it to a solid for edit-ability. The biggest modification I made other than scaling was the addition of ear cutouts, since Azuki’s head structure was a bit different from that of the base dog’s. I should have added nostril cutouts and could have added additional thru holes for string attachments to hold the mask on more securely, but those can be added after the fact with a regular drill.

The total print time was about 20 hours, using approximately 220g of material. Additional print settings in Cura were as follows: 0.3mm layer height, 30% infill, supports from base only. Cleanup of the supports was pretty simple, I was able to clear almost all of it by hand in less than 2 minutes.

The resulting mask fit Azuki pretty well. The ear holes were in a pretty good location, but the eyes sat a bit closer to his face than ideally desired. The fix for this is pretty simple though, foam padding can be added to the top of his head and along his snout to move the entire mask up a bit. Making the mask sit a bit further from his face will also give his nose a bit more room to breathe as well. From a distance of 2 feet away you can’t see any layer lines or notice any triangular surfaces. I’m incredibly happy with how this print turned out and hope that Azuki won’t hate me too much for making it 🙂

Go watch Pacific Rim 2

Pacific Rim 2 (PR2) is the distilled essence of action movie. I watched it on the opening night in IMAX with 12 friends in my Movie Club. We went in with no expectations at all, and came out pretty pleased. The film delivered exactly what it promised: giant robots, plasma swords, monsters, and John Boyega. It bums me out that PR2 isn’t doing better domestically, cause I’d love it if more films just did what they say they’re going to do. Here’s a totally-not-biased-at-all spoiler-free review 🙂

Freshman director Steven DeKnight delivers exactly what you would want and expect. There’s some set up time at the beginning (admittedly a bit slow), but there’s barely fluff to waste your time with once the action starts. Sure, there’s a jump in plot logic here and there, but who cares–you’re obviously not expecting the Shape of Water here =P.

There’s punchy dialogue and the right amount of silly comedic moments strewn throughout the movie. Mandarin speakers can get a bit more out of the dialogue… Our giant group of mostly Asians laughed much louder than the rest of the theater at certain points. It’s pretty clear the studio is gunning for $$$ in the Chinese market.

Pacific Rim 2 shines with the most important stuff: giant robot vs. monster smackdowns. The action scenes varied in participant design, fighting styles, and environments. I’ll admit the scene selection and framing didn’t seem as painstakingly chosen as they did in the original Pacific Rim (but who beats Guillermo del Toro at that), I found the rehash of assorted elements between each fight kept them all really fresh and visually interesting.

Sometimes you can get away with skipping action movie prequels without missing a beat at all (see: Transformers), but PR2 assumes you’re a bit familiar with the basic rules of their universe. While you could proooobably get away without watching the first movie, if you’re like me and like things to fall into place in your mind, I think you’d enjoy PR2 more with a quick rewatch of PR1. I didn’t really remember any of the repeat characters from the first movie and some of the major plot points which had implications for the second, so I wasted energy trying to rack my brain instead of being fully immersed at times.

Overall, I thought the movie was super fun, and pretty well paced once the action got going. The 1h50min runtime felt just about right, and I’ve got no regrets at all. As long as you aren’t expecting a mindblowing plot, or deep character arcs, I think you’ll have a good time.