9/11/2014
I’m not quite sure what inspired me, but last night I just had a huge urge to do some sculpture work even though I hadn’t touched clay since high school. I definitely wanted to use something that I could harden without a kiln. I initially thought of air-dry clay from Crayola because I remember using it in elementary school, but the working life was much too low. After doing a bit of research, I stumbled upon Super Sculpey which is a polymer-based clay that can be fired in an oven. It had some pretty decent reviews, was pretty cheap, and was available at my local Dick Blick’s so I ran out to get a box this morning.
I started playing around with the clay and it felt really smooth, and easy to work with. Manipulating the material was really easy even though I didn’t have any sculpting tools other than my fingers and some toothpicks to use for detailing. After experimenting with it for a few minutes, I decided to make a mini Groot figurine.
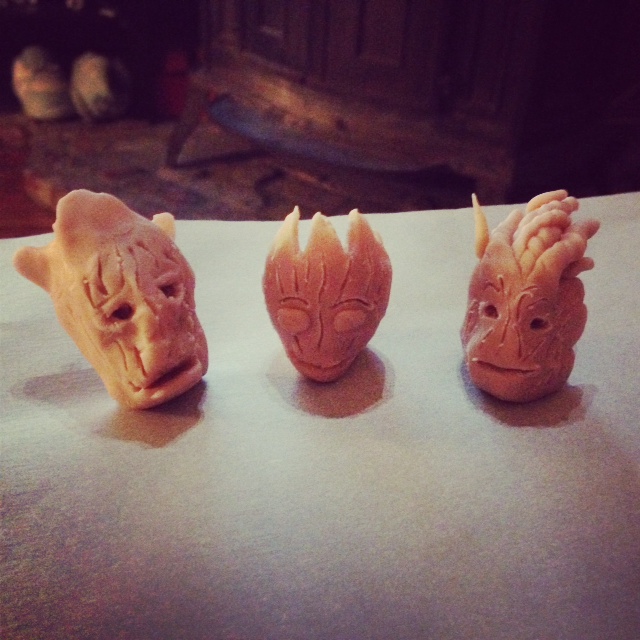
I tried making the head with a few different styles. In the photo above are my first, second, and third tries from left-to-right. I actually liked the face on the first head I made, especially the cheek structures and detail I was able to hold. The second one was a bit creepy and bad looking, mostly because of the eyes. I really liked the hair detailing I pulled off on the third one, so I chose to continue on with it.
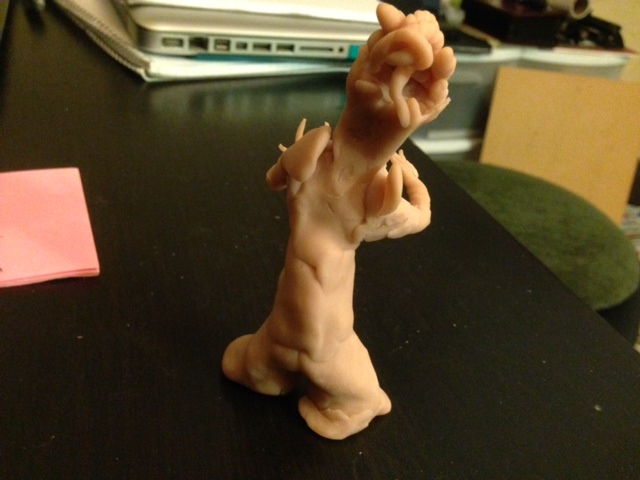
When I was adding the body and arms, I was amazed at how strong the material was and how easy it was to add and subtract parts from it. I was a bit afraid that I would end up with something that looked like the boogeyman from the Nightmare before Christmas (something about this Groot’s hair reminded me of him, I think). I went through three or four iterations of the body and arms until I found one that I liked reasonably well. Next, I added some nice thick legs and some fingers onto the hands. I was really surprised at how well the fingers were able to hold their shape and how well the legs could support the figure’s weight:
The only frustrating part of this project for me came during the firing process. I popped little Groot into the oven at 275º and set the timer for 20 minutes. When I came back to check on him, I was dismayed to find that he had fallen over (probably when I shut the oven door the first time). His face had a dent in it, his arms were bent flat against his body and one of his fingers fell off, and his feet weren’t keeping him upright anymore. I took him out and added more material under his feet just to keep him upright again and put him back into the oven.
I had resigned myself to the fact that my first sculpture in years was going to look a bit broken after I returned him to the oven. However, when I went back to check on him a second time, one of his arms had fallen off completely. I figured that this was probably because the arms were so thin compared to the torso and legs they had gotten over-baked. However, there was no way an armless Groot was going to be acceptable for me, so I took him out and tried to fix him.
I absolutely cannot praise this magical material enough for how workable it was, even though it was already partially fired. I found that I could stick the arm back on by adding new material, so I went ahead and fixed his finger while I was at it. :).
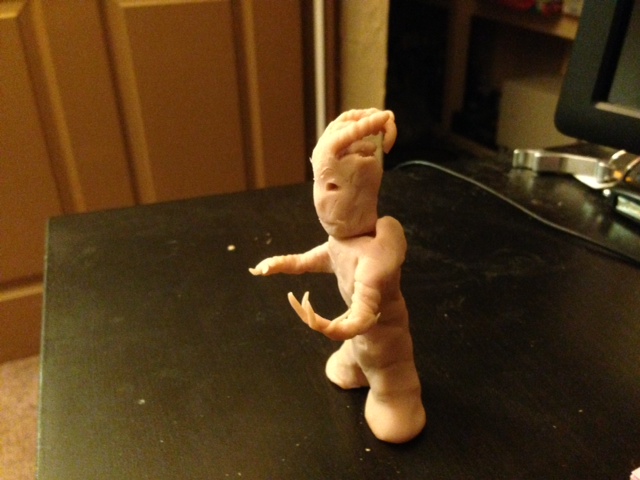
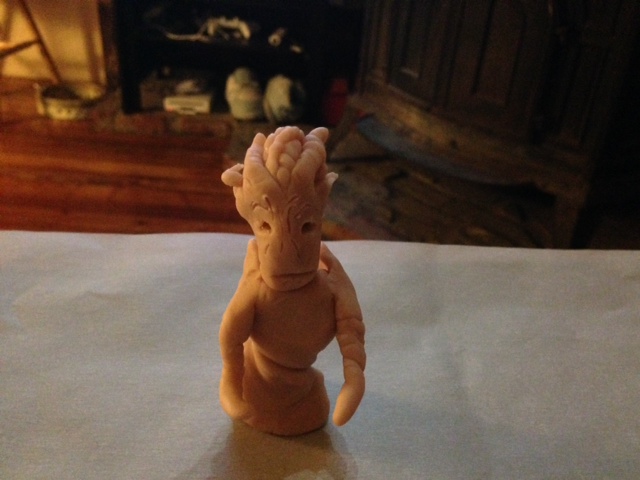
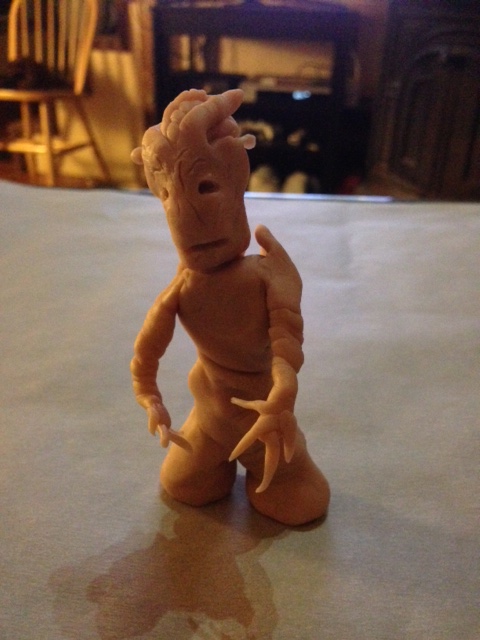
Below are some photos of the finished figurine. I haven’t decided if I want to paint him yet… I do think this beige color works pretty well and I would need a really small brush to get all the details in the way I would want them to look. All things considered, this was a really fun and easy project for me (it only took 2 hours!). I’m really glad I discovered this Super Sculpey stuff and can’t wait to make some more cool stuff!