Four of my friends and I were all bitten by an inspiration bug, causing us to make some light up perler necklaces for those going to music festivals this year (none planned for me though ¯\_(ツ)_/¯). For the uninitiated, perler beads are colorful plastic craft beads which can be melted to make physical pixel art jewelry, magnets, etc. Collectively, we hadn’t seen a whole lot of light up perlers worn out the wild, and the ones we have don’t really look that <a href=” https://www.etsy.com/search?q=light%20up%20perler”> great </a>. So, we thought it’d be fun to make a few for ourselves and our friends.
Personally, I saw this side project as an opportunity for me to tinker with Onshape (a great web-browser based CAD system), make use of my recently acquired awesomely cheap 3D printer (Monoprice Maker Select Plus for $321, all taxes and shipping included!), and practice good soldering (I still need to work on getting better at this, haha).
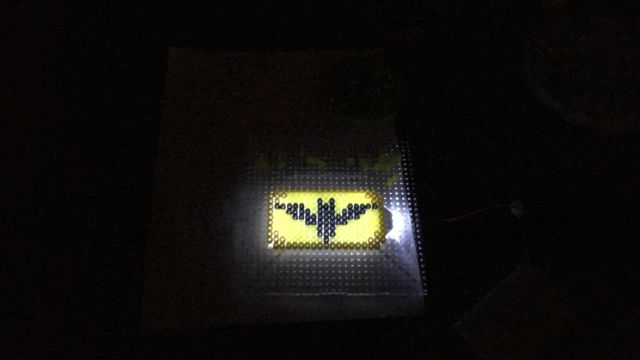
Despite some flaws, it was a quick (less than a day to make) and did its job of helping us learn and figure out what we can improve on. Instead of using point LEDs, we opted to try an off the shelf <a href=”https://www.adafruit.com/product/1621”> diffuser unit </a>. This gave us a nice uniform background light using a single LED over a relatively large area (45mm x 86mm). Using just one LED in the assembly maximizes battery life and simplifies wire connections. In fact, we only used two other electronic components: a regular coin battery holder and a push button.
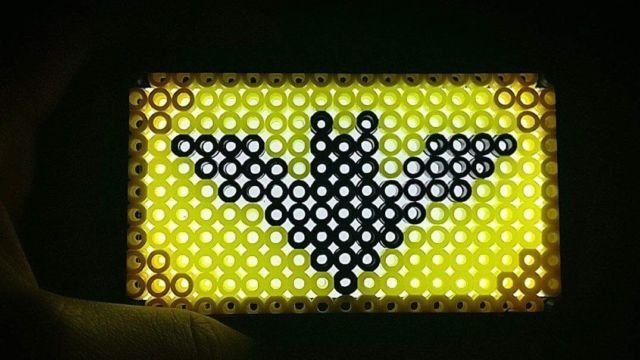
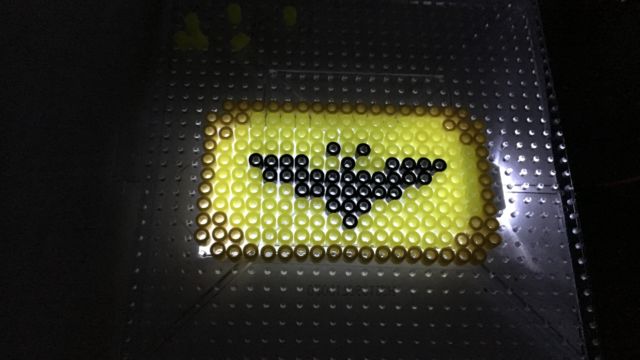
The first snag we ran into is the fact that standard-sized perlers are roughly 5mm in diameter, so our lit-up pixel area was actually pretty small (9×17). This greatly limited the designs we could feasibly make. I initially tried portrait-oriented Stanford Tree and Pickle Rick designs, but the low pixel count made it pretty difficult to create anything with intricate details. Instead, I opted for super simple yet recognizable shape: the bat symbol.

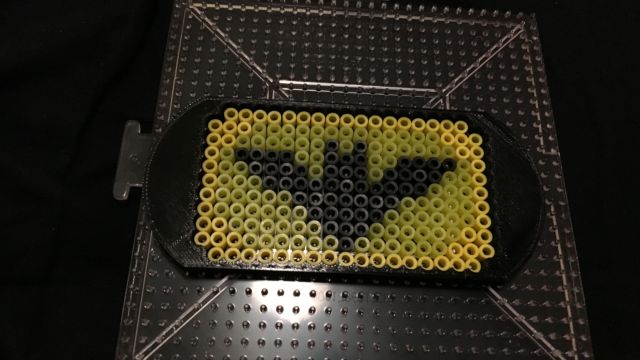
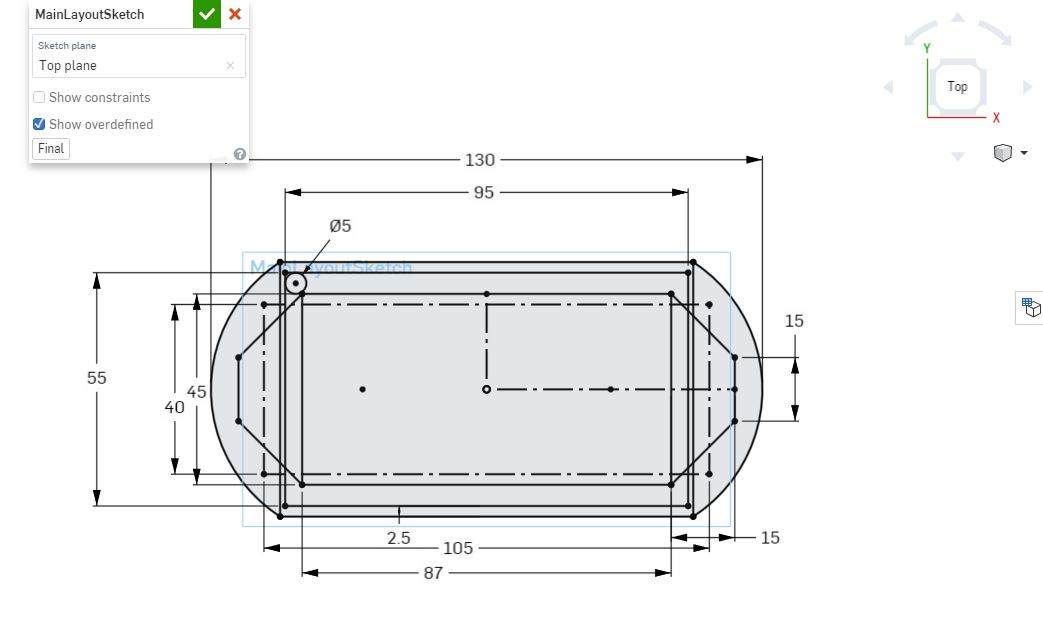
After laying out the bat design on the perler board, I created the CAD files in Onshape. Unfortunately, going with a landscape-orientated design was less than optimal, as it forced me to add extra material on one side to make the assembly to keep the lit up area in the center. The extra material made the prototype look more like a belt buckle (or a PlayStation Vita on a string) than a necklace like I originally shot for. The assembly is straightforward though: perlers on top of a diffuser, all mounted in a plastic enclosure with thru holes for connecting to an external battery and necklace string. For this test, I wanted the product to withstand some jumping and bumping yet still be easily dismantled for part reuse.
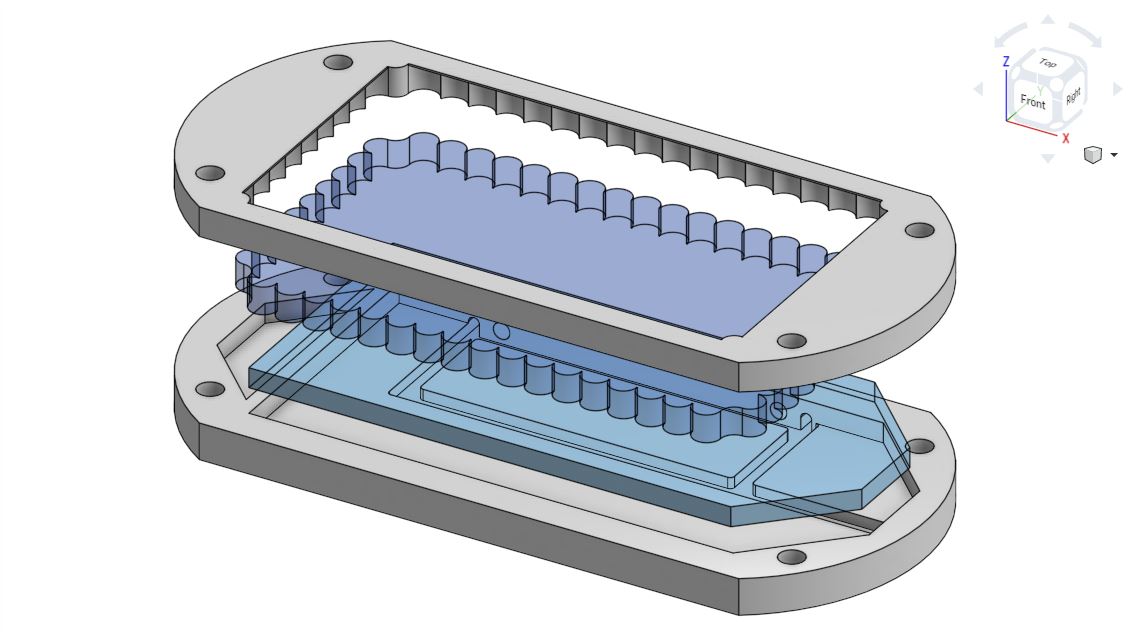

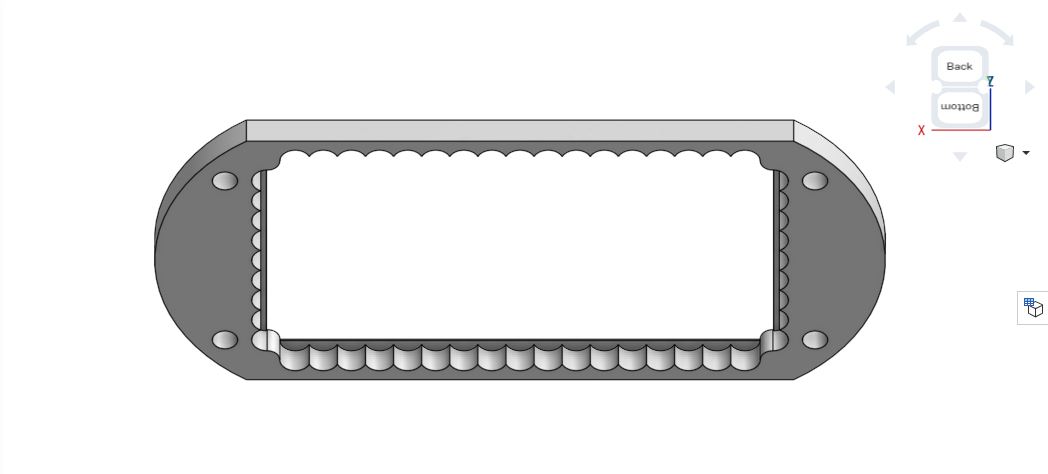
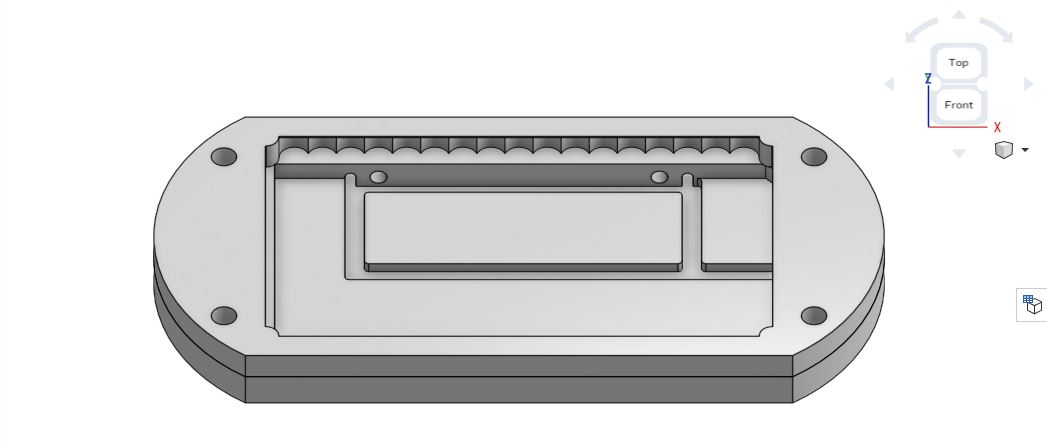
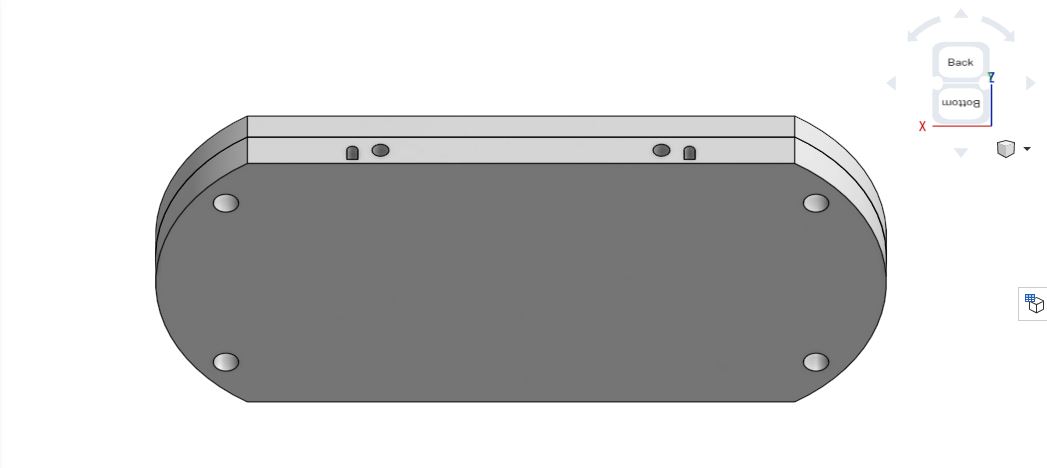
Inevitably, I procrastinated on this project by waiting to print the enclosure until the morning of the event we wanted to test the product at. Since I had no temporal wiggle room, I needed to make my design bulkier and less spatially efficient to guarantee everything would fit together on the first try. Wire routing posed the greatest assembly risk, so I created troughs much wider and deeper than theoretically needed (roughly 3.5mm wide and 2mm deep). The extra space proved useful and it was pretty easy to put everything together.
Here’s a list of observations that were made, immediate improvements, and things we can try for the next version:
- More melting of the perler beads, to ensure no light bleeds through the center of individual beads. Having holes still visible meant the white backlight bled straight through and washed out the design completely at most angles.
- If melting the perler beads more doesn’t work, we can add a resistor to reduce the harshness of the backlight.
- Add a mask directly on top of the parts we don’t want backlit
- Take time to actually plan wire routing, use smaller wires and thinner troughs to minimize assembly thickness
- Replace screws with the aforementioned snap feature. This will also help thin out the assembly.
- Optimize the placement of the battery and on/off switch.
- Either reduce the size, or replace necklace form factor with belt attachments.