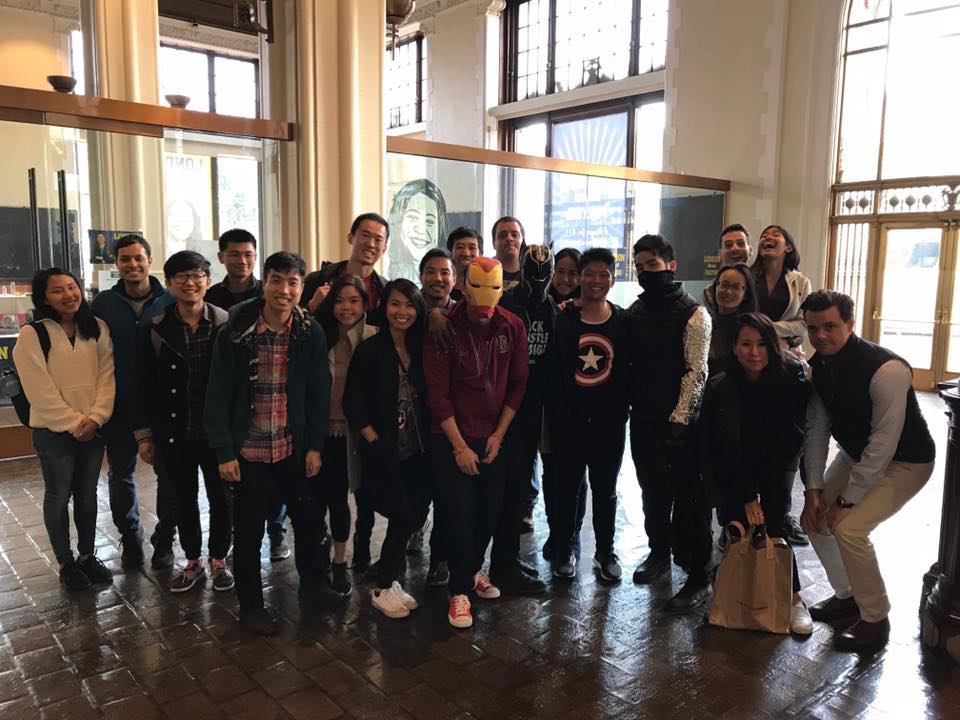
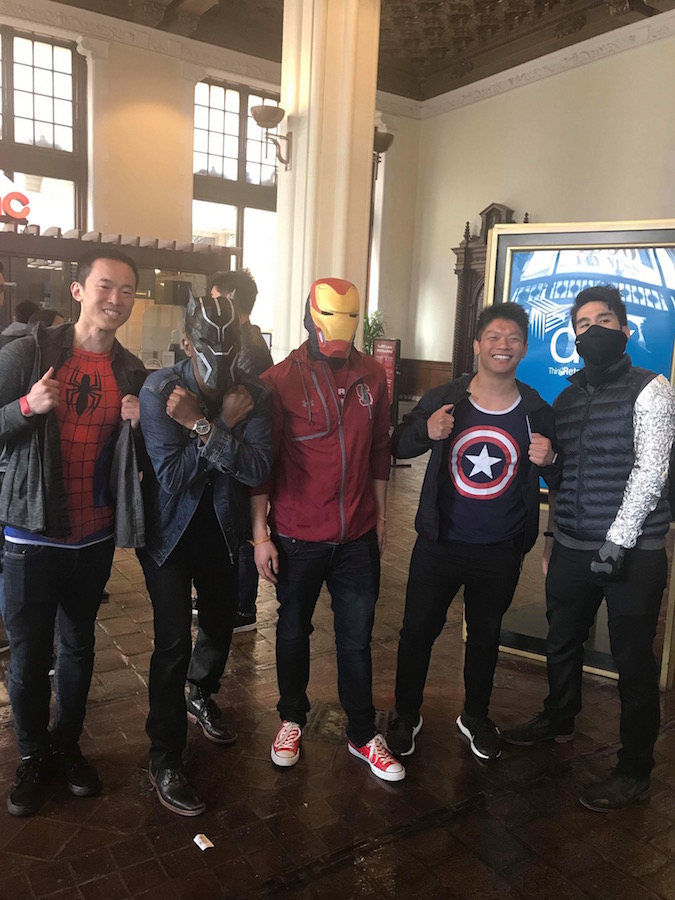
I waited 10 years and 18 movies for Infinity War, and as a superfan with a movie club, I obviously needed to watch it opening night. I bought 22 tickets in the center of the theater within 15 minutes of their availability, but unfortunately, Alamo Drafthouse’s site wasn’t ready when I was. Alamo is by far my favorite movie experience, and the moviegoers there are true fans. It’s pretty normal for opening night premiers to be filled with people dressed up (scroll down far enough and you might see a familiar face :P).
I managed to cajole a few members of my movie club to join in geeking out and dress up for the premiere at AMC. As somewhat expected, we were like the only group dressed up there, but whatever. We had fun and that’s all that matters.
I continue to be pleasantly surprised at the utility of my cheap little 3D printer. This was the first project I completed that involved painting post-print. I found some decent STL’s for Ironman and Black Panther on Thingiverse. While these base STLs worked, there were some changes I wanted to make but didn’t have time to do so, cause of course I procrastinated. I didn’t start making the masks for Abaho and I until 5 days before the movie.
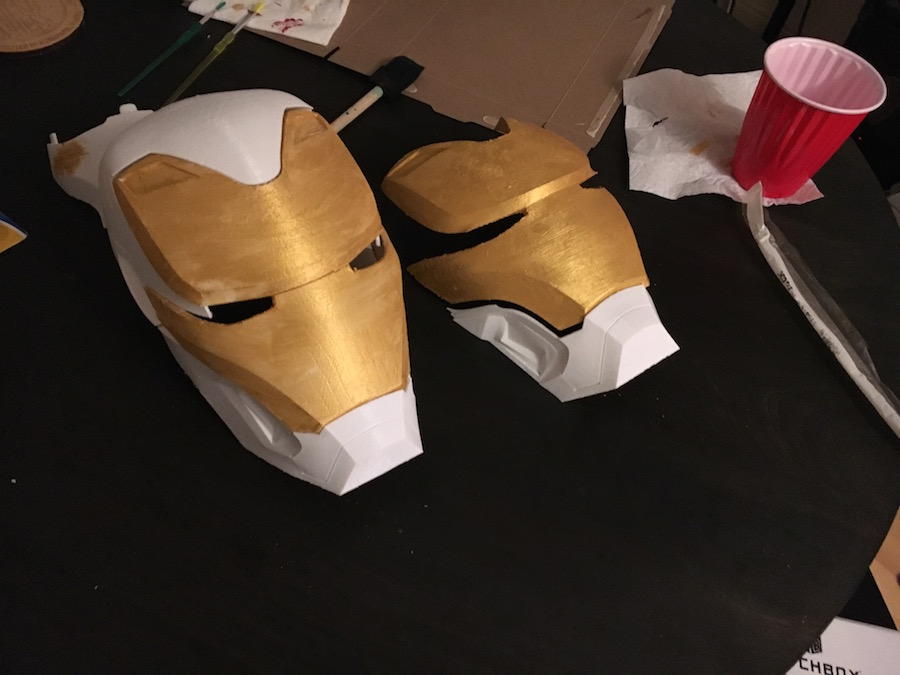
The first part I printed was the faceplate for the Ironman MK50 (Bleeding Edge armor that debuted in Infinity War) helmet. I measured the space between my eyes and scaled everything accordingly. I tried it on and it seemed to fit well, so I continued with the rest of the helmet. It turns out that my head does not have the same proportions as that of the guy who originally designed the model, so I couldn’t get the skullcap on:

At this point, I only had 3 days to print and paint 2 masks, so I decided to cut and print only the front part of the Ironman helmet to save time and ensure wearability. It was pretty easy to make planar cuts of the mesh files using Fusion 360, which was good.

I noticed that the STL I was using was not perfectly symmetric, and the parts didn’t actually fit perfectly together. It’s definitely something I’m going to address before I make my next print.
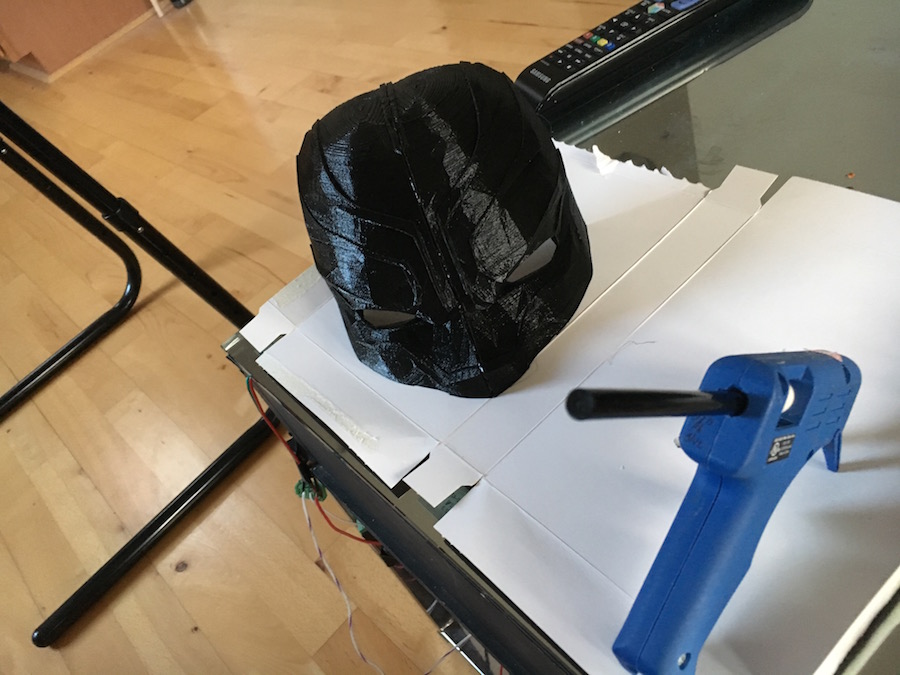
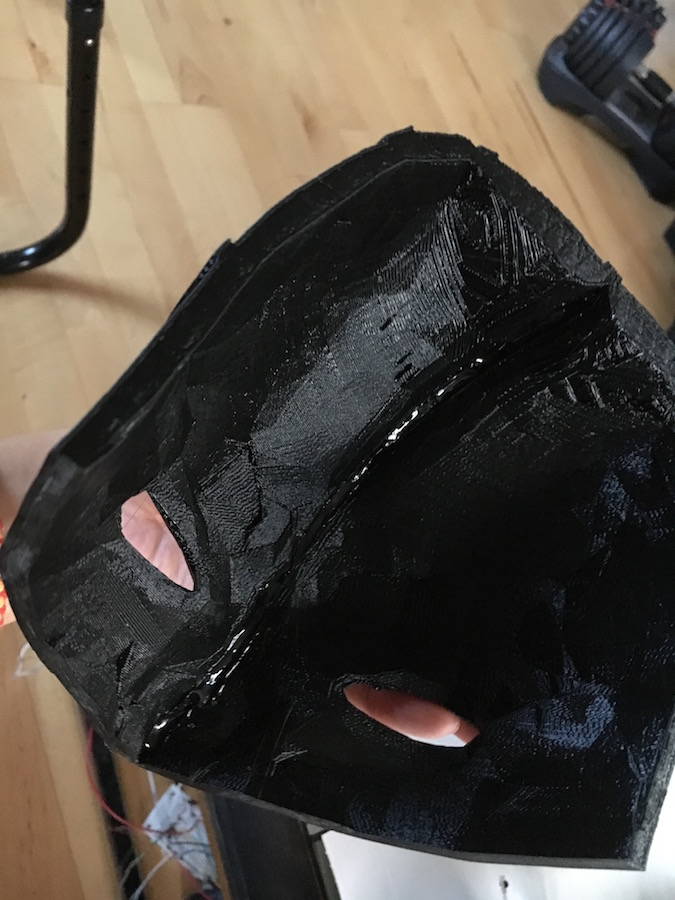
I needed to do a decent amount of work to prepare the Black Panther mask for printing. First, the raw STL had a ton of unnecessary detail and sharp edges on the inside of the mask, which would have increased the print time and made the helmet more uncomfortable to wear, so I did lot of simplification and smoothing of the inner surfaces. Next, I needed to slice the helmet into a bunch of parts to both fit on my printer, and print in time (I only had about 36 hours cause I ended up printing TWO Ironman masks). Initially, I was worried about having visible weld lines in this mask, but luckily, I bought some BLACK GLUE STICKS a few weeks earlier at Daiso (I didn’t know these were even a thing) to hide them perfectly.
Here’s a gallery of the build process:

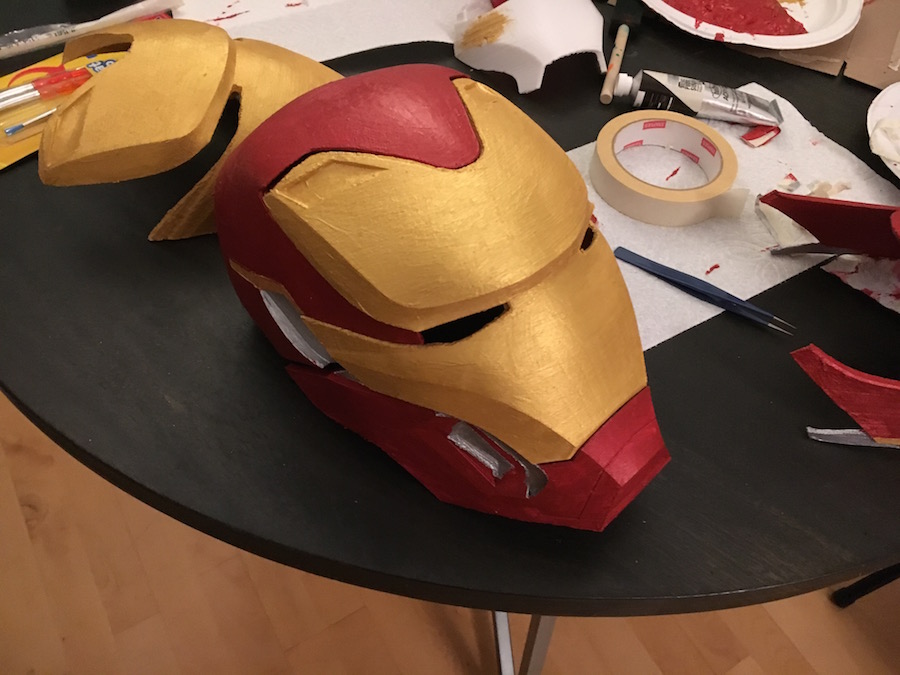
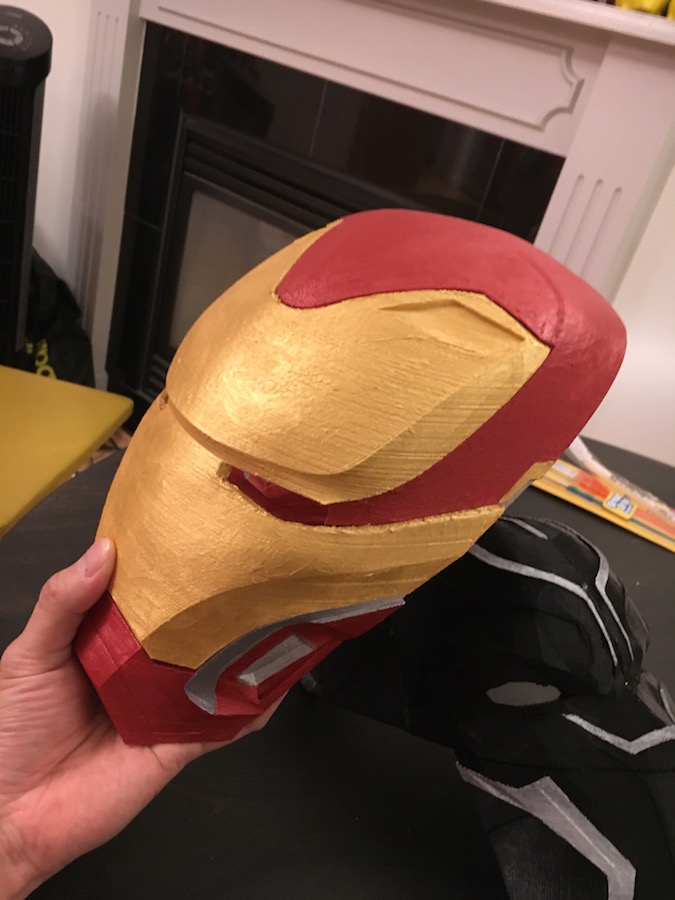
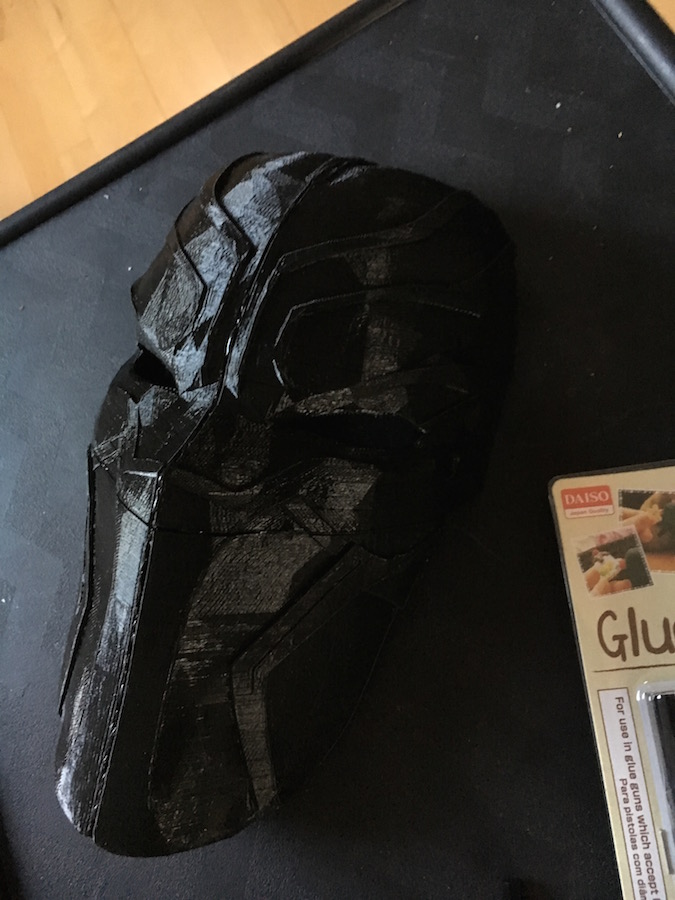
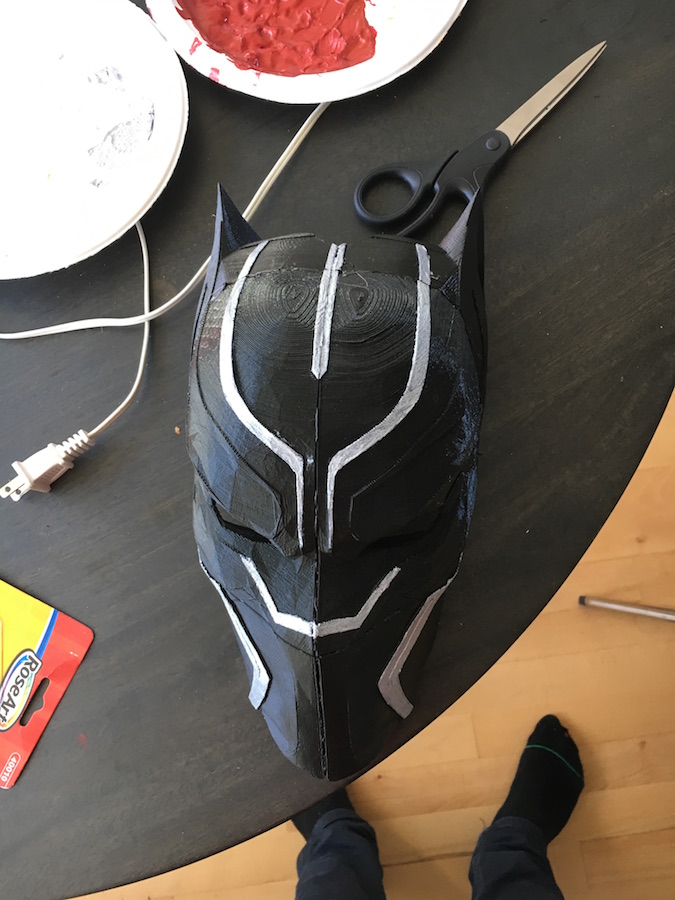
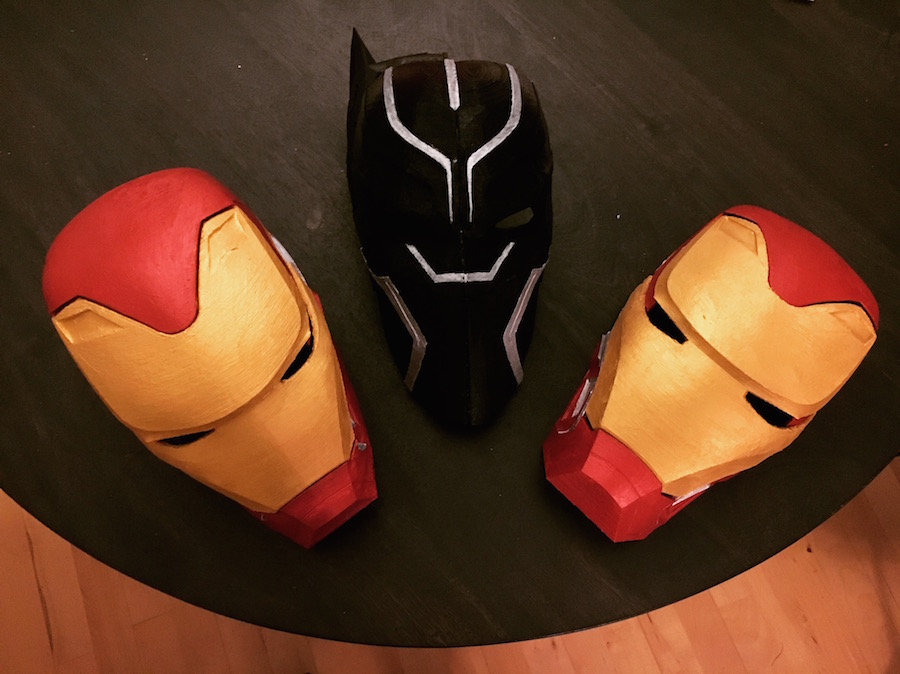
Painting the Ironman masks was a huge pain since I needed to cover quite a bit of surface area using three different colors of paint (gold, silver, shiny red). To make the shiny red, I needed to mix a metallic copper paint with the basic red I bought (the red was too flat and bright to match the gold). The Black Panther mask in contrast was ridiculously easy to paint… the mask was already printed in black, so only a few raised areas needed to be highlighted in silver.
I was incredibly happy with how the finished helmets turned out. I added a fabric strap to the back of the Ironman helmet with some hot glue for wearability. It turns out that Abaho’s head fit perfectly within the Black Panther helmet with no additional modifications needed.
Next up, I’m going to be printing out and attaching parts of the Black Panther mask we removed earlier. I’m also going to fix the model symmetry and adjust the dimensions to fit the proportions of my head.