ButterBot Spotlight Lamp

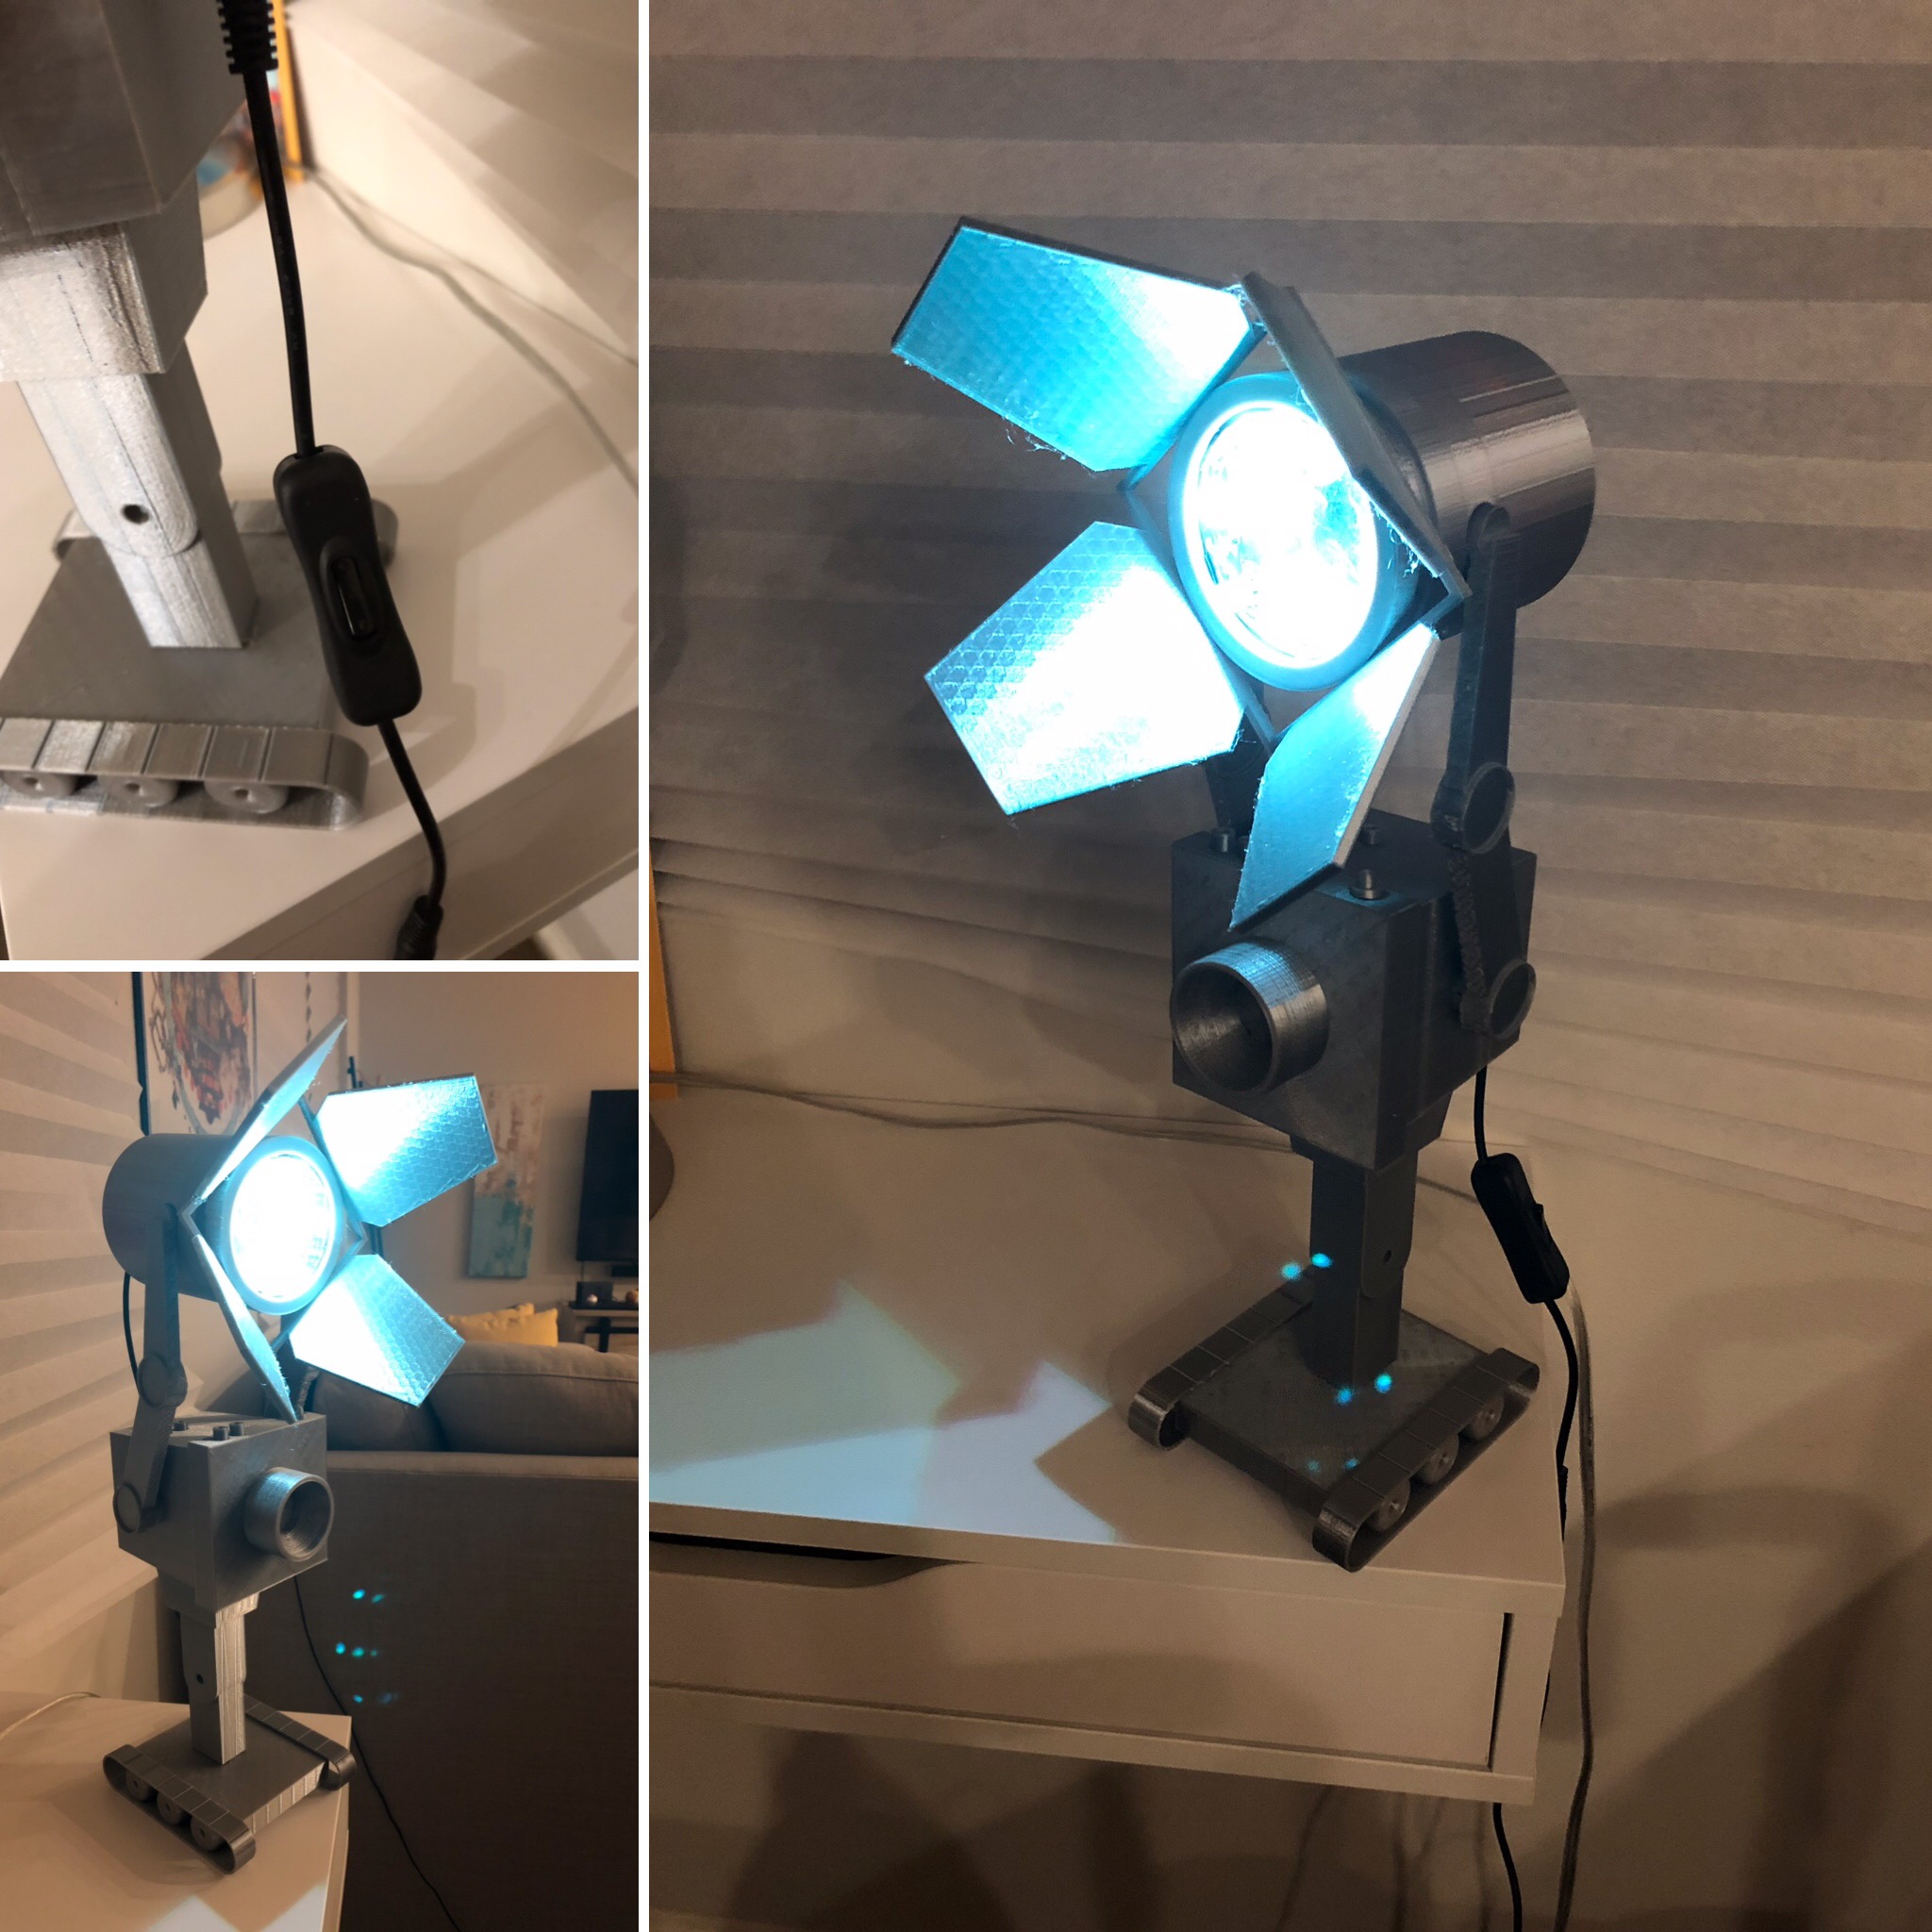
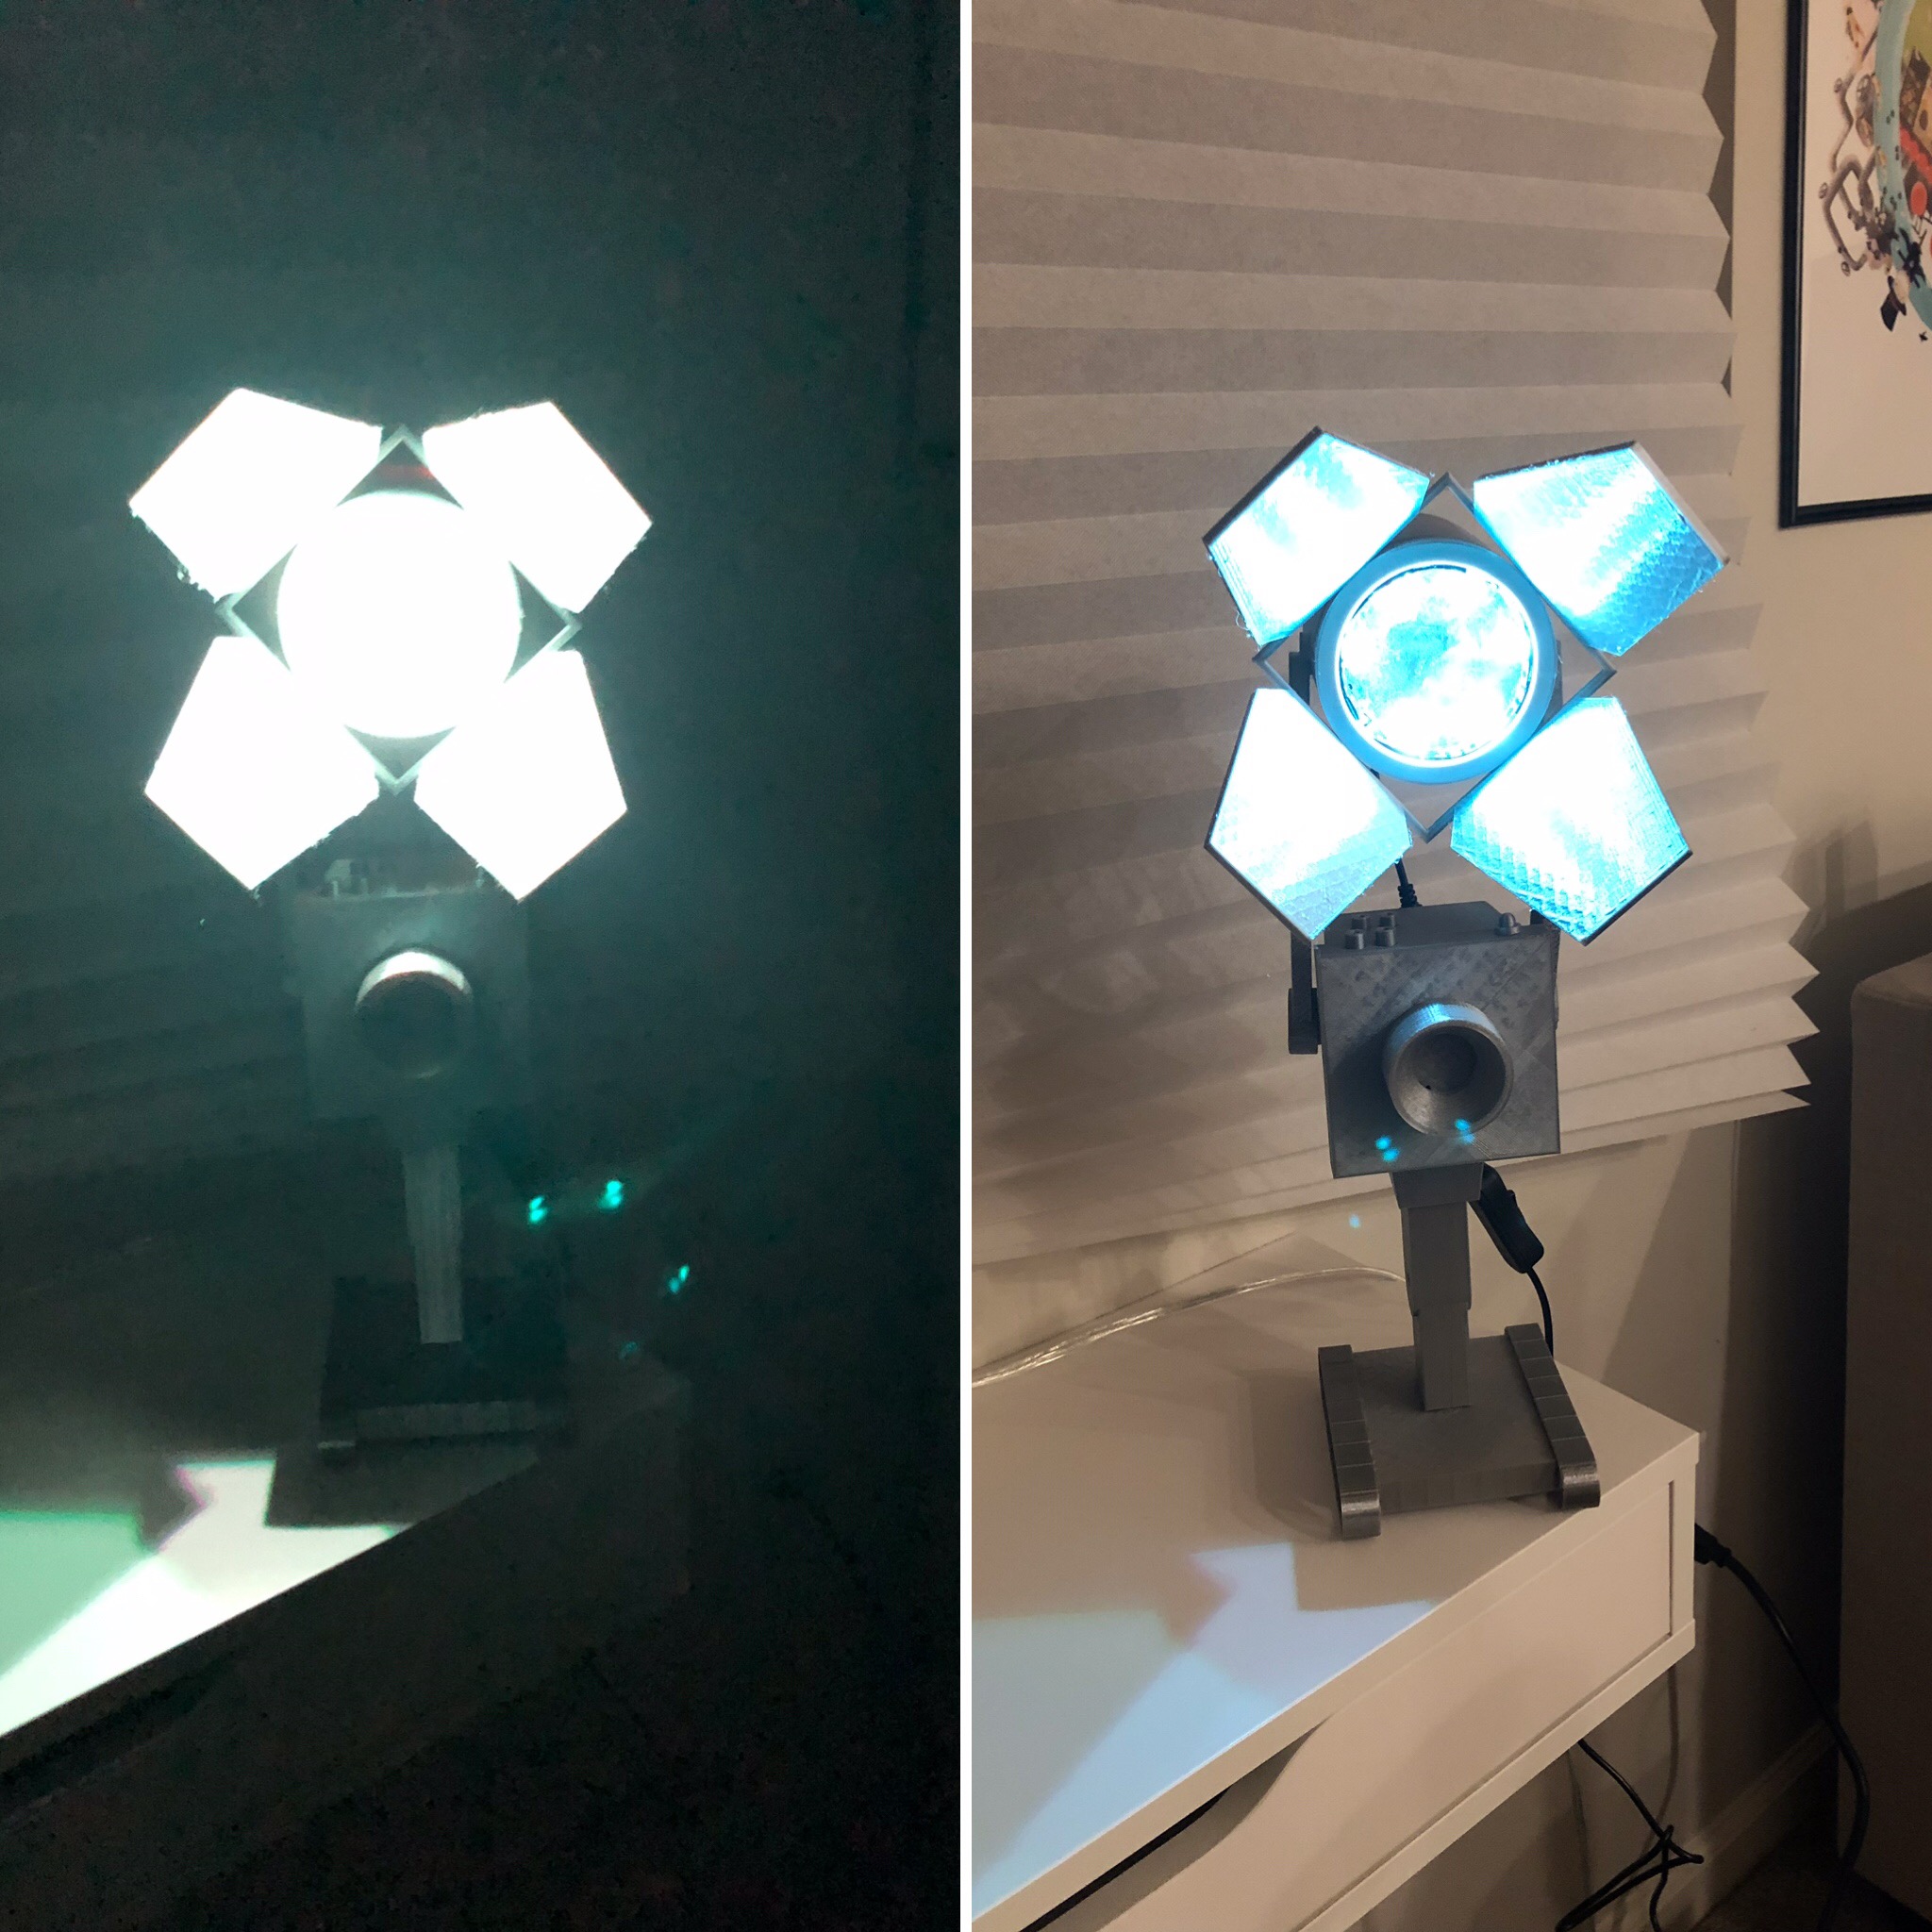
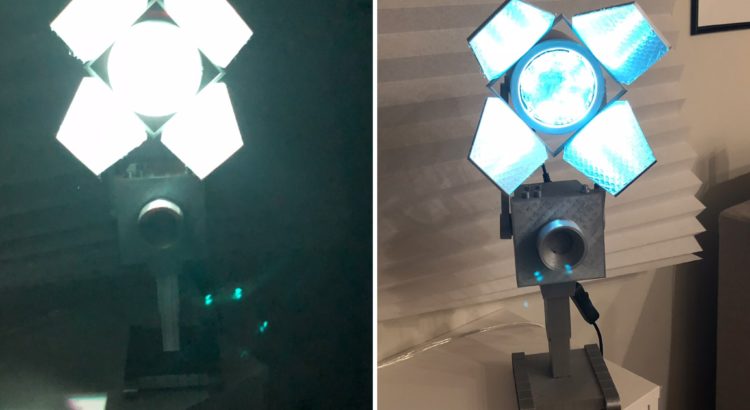
TL;DR: I made a robot whose only purpose is to hold up a spotlight… At least it’s a step up from passing butter :D. I am extremely pleased with how this guy turned out. The light is adjustable both in leaf rotation and tilt angle.

A few weeks ago, I desperately wanted a lamp for my nightstand to keep me from needing to stumble around in the dark trying to find the bed while avoiding squishing the dog after turning off the lights at night. Thus, I decided to do the most practical thing, and began designing my own.

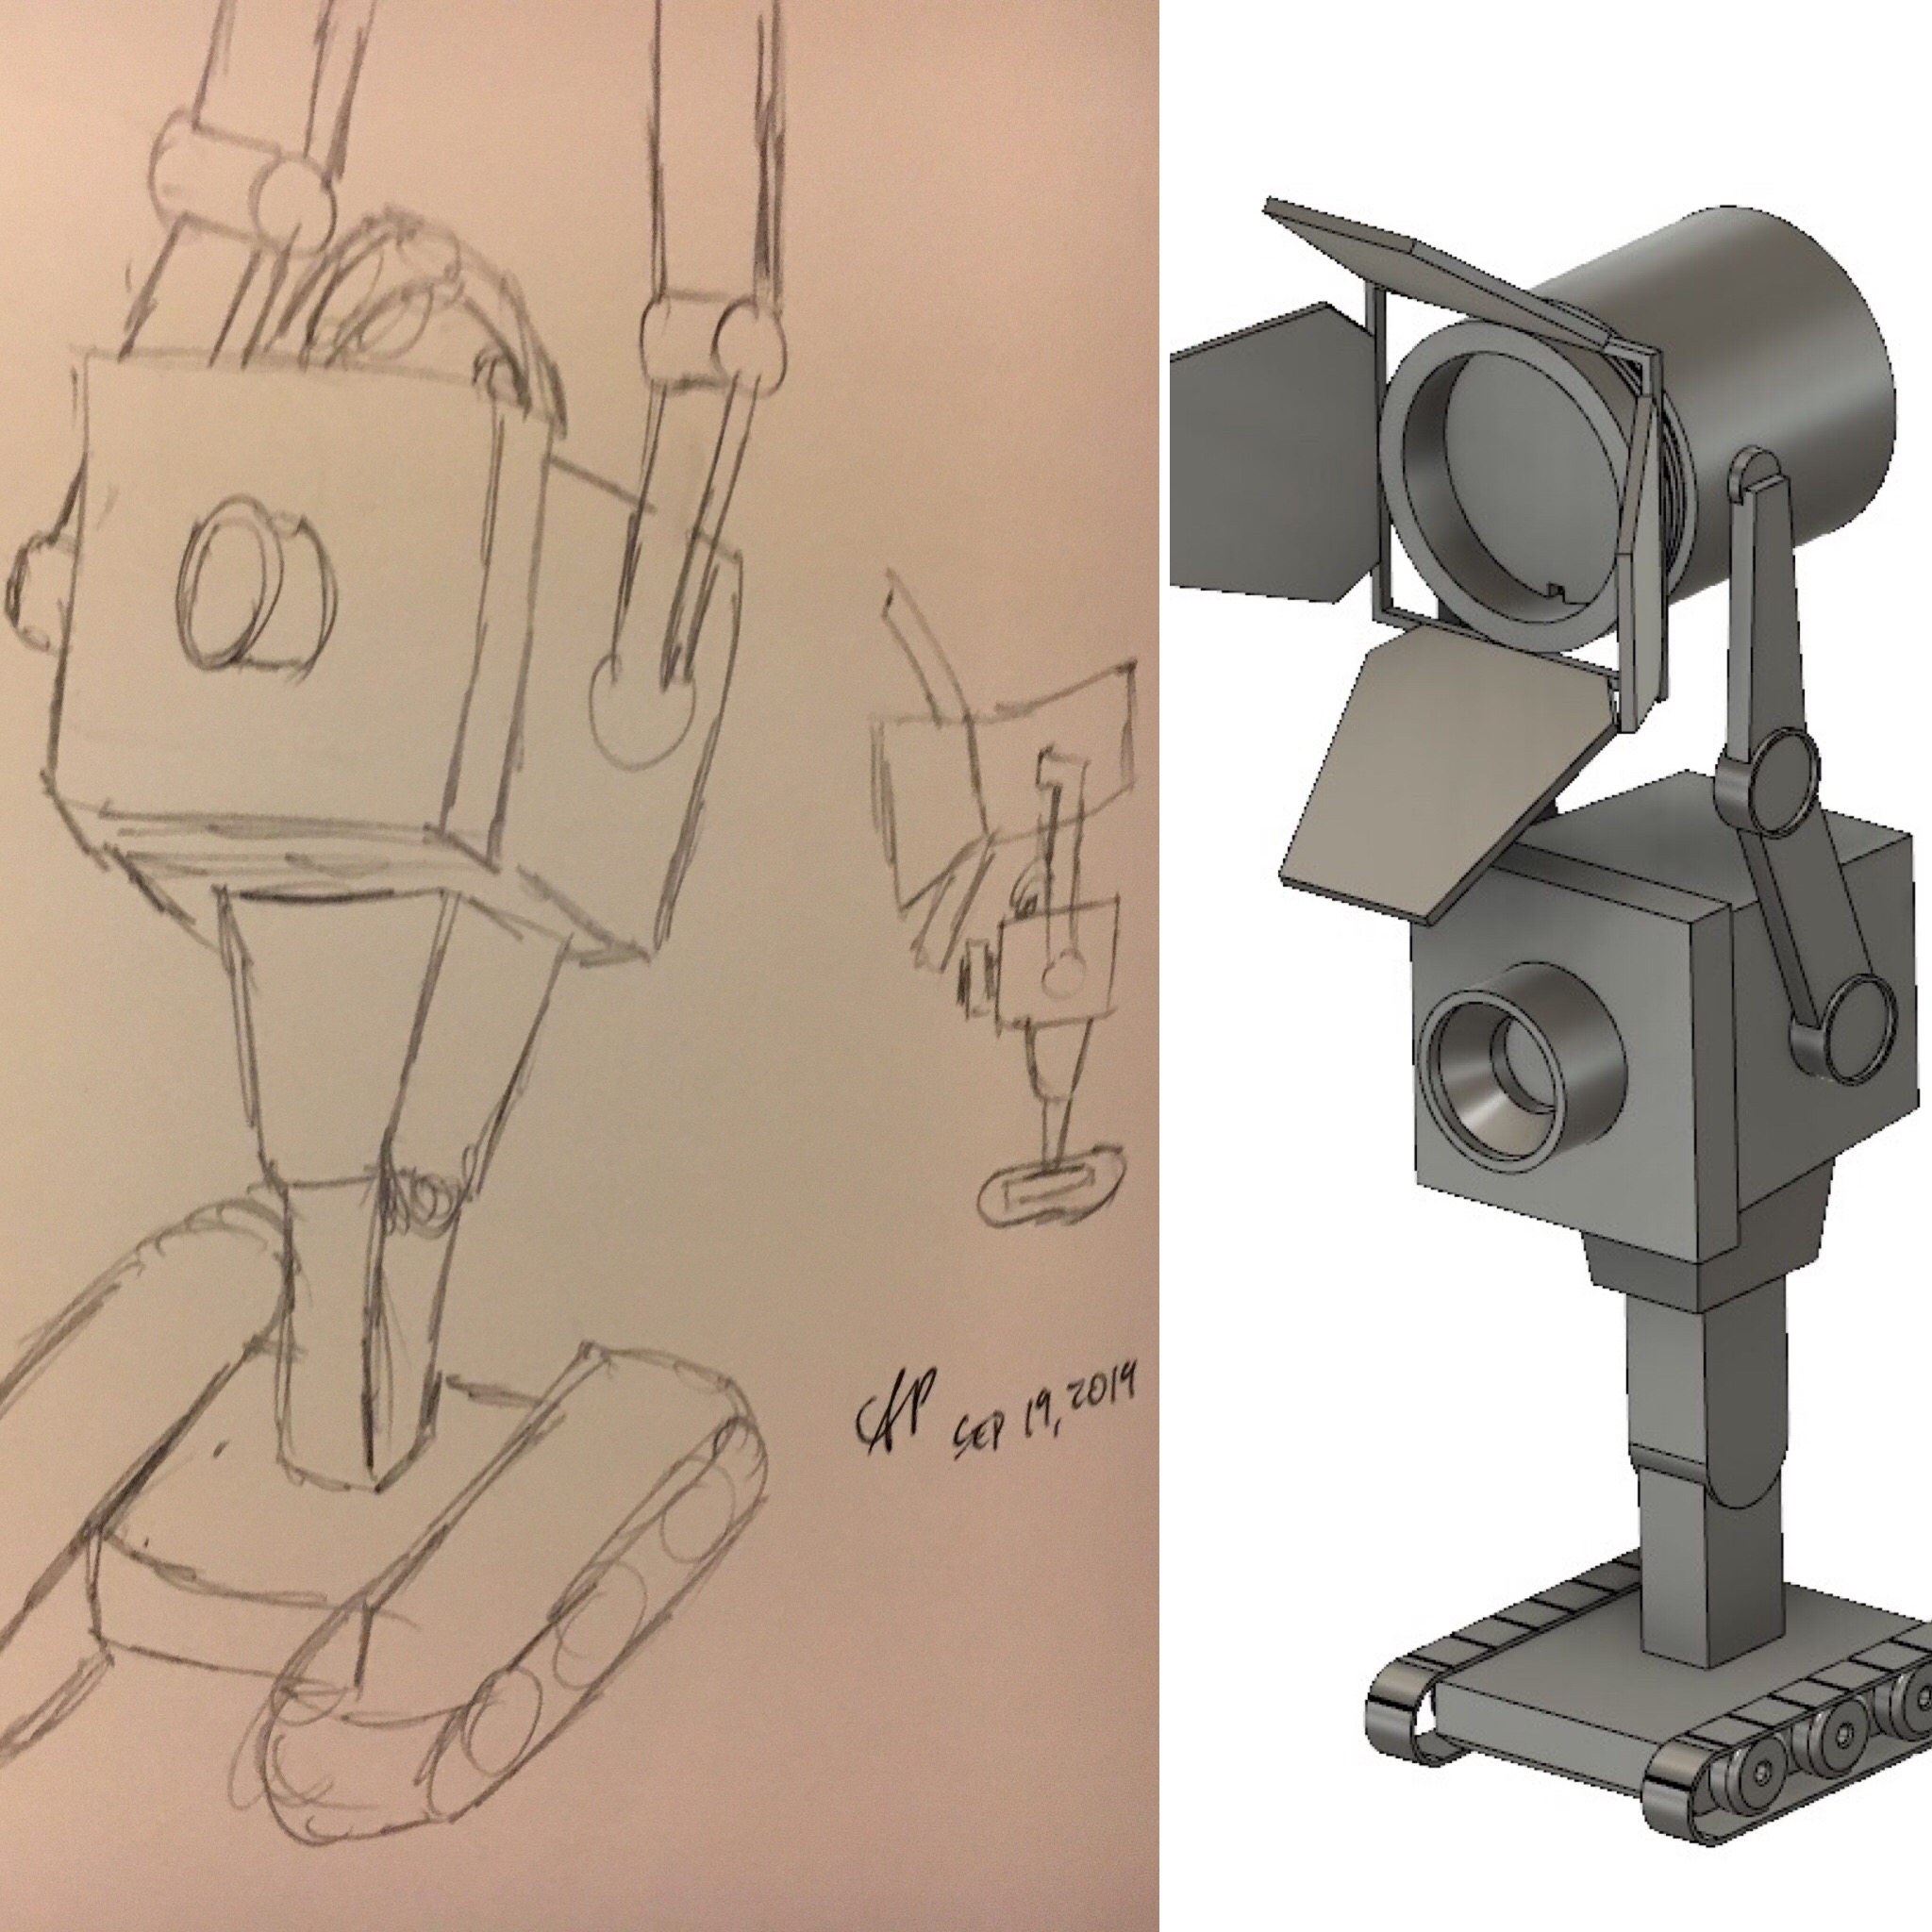
I began my design around the idea of creating something in a modular manner. I knew I wanted to have some sort of character holding up the light source, but was unsure about the specifics of what was going to be feasible, and what would be accepted by my landlord to have around the house. I landed on the idea of building around a spotlight—I like the simple shape and general aesthetics and the character-neutral nature.

Over the next few weekends, I kicked around a few ideas and asked some friends for inspiration when I had my eureka moment—THE BUTTER BOT FROM RICK AND MORTY IS PERFECT FOR THIS!!! I am a huge fan of the show, wanted to use up my silk silver plastic filament, and thought I could give this little guy a better purpose than just passing butter. Really, it was a win/win/win scenario.

I don’t have any photos detailing the electronics, but I’ve got a simple ATmega32U4-based Arduino board with a micro-USB interface. I found this awesome inline DC jack power switch and paired it with an even cooler DC jack to micro-USB cable to provide power and add the ability to turn the light on/off.

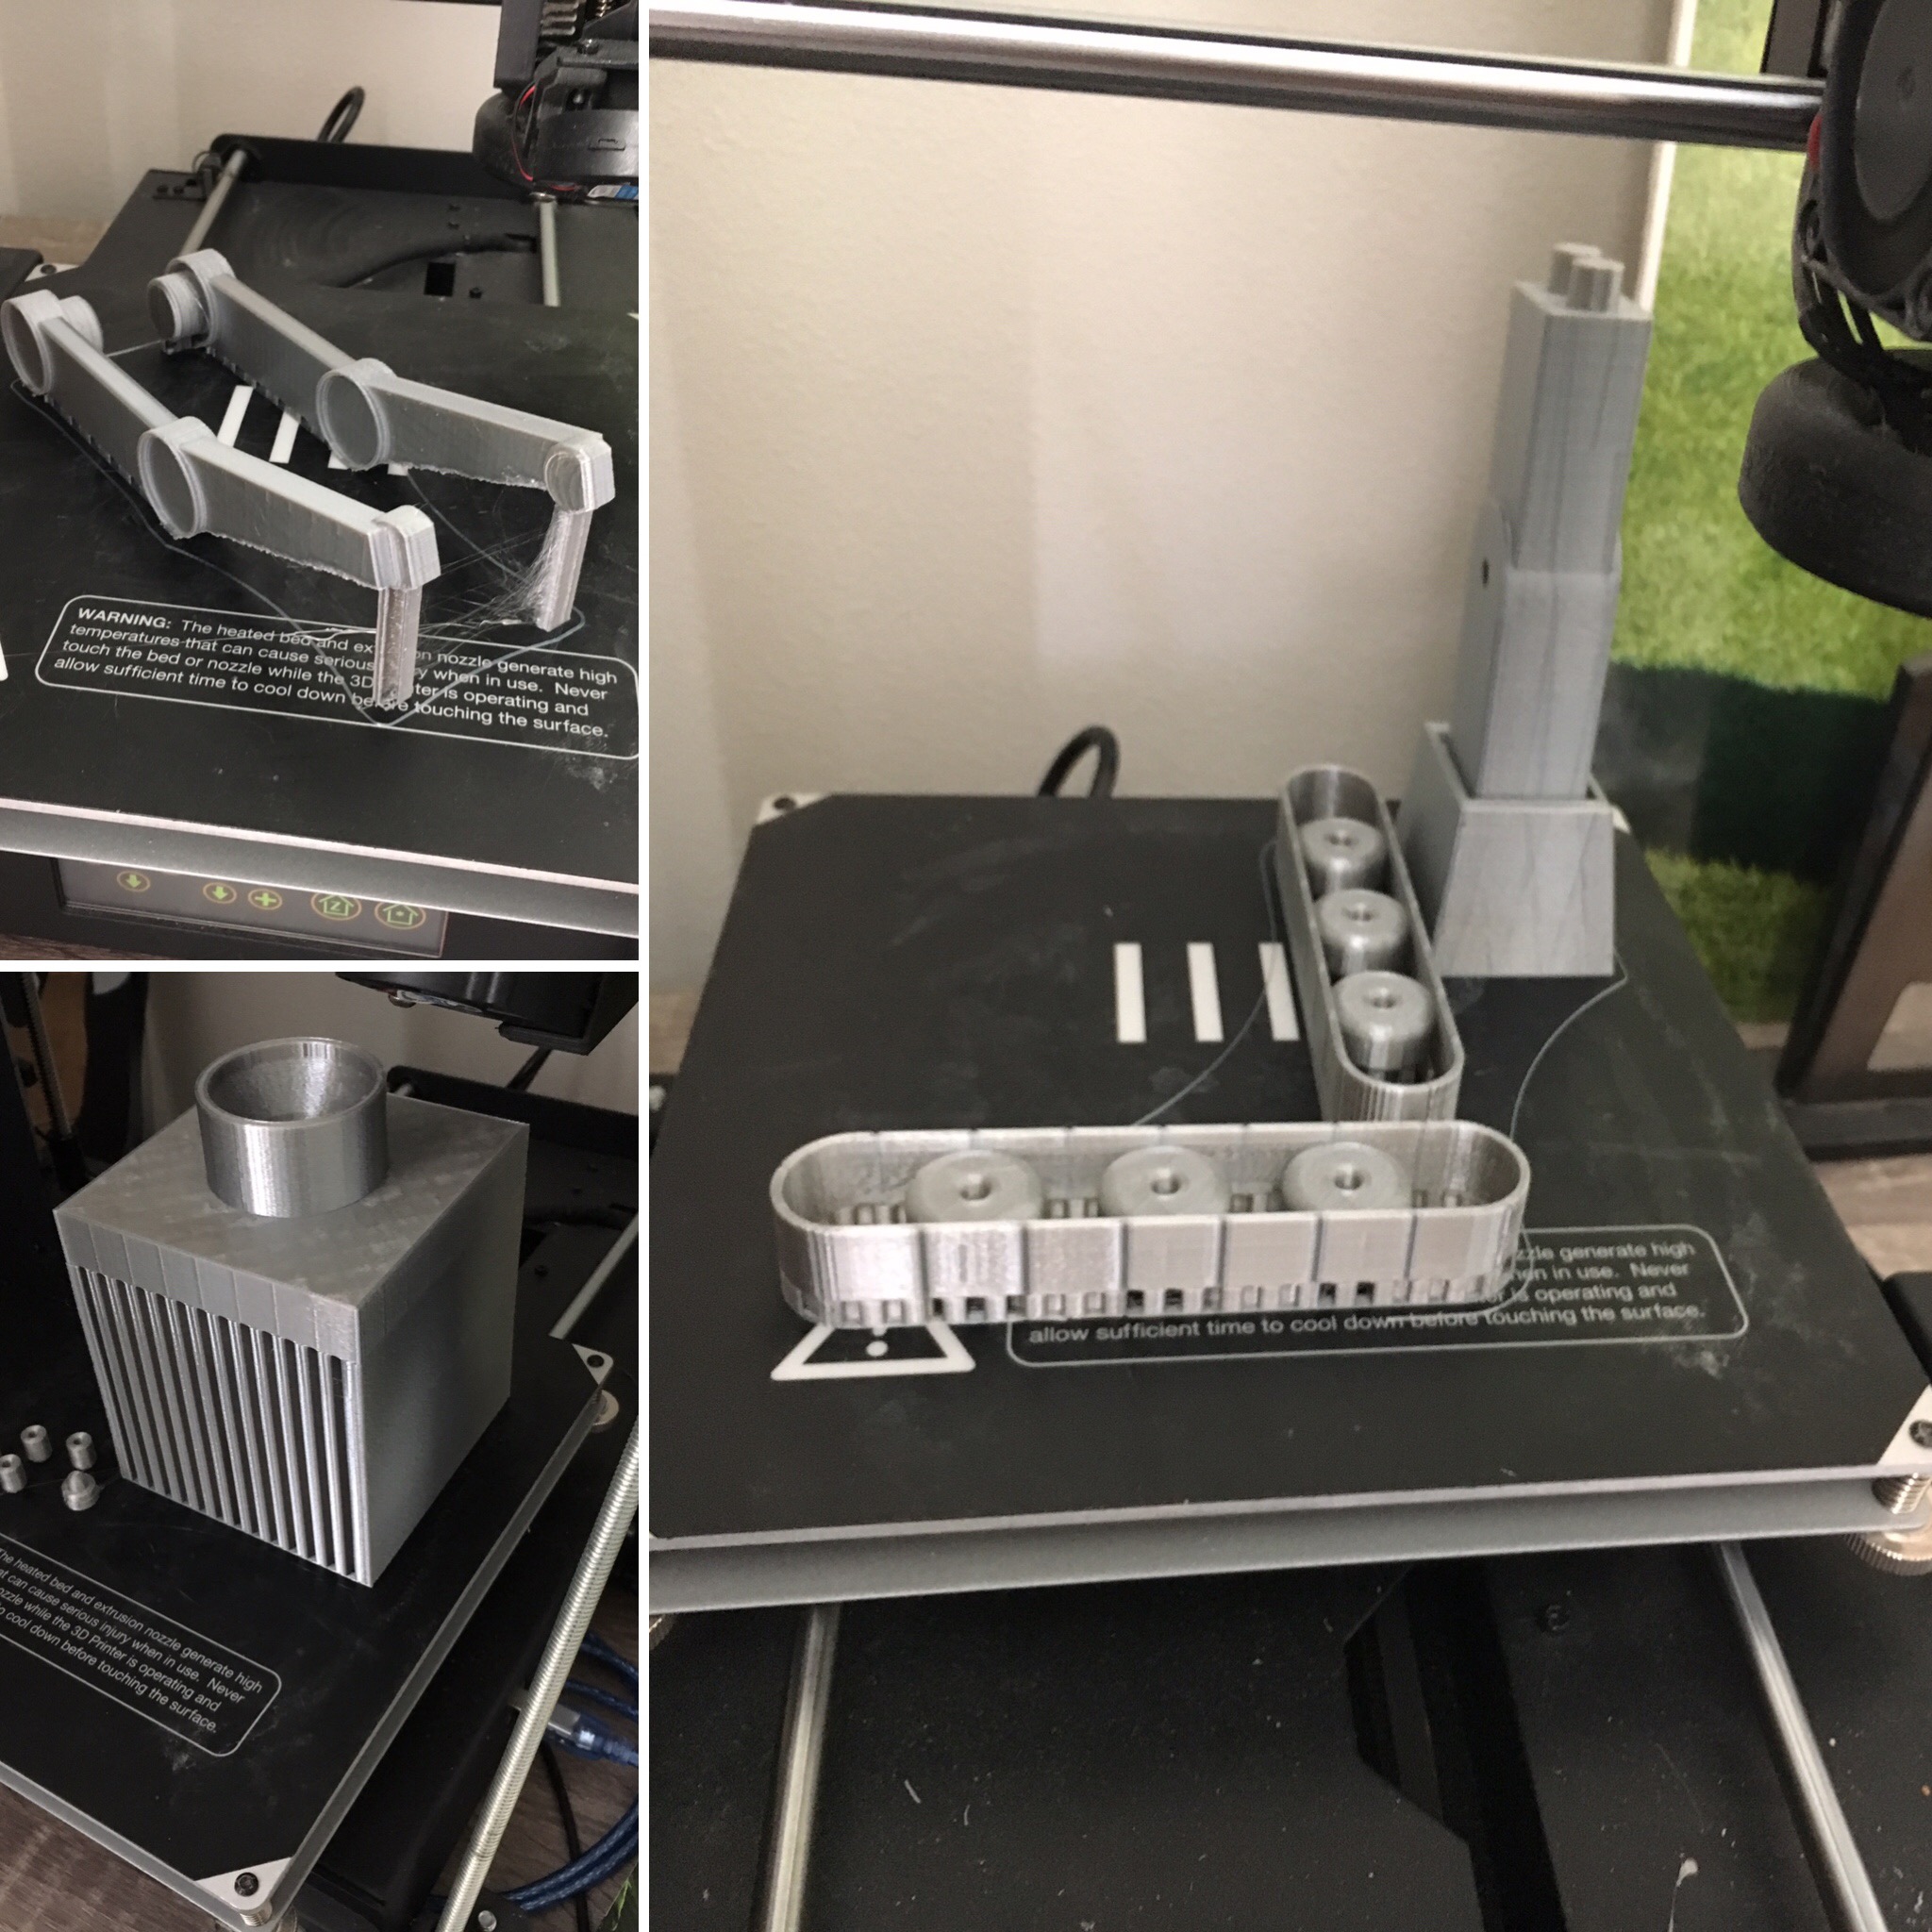
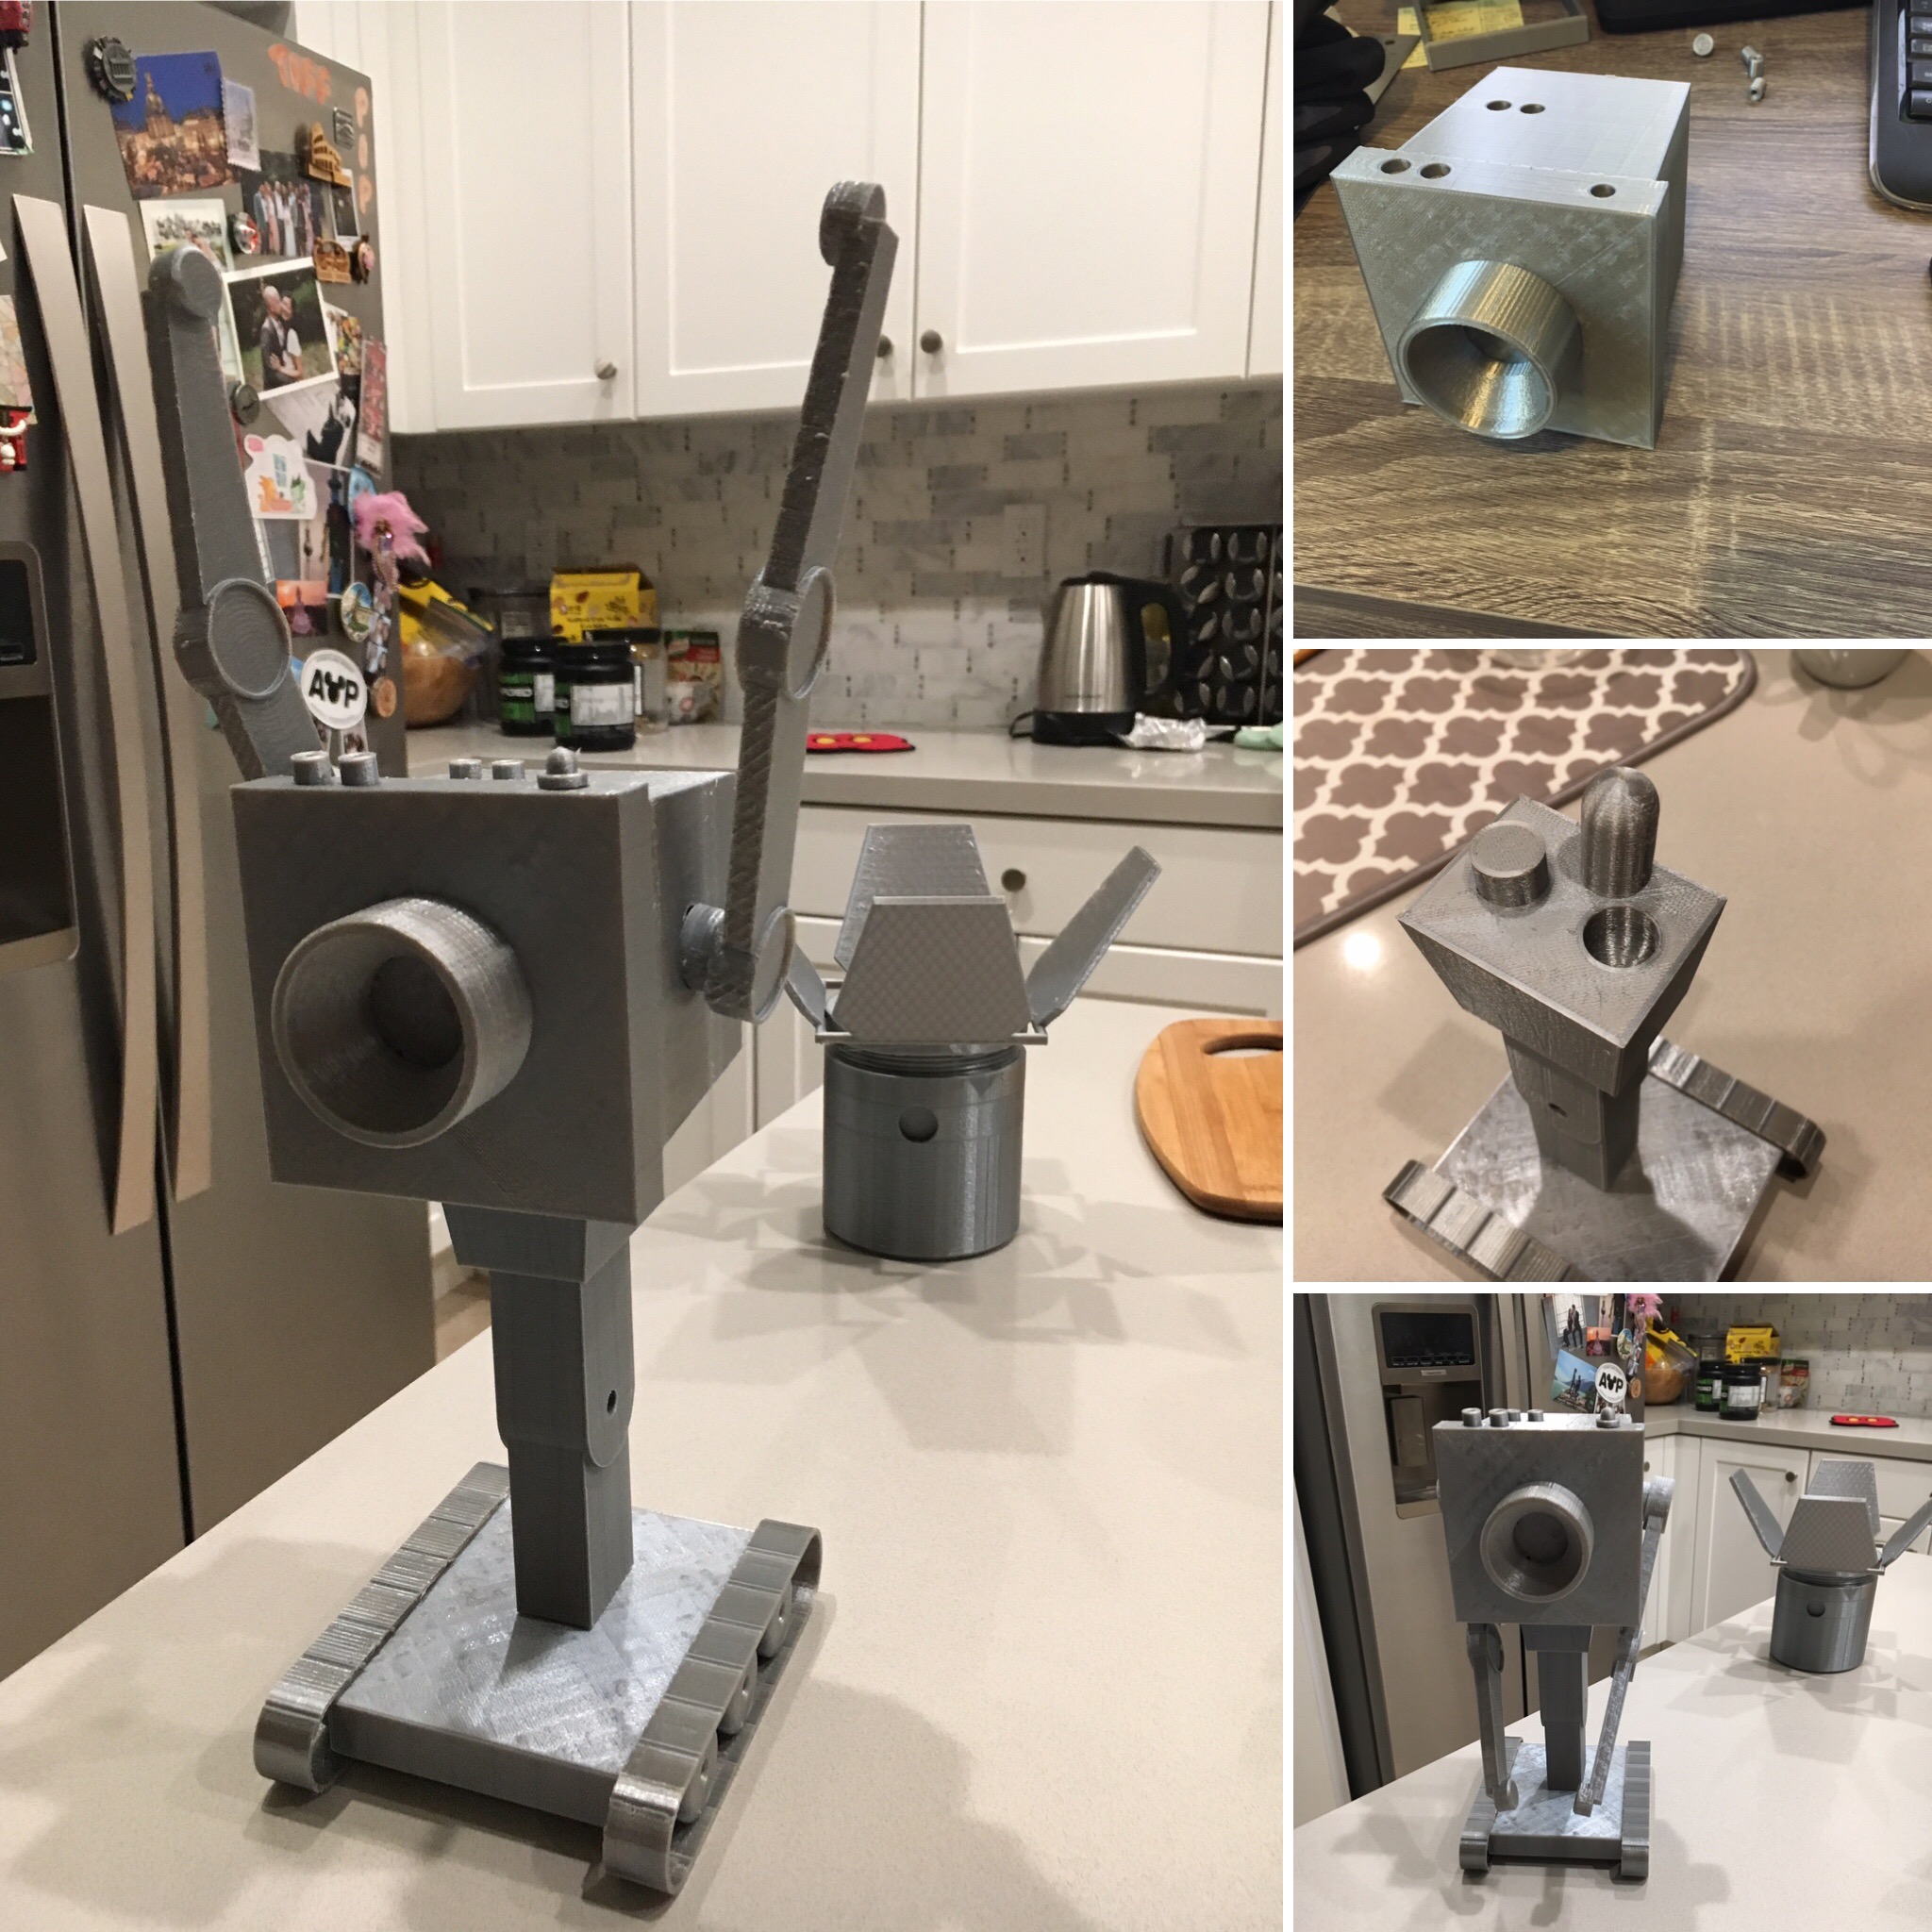
Designing and implementing my idea was relatively straightforward after deciding what to build. The trickiest part was designing the parts in such a way so they could be broken up and printed in different jobs—the overall size is roughly 7” x 8” x 18” (although the 7” width can change depending on how the spotlight leaves are oriented, and the height can change depending on the tilt angle). I am particularly proud of my insight of creating a domed peg to enable the printing of the main body without the need for supports.

The only thing missing from the completely finished design are a red wire, a yellow wire, and a red led bulb. Anyway, here’s a gallery of my design and build process:

Lithophane

TL;DR: For Valentines Day, I made a lithophane—a 3D object which reveals an image when light is shined through it. The operating principle is basic—different “pixels” are created since thicker areas block more light.

Lithophanes are really cool. Essentially, they’re 3D photos that physically encode pixels of an image by varying the amount of material. Thinner sections of the lithophane allow more light to pass through. I discovered a simple to use, yet highly customizable online lithophane generator at http://3dp.rocks/lithophane/. Upon making this discovery, my mind immediately went to the perler project I worked on last year… I saw I could reuse most of the components (back plate, switch, LED backlight), only making a new front plate. Since I designed the perler project housing in Onshape using top-down design principles, all the modifications only took a few minutes to complete and export for printing.

It took me three tries to finetune my print settings. In the first print, I inadvertently made the image inverted:

My first attempt resulted in a scary looking inverted image… oops!

For the second print, I ended with a lot of blobs on our faces. Clearly this was because the nozzle dwelled a bit too long on the top surfaces since I printed this part flat on the bed:

My second attempt turned out nicer looking with the proper color inversion… but the blobs all over the place were less than ideal.

To correct for this, I reoriented the part on the print bed. I was worried about the part falling over (hence my original print orientation), so I added a really large brim to keep it rooted:

The 12mm brim I added, along with copious glue, helped keep the print from falling over

The third time really did turn out to be the charm, and I was very pleased with how it turned out:

Success! Third time’s the charm 🙂

There’s a ton of ways in which the lithophane idea can be expanded and improved upon. First, I need to redesign the housing unit to incorporate the switch and battery. Others on the internet have wrapped lithophanes around objects like cylinders to make custom lamps, trophies, and other neat projects. The possibilities are endless… as you can see in the summary photo below, you can use pretty much any light source and have the images turn out well:

It was very easy to progress pretty quickly since the parts were fast to print.

I’m excited to play around more with this type of stuff!