Alright, with writing about process and tools done, I’m finally onto the physical builds! We made an above average number of items so not everything fits in a single post. I will be the first to admit that the most exciting part of wedding planning for me was the DIY project part. It’s in my nature to make, so I’m glad that Tiff was on board with everything, even pitching in and toiling away on several projects. While we didn’t make every single item from scratch, we added our own personal flair, so it counts ;).
The very first piece of design work I completed for the wedding was our logo consisting of our couple name (Apiphany) and our wedding date atop two garlands. I created the design in Inkscape as a vector file for easy scaling for application in multiple places. It only took me a few iterations to win Tiffany’s final approval!
Here’s the full 17-item list of things we created for the wedding:
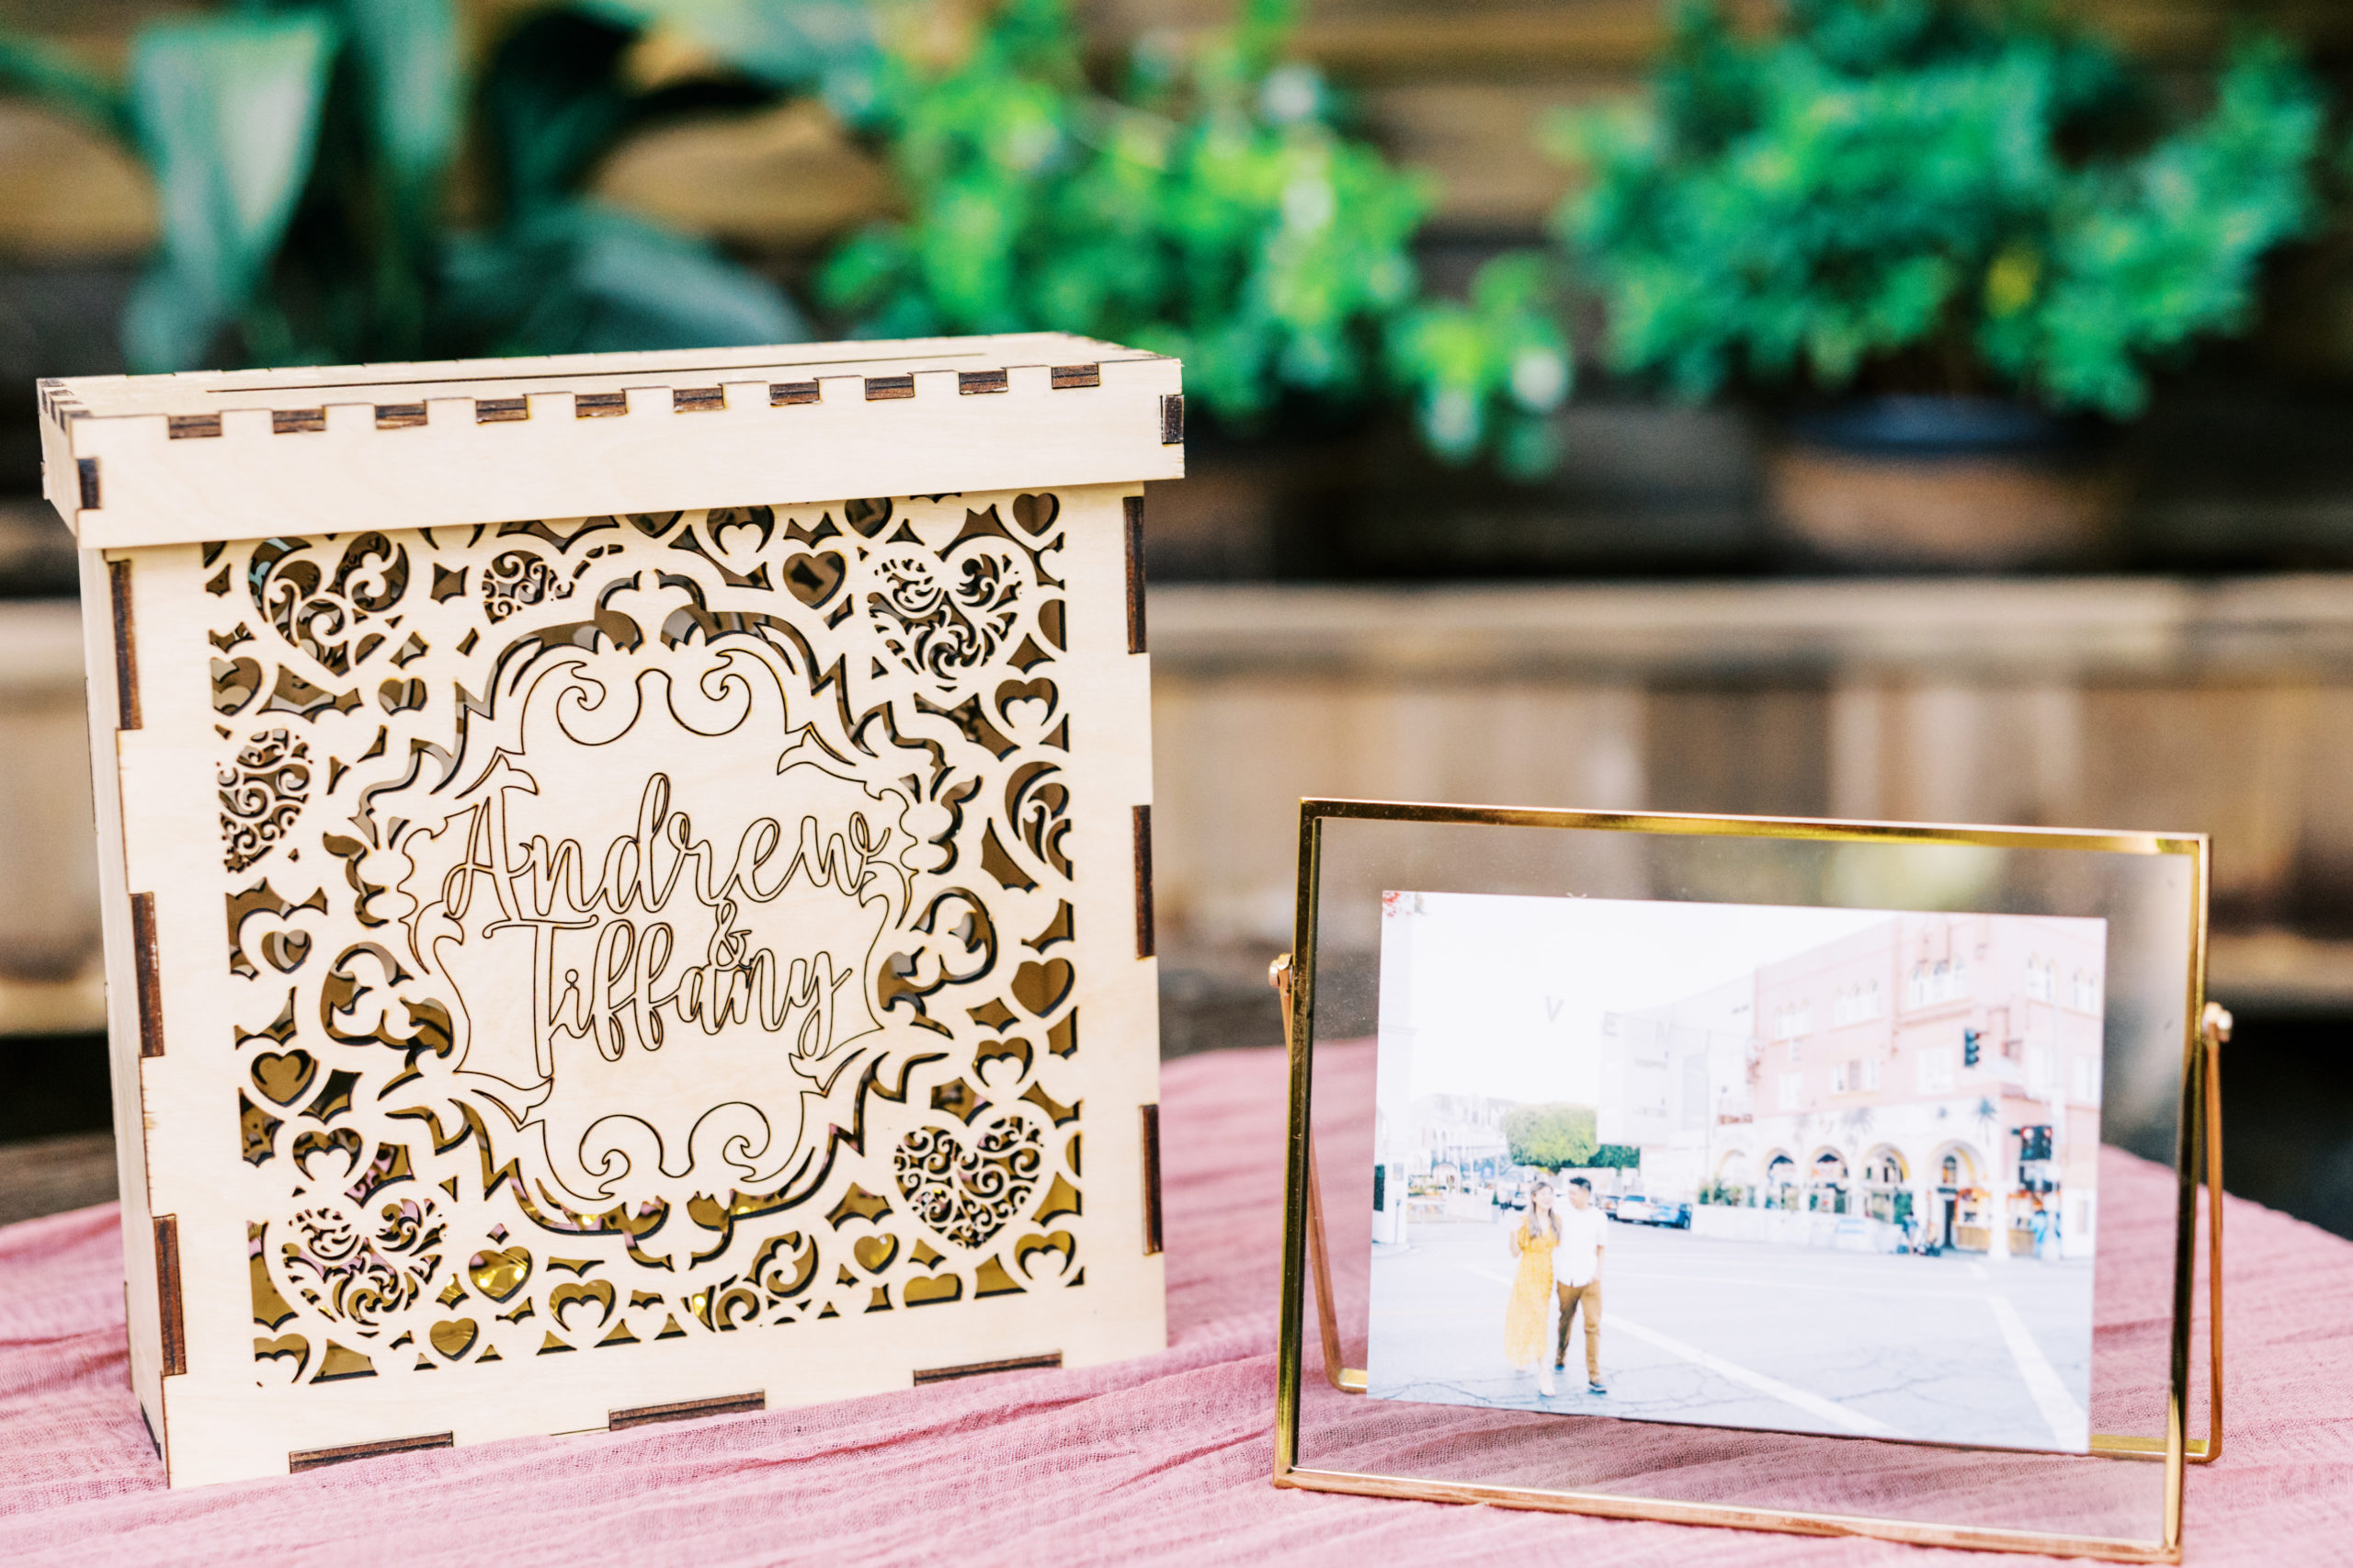
- Card box
- Lantern boxes
- Guest Book Box
- Escort Cards
- Easel Signs
- Mini Signs
- Mini Sign Holders
- Favors
- Table Numbers
- Neon Sign
- Centerpieces
- Cake Topper
- Tip Jar
- Wedding Party Gifts
- Boxes
- Customized Luggage Tags
- Customized Moleskines
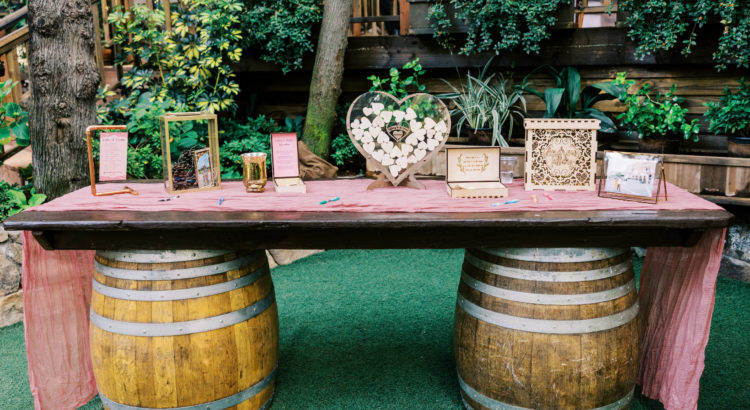
This post will cover some of the items we created for our two tables for the ceremony and cocktail hour — guest book accessories, raffle box, lantern boxes, card box, mini signs, and mini-sign holders.
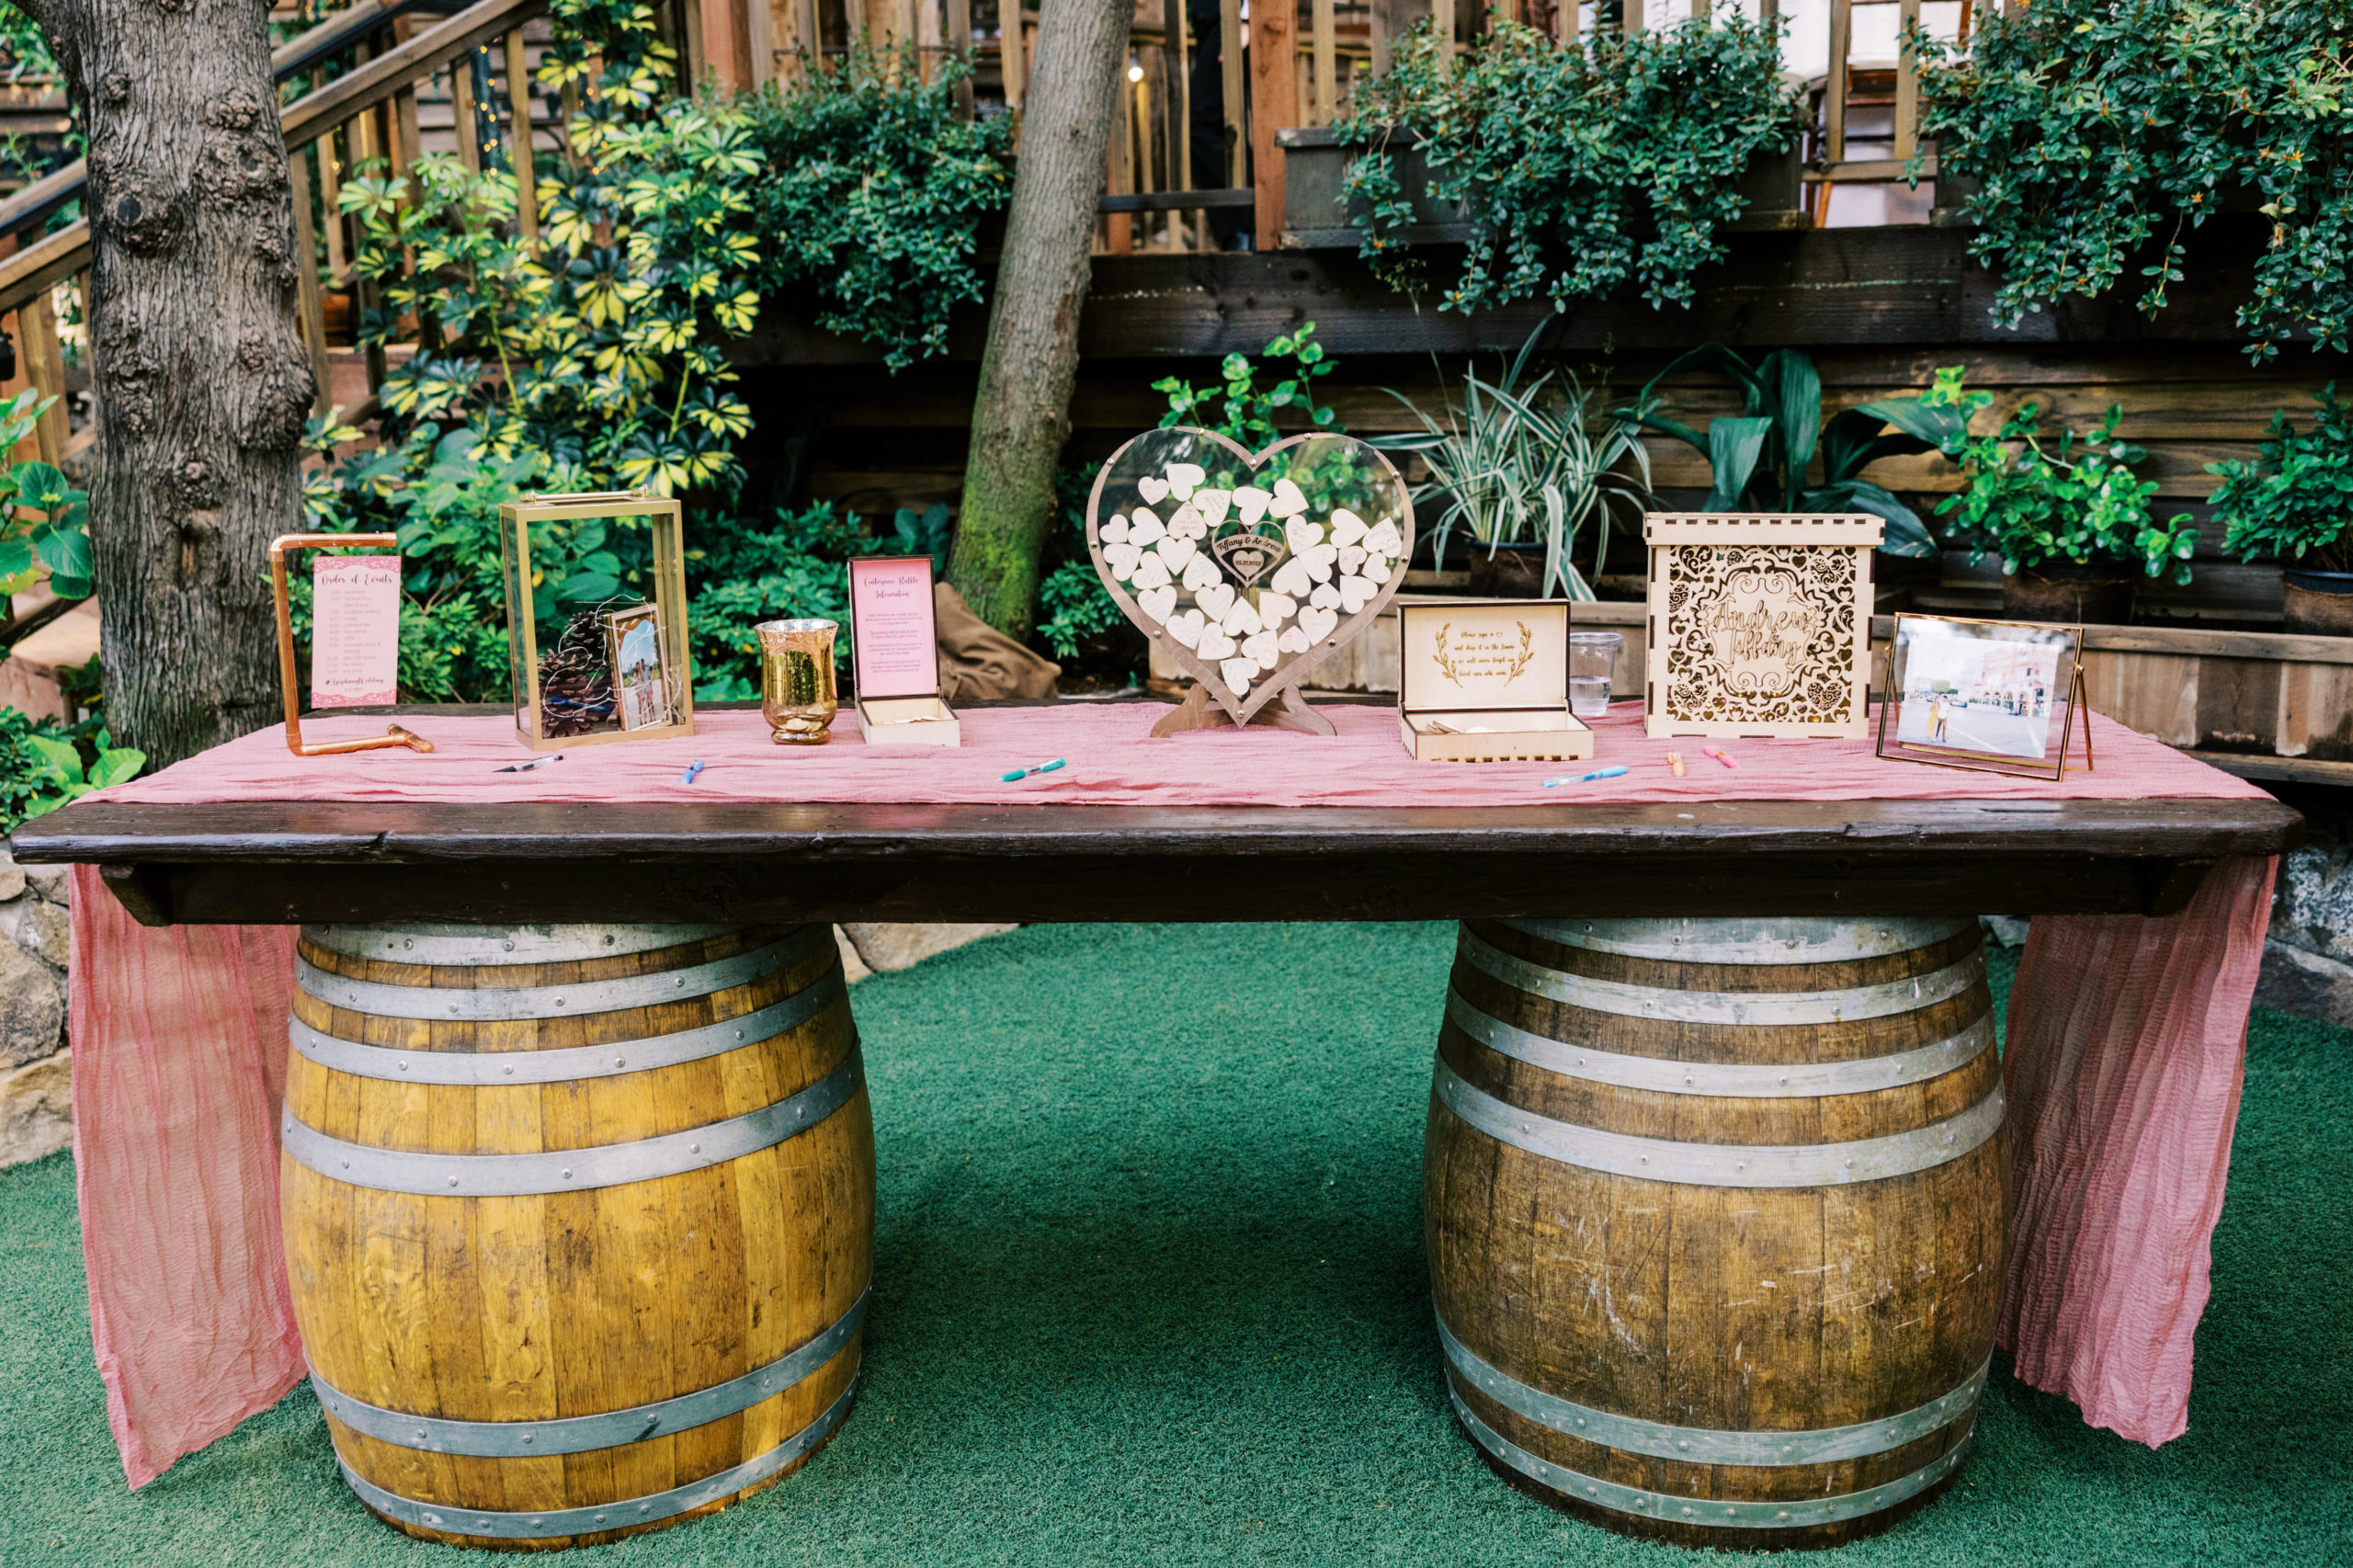
Before we started planning, I knew I wanted one of two styles of more interactive guestbook. The first type I considered was a polaroid book, and the second was a name drop. While we could have borrowed a pair of cameras, we decided against a polaroid book out of a concern of lighting and ease of use. I initially planned on creating my own name drop guestbook, so I purchased a shadowbox picture frame. However, I found a Ukrainian shop on Etsy (https://www.etsy.com/shop/WeddingByEli) who was somehow selling the guestbook (with customization) for less than the cost of materials would be for me. They worked with me going through multiple iterations of the design of the names to get it exactly perfect! I made the purchase nearly a year before Russia’s invasion, and I hope the people at the shop are doing well. The basic idea is that the guests take and sign a wooden heart and drop it into the frame which then serves as a sculpture rather than laying around as a rarely opened book.
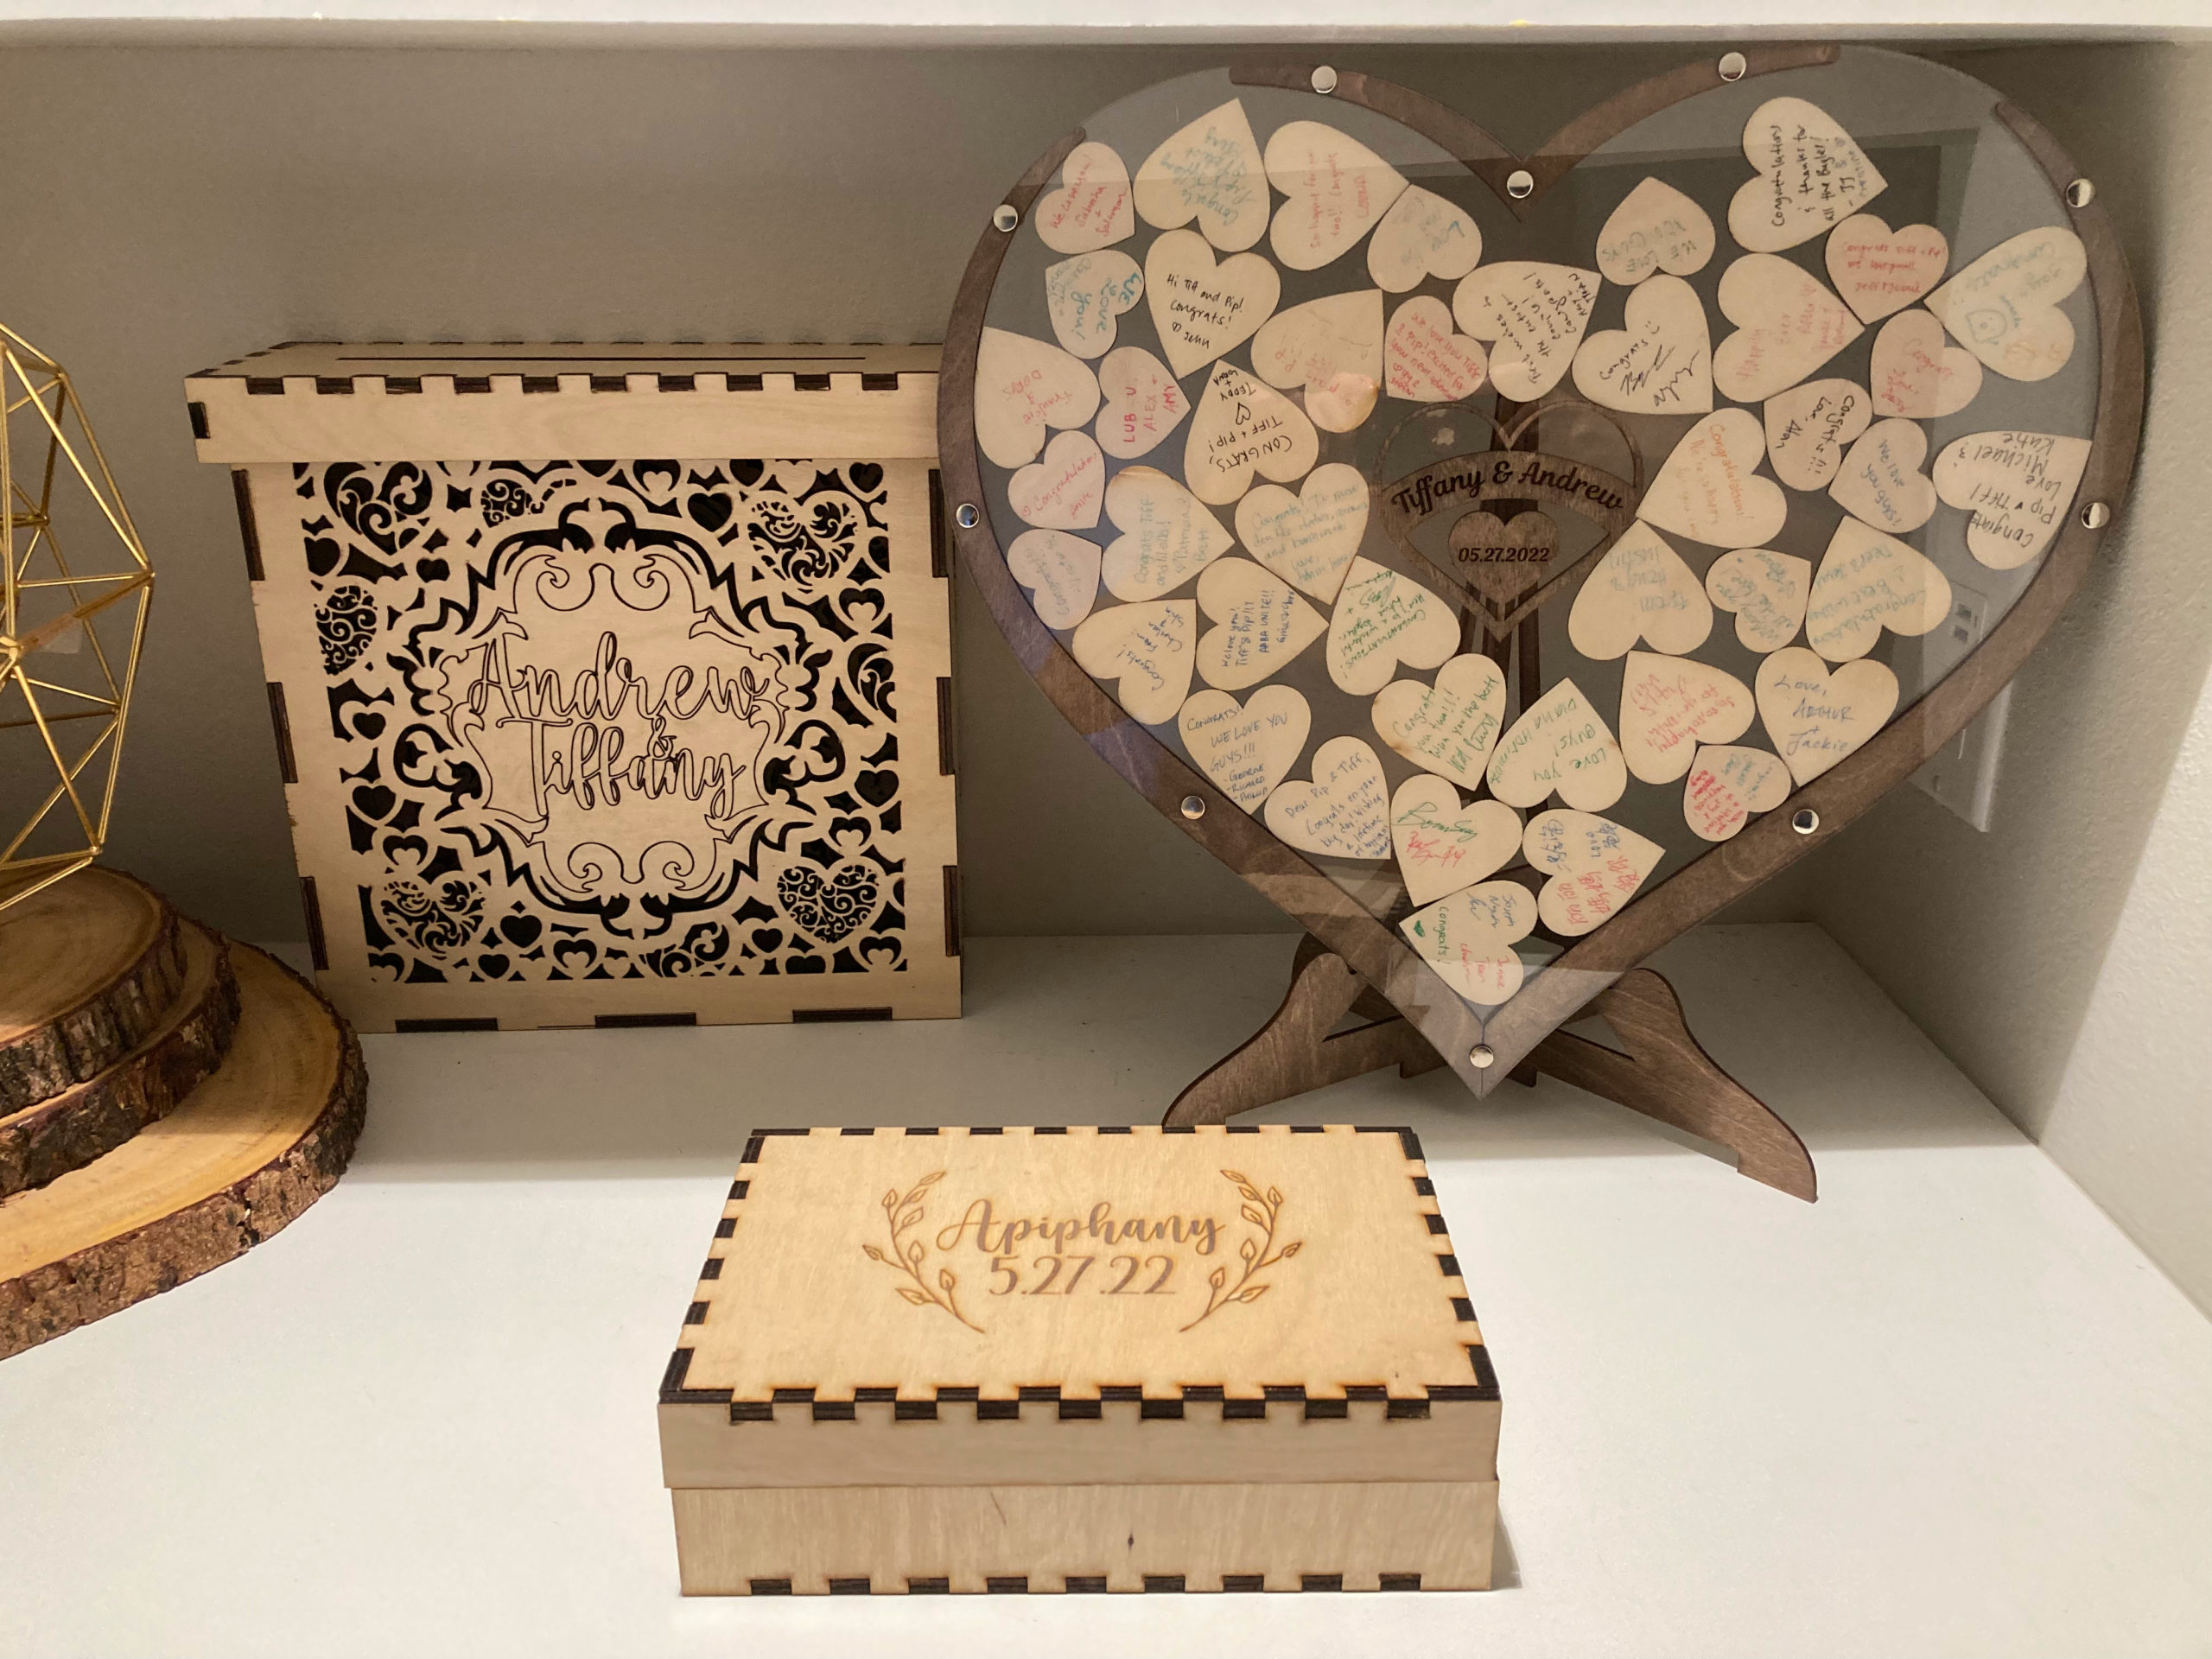
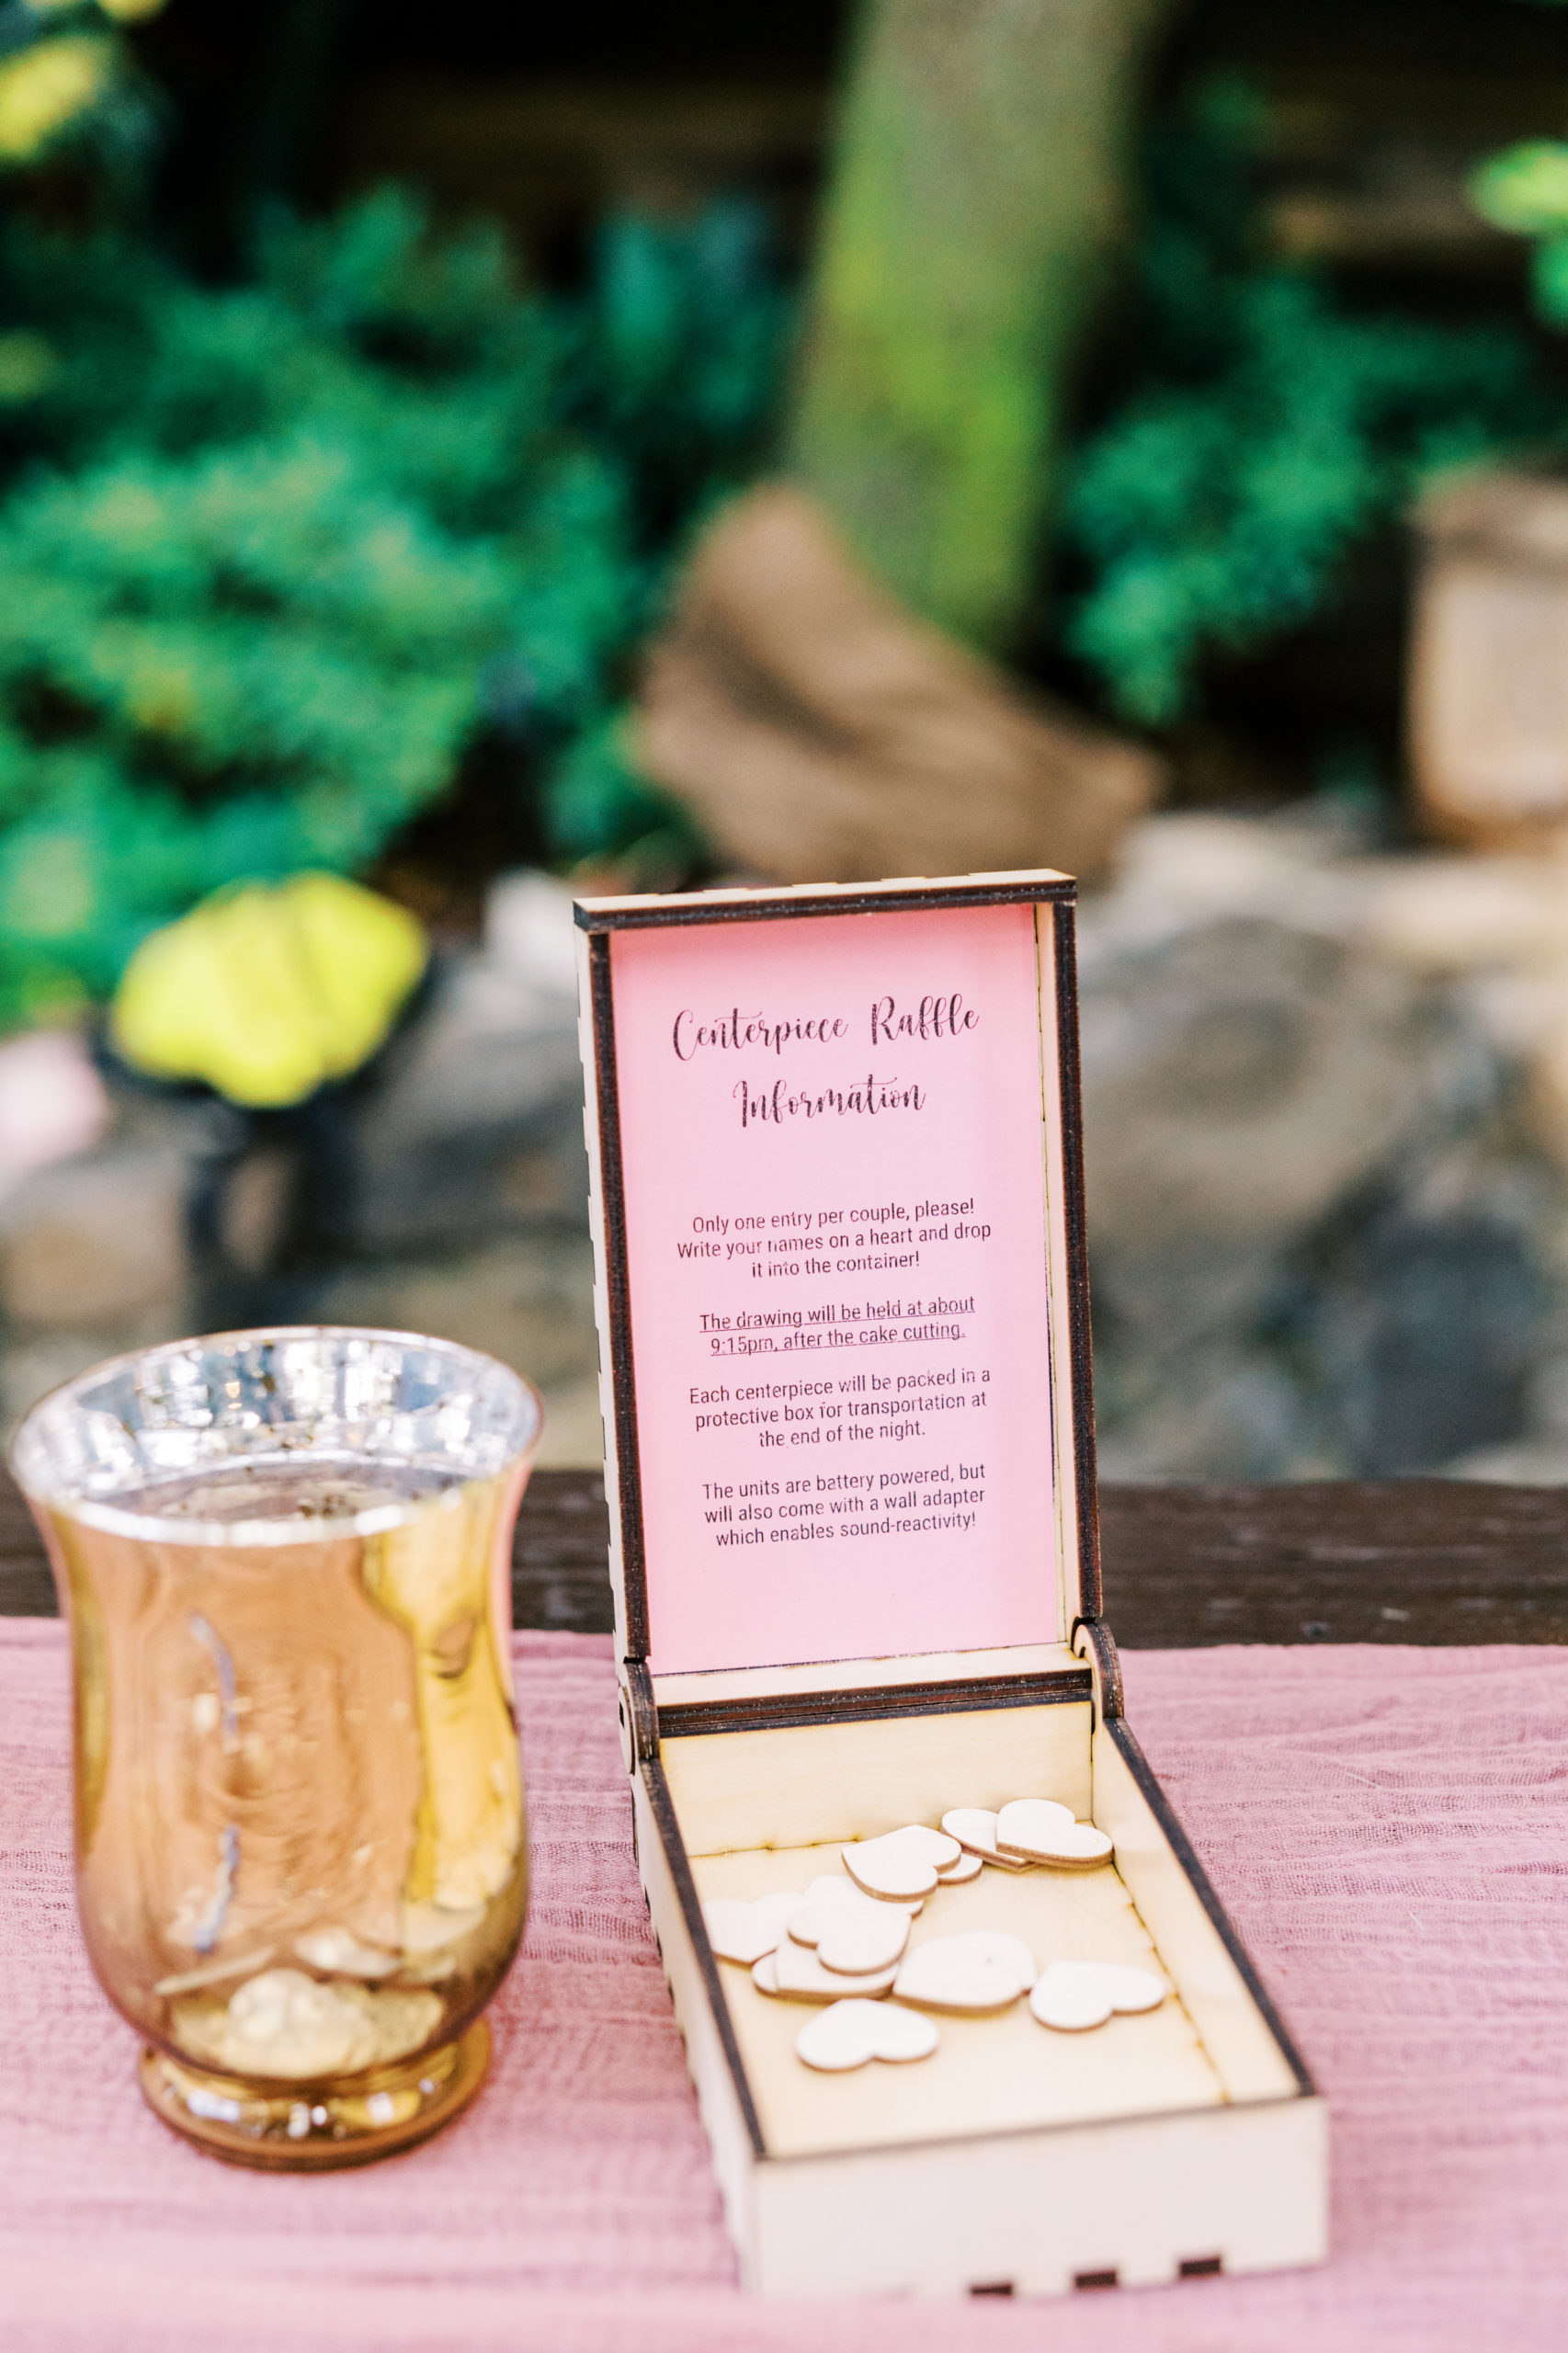
As an accessory for the guest book, I generated a hinged box design using boxes.py (https://www.festi.info/boxes.py/) to hold the blank hearts. I then added engravings of our wedding logo on the lid, and added instructions on the inside. Assembly was straightforward using translucent wood glue and plenty of clamps
Unfortunately, I mixed up the length and width dimensions for the box the first time I cut it… oops. Luckily, I needed another box to hold hearts for the centerpiece raffle anyway, so nothing went to waste. I printed raffle information and instructions on cardstock then cut them out and glued it inside the lid, covering up the obsolete guestbook instructions XD.
I re-used the boxes.py script twice to generate the basic .svg files to cut our card collection box–once for the main box itself, and one for a slotted lid. This was very easy to do since the script gives the option for entering both inner and outer dimensions. I then modified the base vector files by adding a slot in the lid and our names along with a huge amount of detail to be cut out for the front of the box.
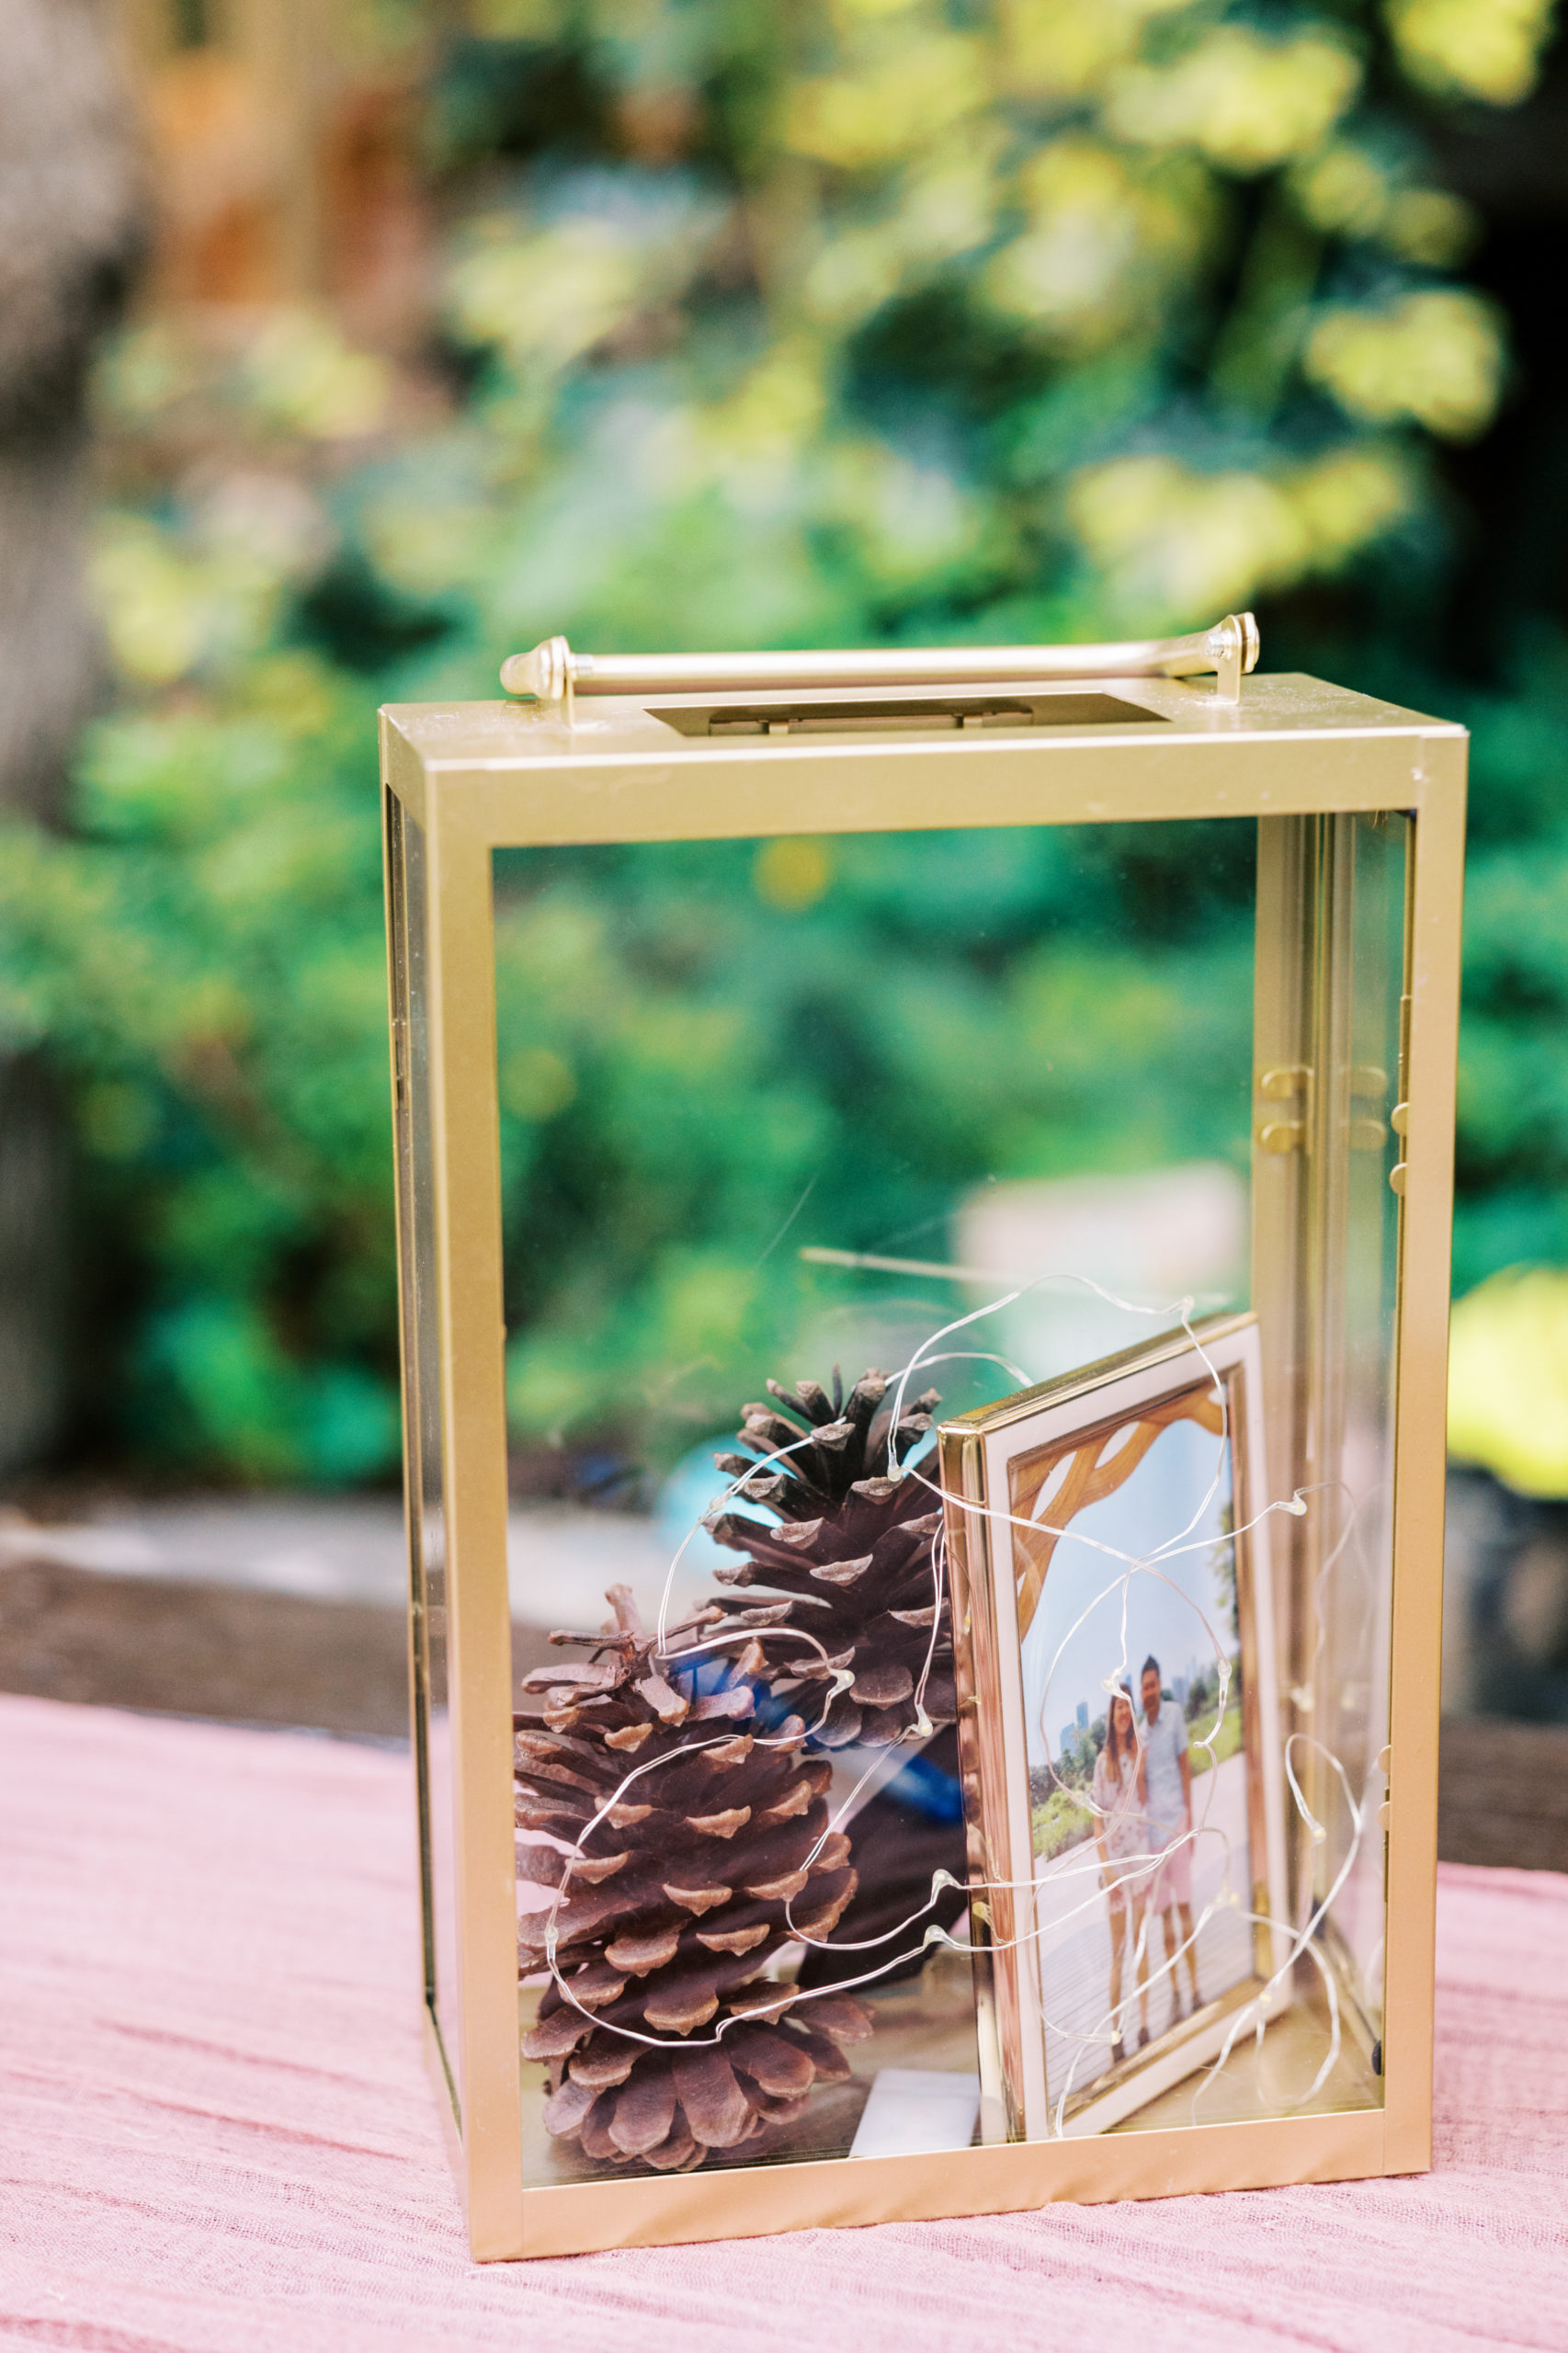
We borrowed lantern boxes from Tiffany’s matron of honor and reused them exactly as she did at her wedding… We stuffed them with pinecones, fairy lights, and added mini framed pictures of ourselves in them. I loved how they turned out!
The last thing I will cover in this post are the mini signs and copper pipe holders we created to hold them up. The design of the holder was a simple C with perpendicular stabilizers. I arrived at this configuration to maximize the four 1ft lengths of copper we purchased. The cut list I derived demonstrates the only true advantage I feel imperial units have over metric–the 12 inches in a single foot were easily divided into fairly whole numbers:
| Bar 1 | Bar 2 | Bar 3 | Bar 4 | |
| Cut 1 | 9 | 9 | 4.5 | 4.5 |
| Cut 2 | 3 | 3 | 4.5 | 4.5 |
| Cut 3 | 3 | 3 | ||
| Total Length: | 12 | 12 | 12 | 12 |
As a bonus, the C-shape also minimized the number of fittings needed (2x L’s, 1x T’s, 3x endcaps for each sign). Somewhat surprisingly, the most difficult part of the process was fixing the pipes into the fittings. Plugging the pipes into the fittings straight up resulted in too loose of a fit. Using teflon plumbing tape looked very ugly. What ended up working very well was carefully adding a mess of hot glue into the fitting and jamming the pipe inside before the glue hardened. I may or may not have dropped a fitting cause copper is a great conductor ;). The signs were created by printing the schedule onto cardstock and gluing on the detail pieces which were laser cut from a differently colored cardstock.

Thanks for making it this far, I’ve only covered about a third of the project list (the most basic ones at that), so there will be a few more posts in the near future! I know I’ve been a bit slow on getting these posts out, but they’re coming!